
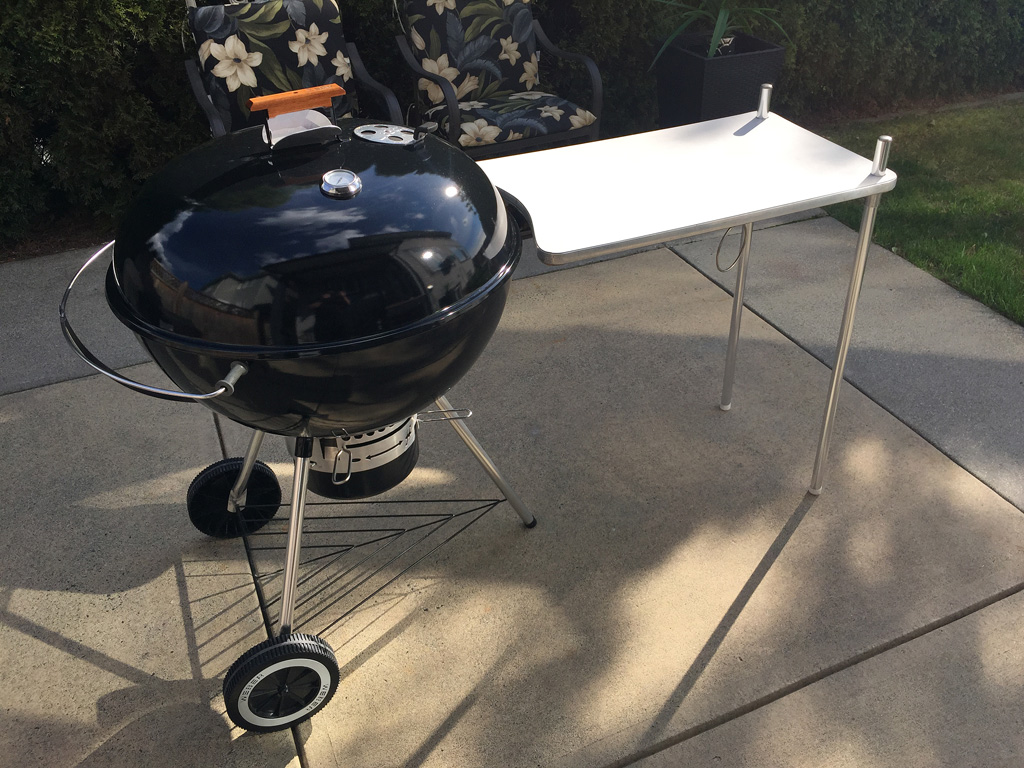
The old Weber side table accessory gives you a substantial amount of useable working space within arms reach of your favorite grill. Not only that, but it can be completely disassembled and put away in less that a minute freeing up valuable patio space and even allowing you to take it on the road. Brilliant idea, and it’s a shame they stopped making them in my opinion. The only drawback is that this table was designed to be used with an 18″ or 22″ Metal Bowl Handle or “MBH” kettle and not the newer wooden or plastic handled models.
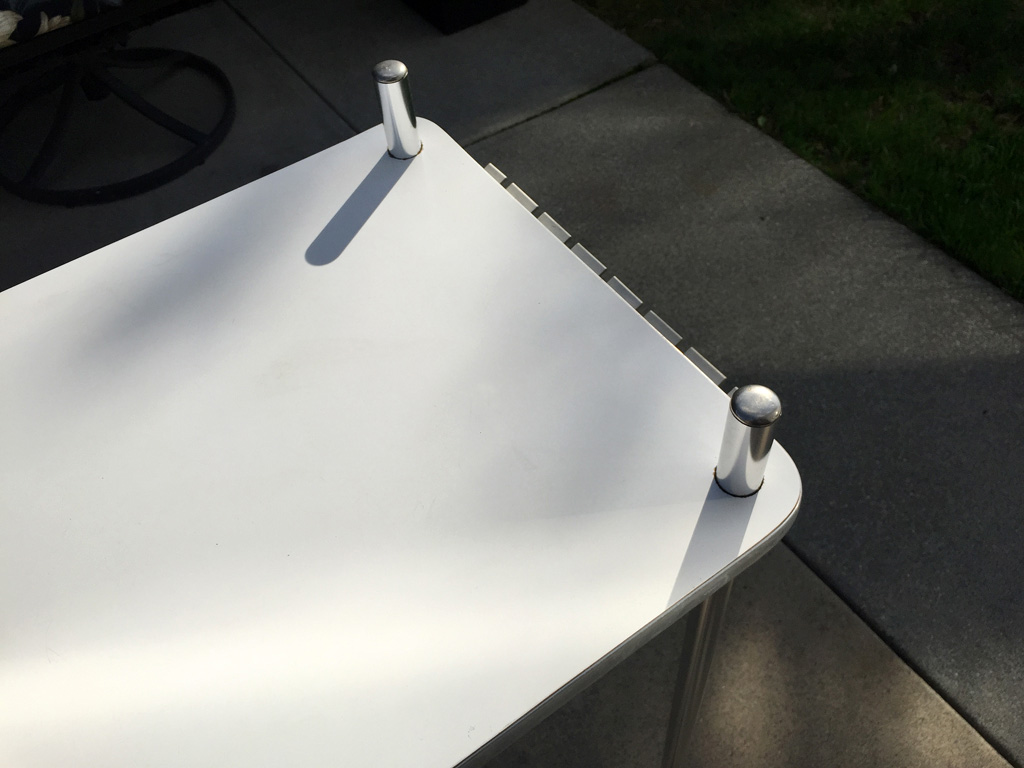
With that in mind, my plan was to come up with a solution allowing me to use it alongside a newer 26″ kettle. The first concern was the metal bracket not fitting over the wooden bowl handle, but it latched on no problem. Unfortunately the joy of that victory was short lived as the legs on the other end of the table were not long enough to create a level surface. It was useable, but the legs had to be retracted 3/4″ down into the table and there was still a 1/4″ slope on deck. This method also left two unsightly holes on the top surface that just didn’t look right. Time to make up a shiny new pair of stilts 🙂
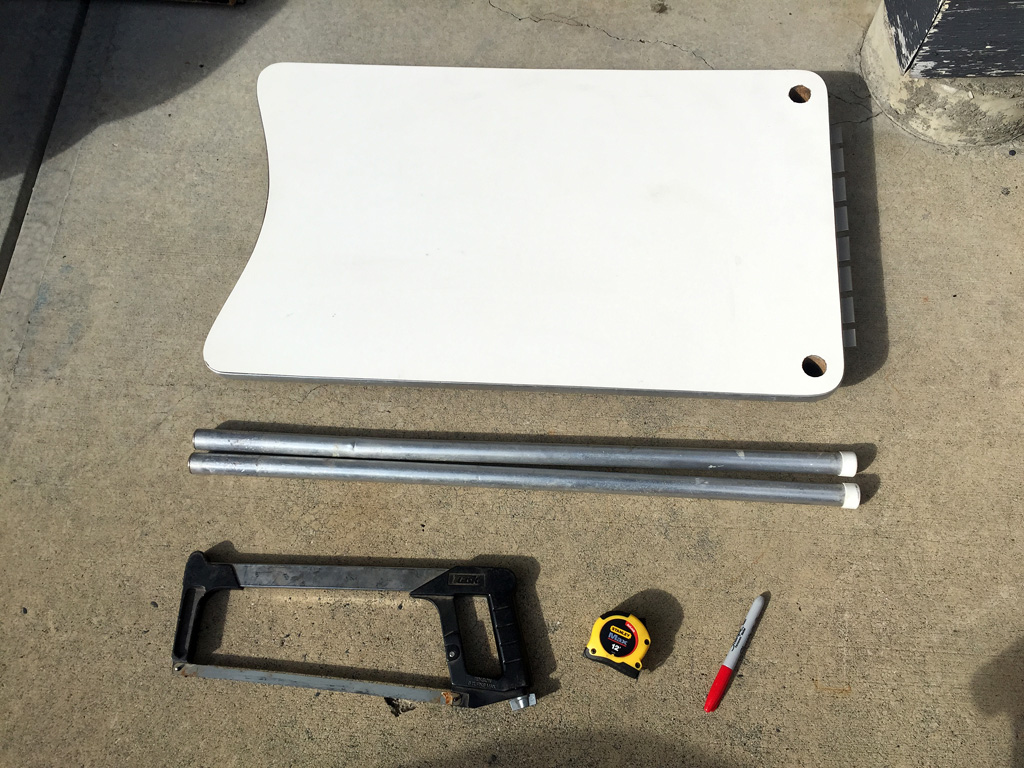
Here are the items used:
- 1″ Aluminum Anodized Pipe – sold in 8′ lengths. I found this one at HD.
- Hack Saw or better yet a Mitre Saw with a blade suitable for cutting metal. (This will provide a far cleaner and more precise cut)
- Tape Measure
- Sharpie
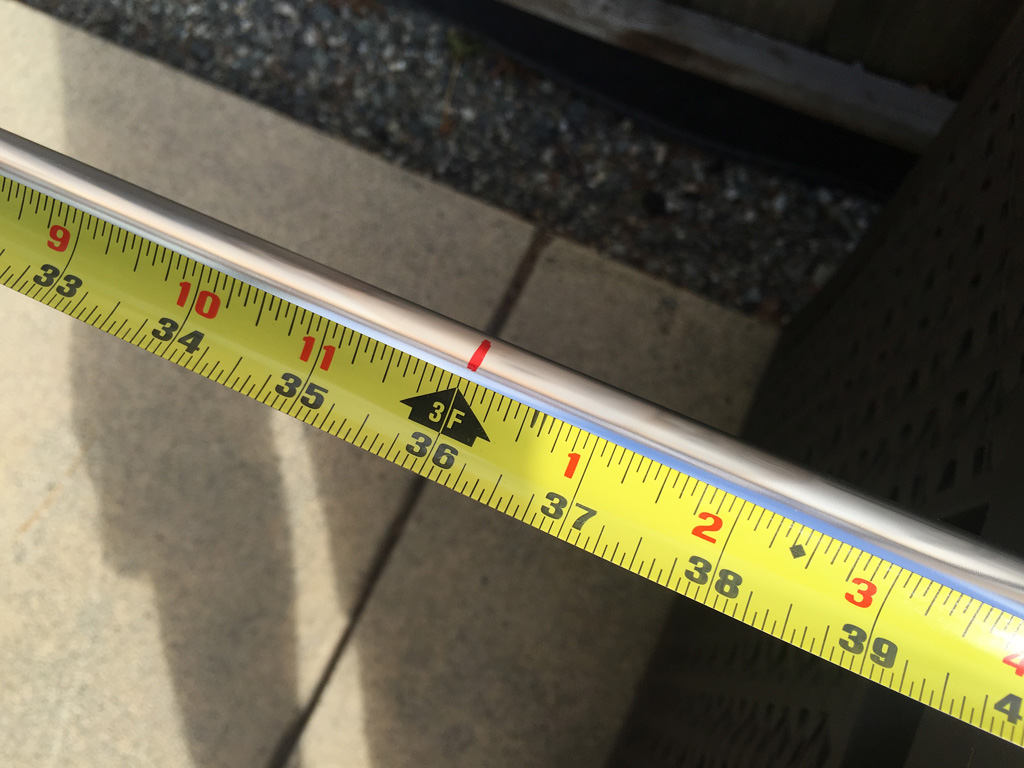
Here is the length of pipe just prior to cutting – its an exact match to the original!
The stock legs measure 30″ in height:
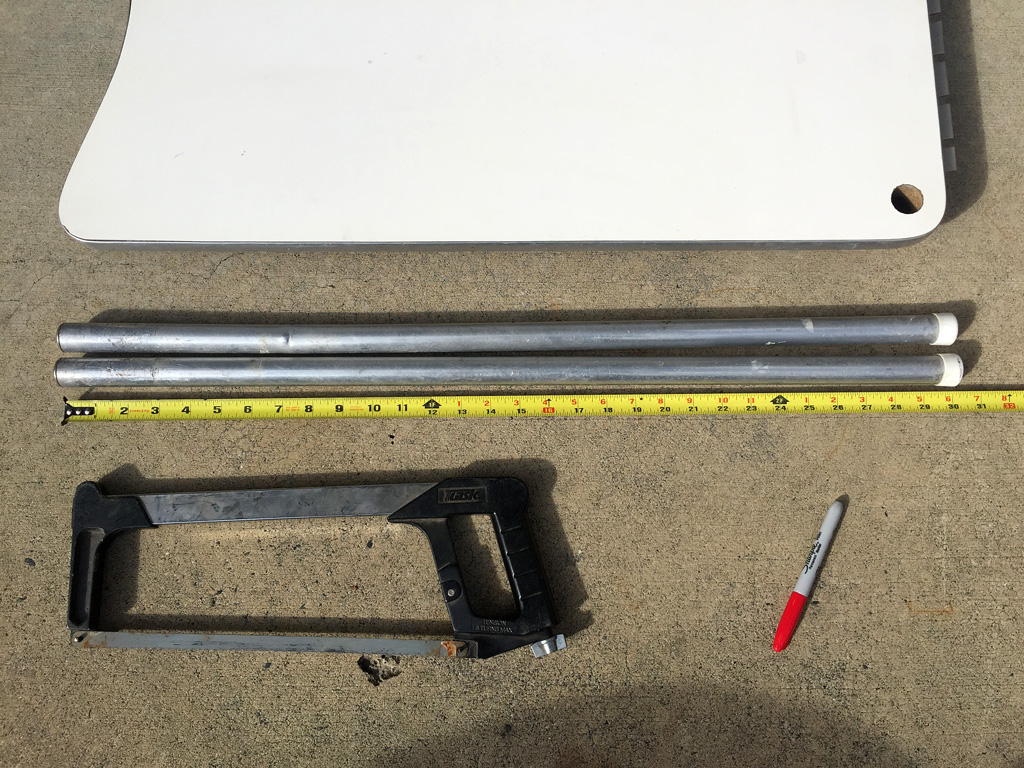
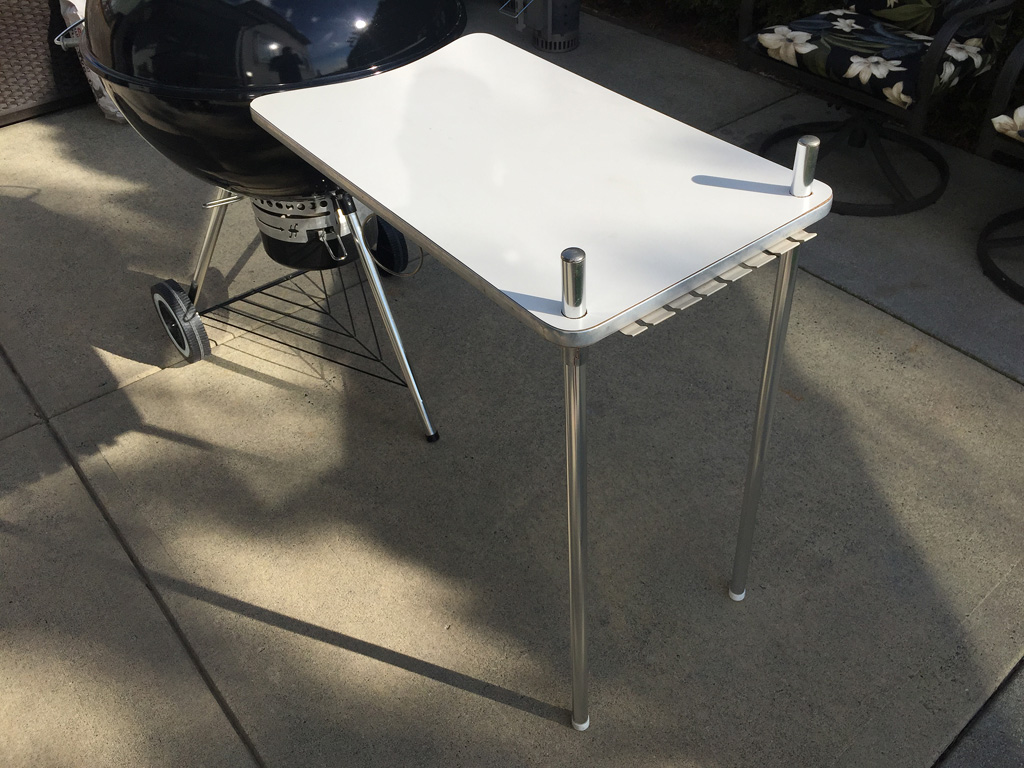
I wanted plenty of adjustability so each leg was extended by 6″ – (36″ total length)
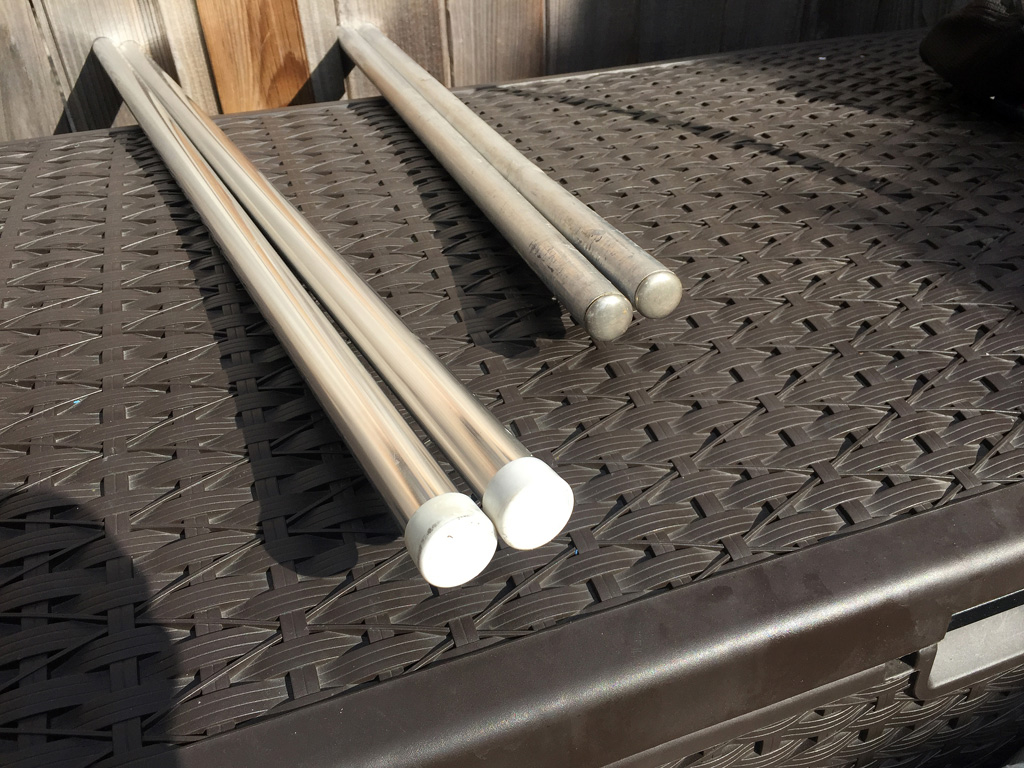
The white leg caps were easily removed and swapped over:
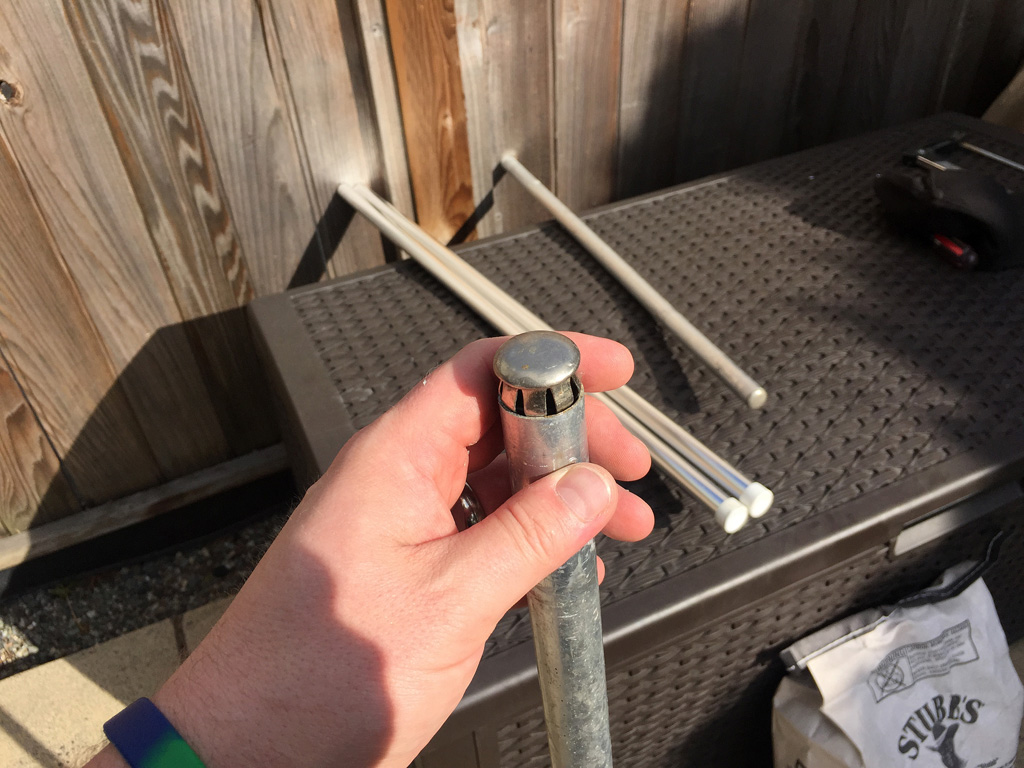
There are also two round metal caps on the opposite end of each leg post. These just give the table a nice “finished” look rather than just the top of a pipe. I found that a skinny broom handle was perfect tool to slide inside and punch out the cap from the backside rather than risk scratching it up with a screwdriver.

A couple taps and it popped right out… Super Easy!
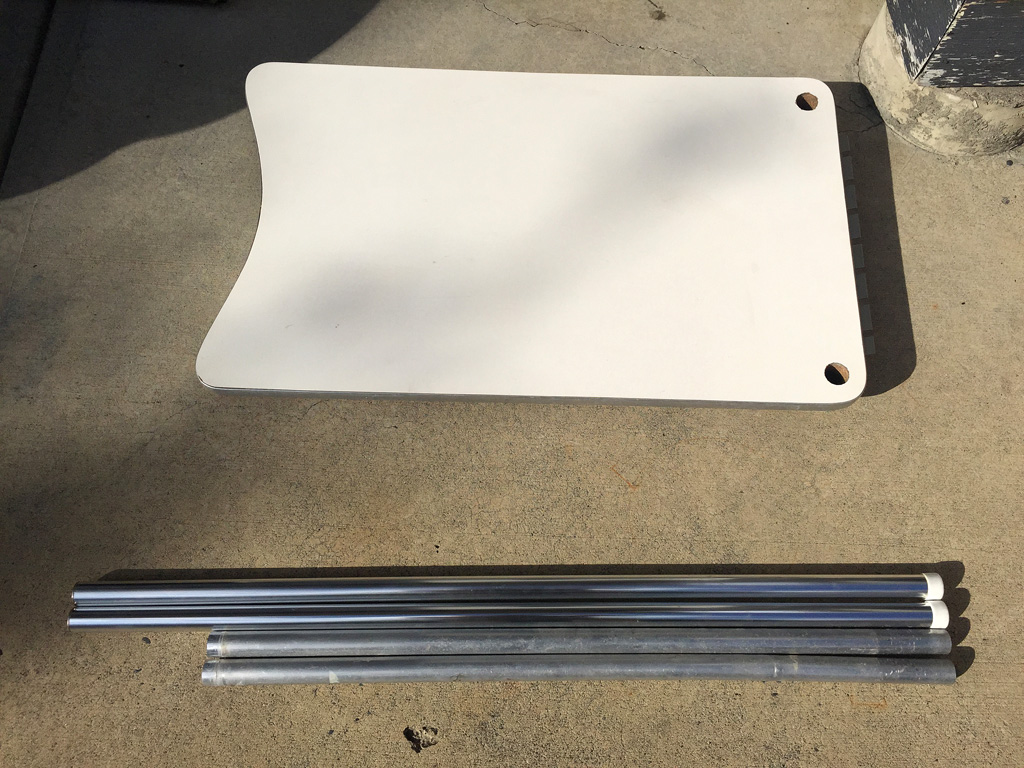
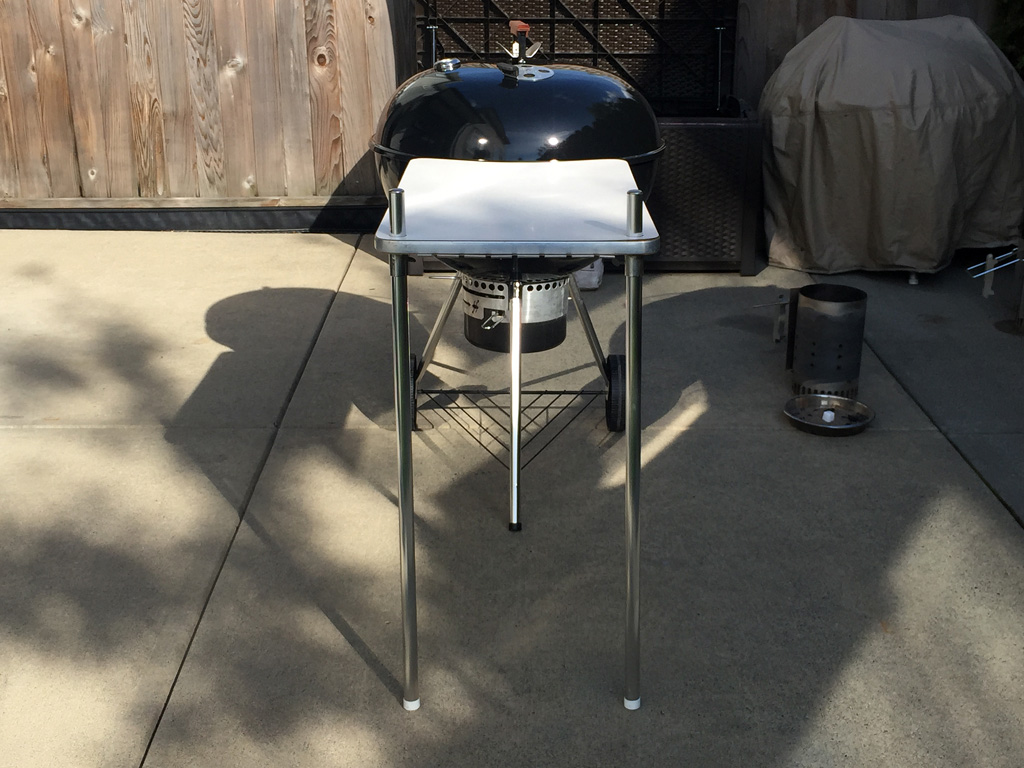
And that’s it! A really easy way to give your vintage table new purpose. Here is an old vs. new shot below:
Nice and level, and most importantly looks completely original:
Thanks for Looking,
Matt
Nice mod, Matt! Hey can you share a picture of the bracket attaching to the wood bowl handle?
Very nice. I like that.
What keeps the table from sliding down the legs?
A tubing cutter would work well to cut the legs, and probably cheaper than a blade for the miter saw.