The triangle sits low to the ground and therefore tends to get wet even when a proper kettle cover is being utilized. Because of this it is not uncommon to find that rust has often set in around the corners and weld points of the triangle. The good news is that more than likely there is a shiny triangle hidden underneath all that corrosion! This guide will show you the most effective methods of ridding you grill of that nasty rust.
In the first installment of the WKC Restoration Guide we took a look at how to clean and refurbish old Weber aluminium legs. Today we will have a look at a related item you will more than likely want to clean up at the same time – the triangle.
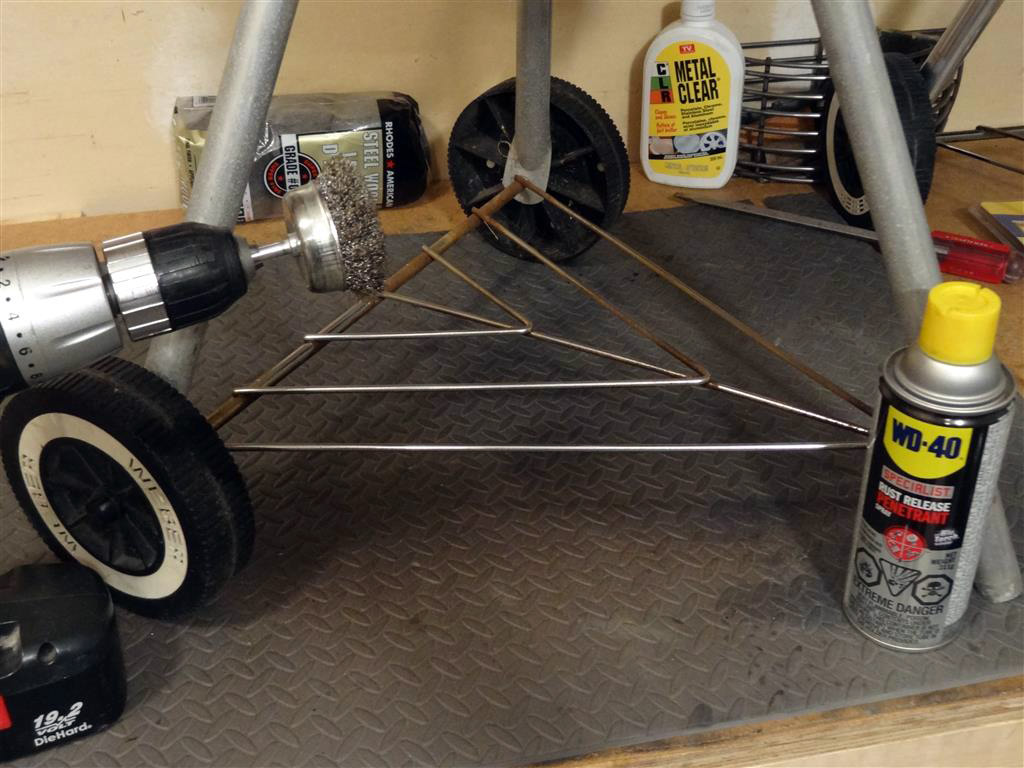
Weber Triangle Restoration – Recommended tools and products:
– #0000 extra fine steel wool (1 or 2 pcs)
– Razor Scraper
– Wire Bristle Brush
– Large Flathead Screwdriver
– Rust remover (I use WD-40 Specialist Rust Release Penetrant Spray)
– Paper towels or Rag
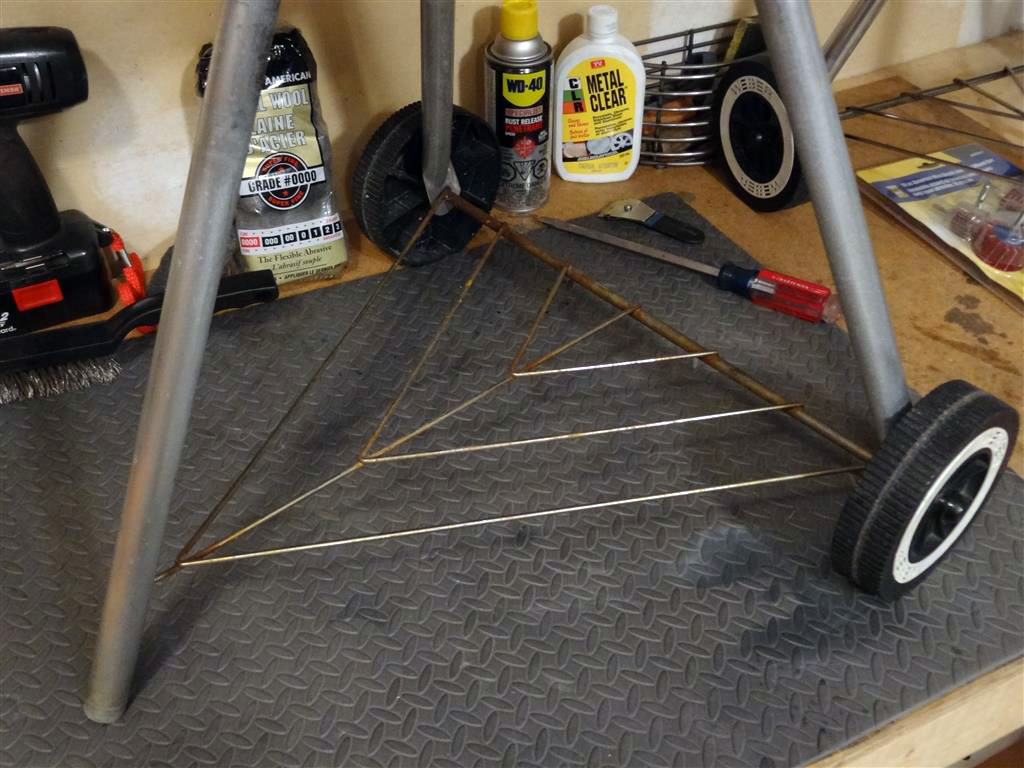
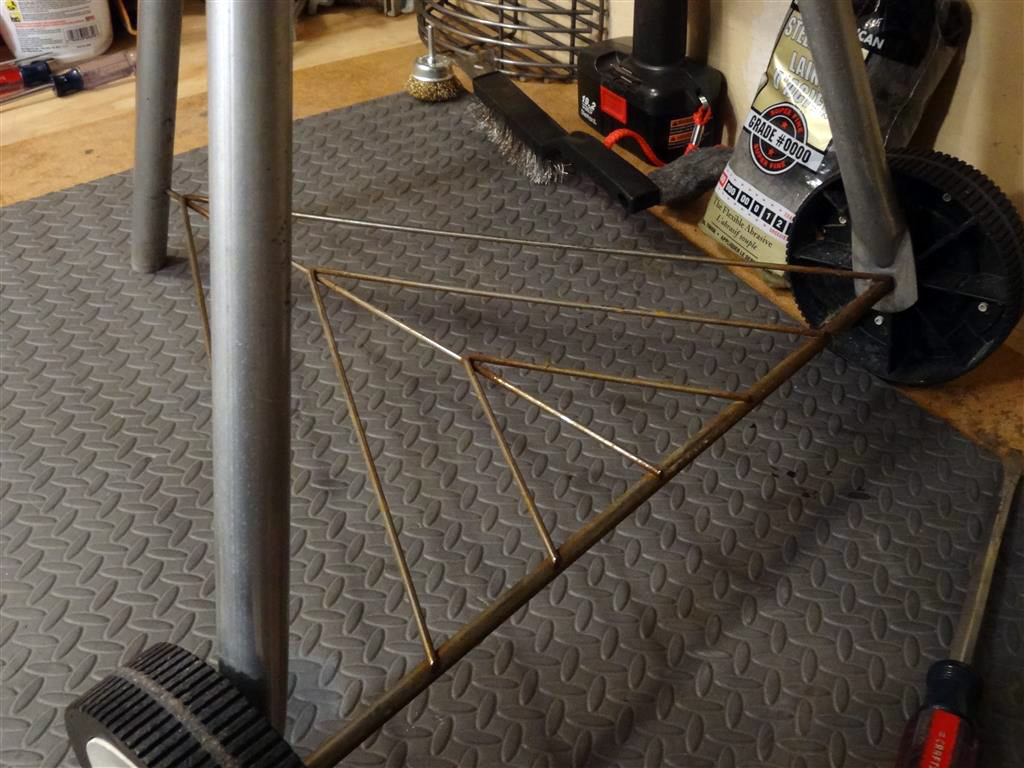
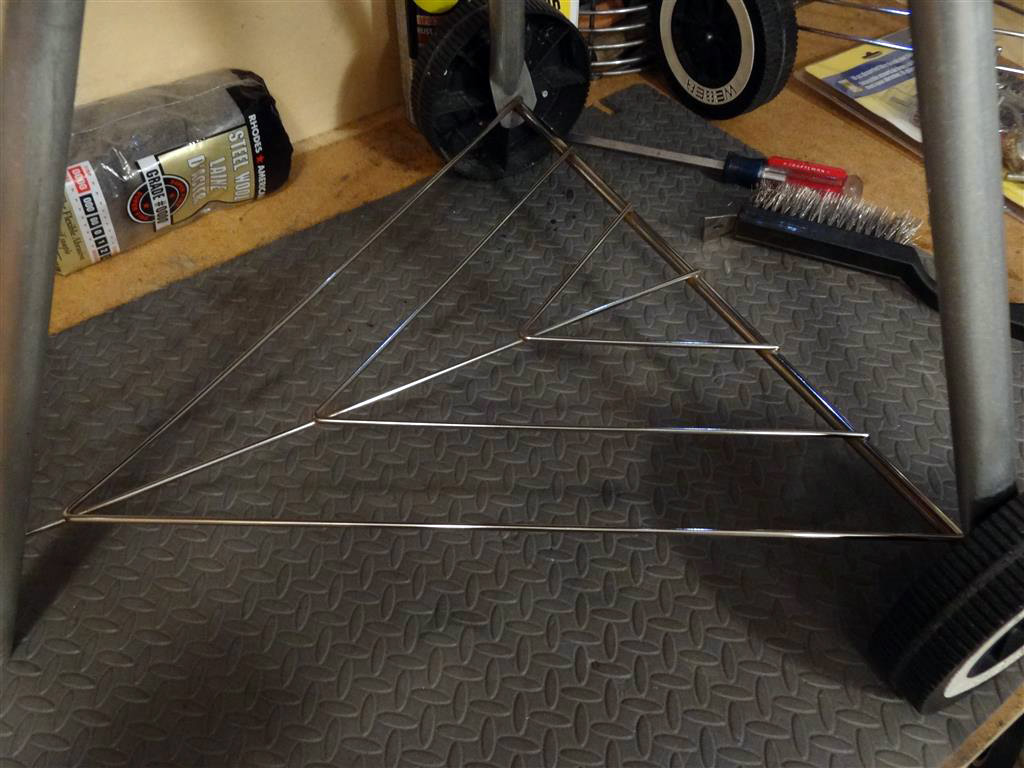
The picture above is an example of what I would consider a triangle in need of a “standard” restoration. Additional details will be covered at the bottom of this page regarding “heavy duty” rust removal.
Method One: The Razor Scraper
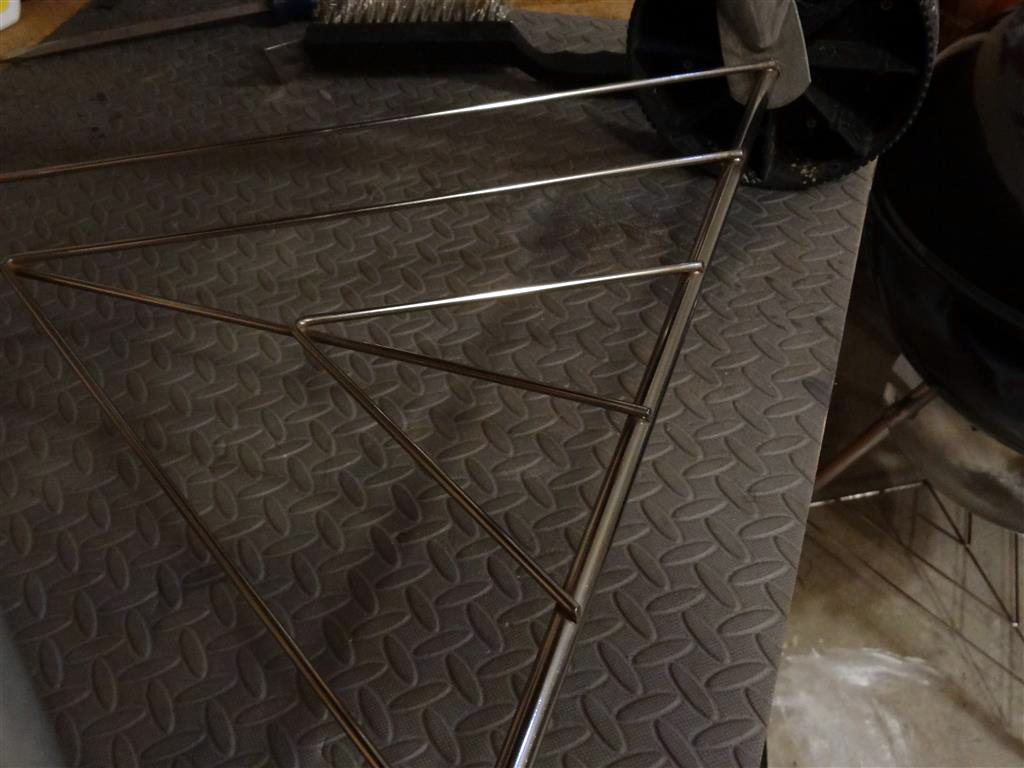
On our example above, the once brilliant finish of the triangle has tarnished and discolored making the grill appear rather old and beat up. Although hard to believe, more times than not this rust can simply be scratched off the plated triangle surface using a razor scraper tool!
Always perform a test area on the bottom side of the triangle to ensure this is the best method for your application. Using smooth strokes, begin to “shave” the rust from off the triangle. You will quickly realize that you can be rather aggressive with the scraper without damaging the triangles finish.
As you can see, the triangle segment at far right has been easily cleaned in less than a minute! The size of the little razor tool is perfect for reaching those hard to clean tight corner and wire ends. Once the bulk of the rust has been removed I generally switch to #0000 steel wool to give the triangle surface one last polishing.
Method Two: Wire Bristle Brush
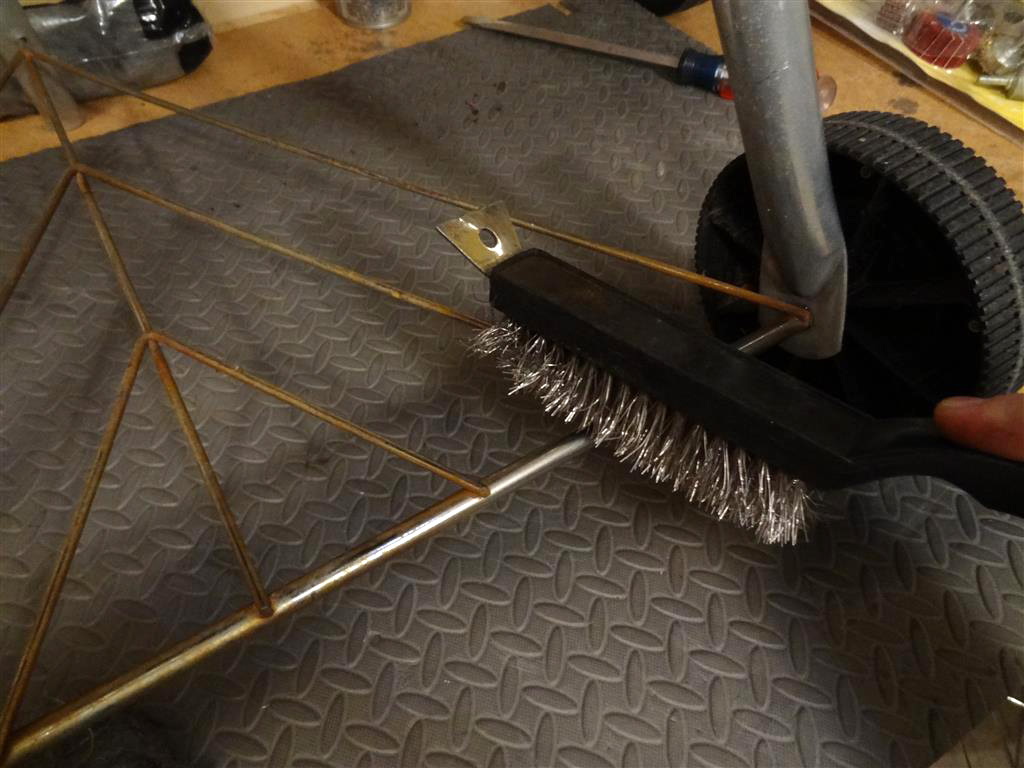
A wire brush can be a very handy tool to have access to, especially on more difficult restores. It allows you to easily scrub at the tight corners and weld points without harming the finish of the triangle.
Pro Tip: spray rust penetrating oil all over the triangle and then allow it to sit for at least 10 min. This helps to start breaking down the rust and loosening contaminants before you attack it once again with the wire brush and/or steel wool.
Method Three: #0000 Steel Wool
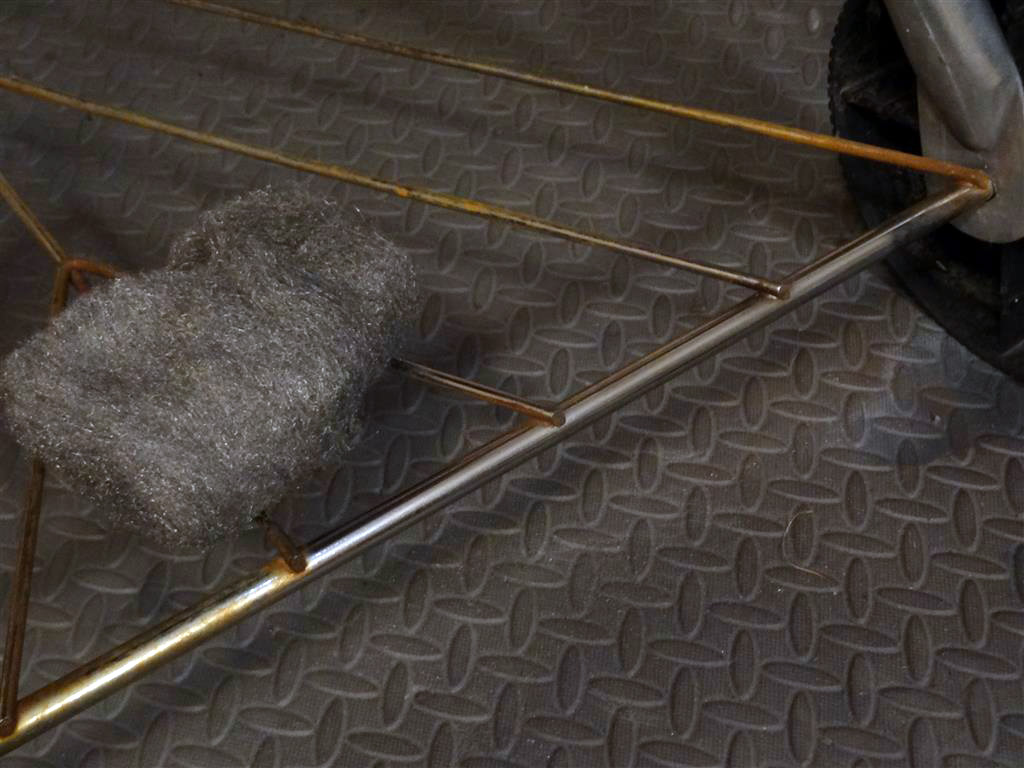
As most kettle enthusiasts already know, #0000 steel wool is a staple tool of most restoration pros on the forum. The wool is an abrasive that will not scratch the porcelain finish of a Weber kettle or harm the metal of the triangle itself. It is however extremely effective in removing contaminants like mild surface rust. In my opinion this is a vital product to have on hand at all times while restoring ANY Weber kettle. (Also works on vent dampers, handles, sweeps…!)
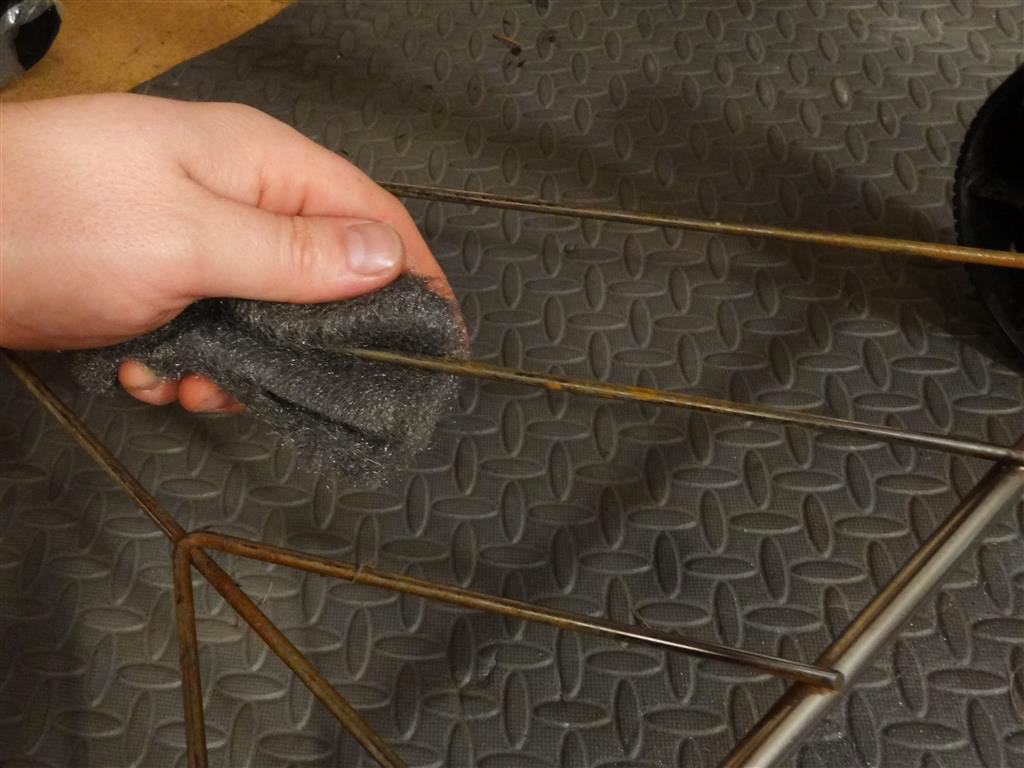
The steel wool conforms perfectly to the narrow gauge triangle wire and does a fantastic job of cleaning it up by simply scrubbing back and forth down the length of the piece a few times.
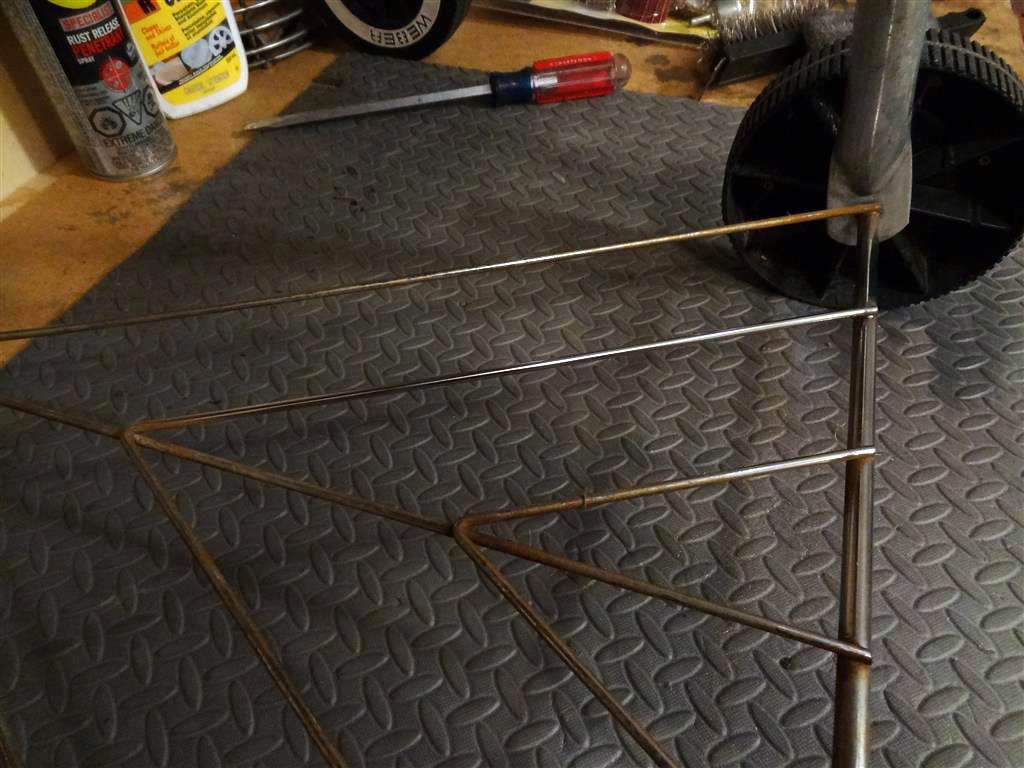
This is where you get to see big results and fast! Take a look at how nice the right side of this triangle is looking and I have less than 10 minutes total time into it so far!
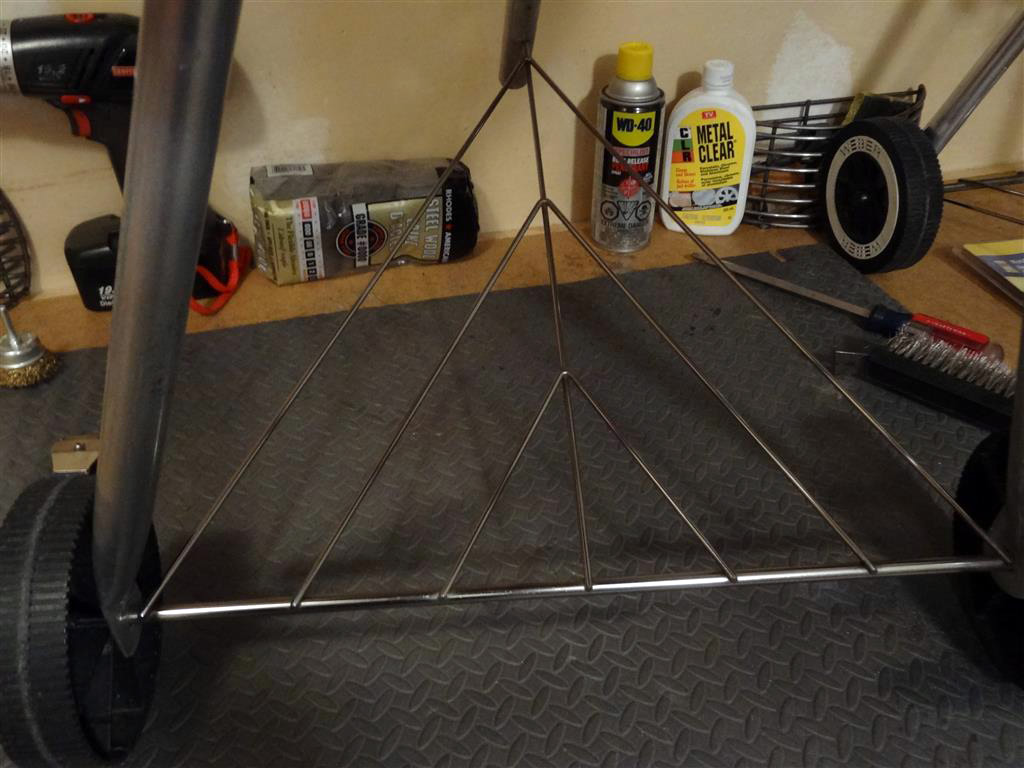
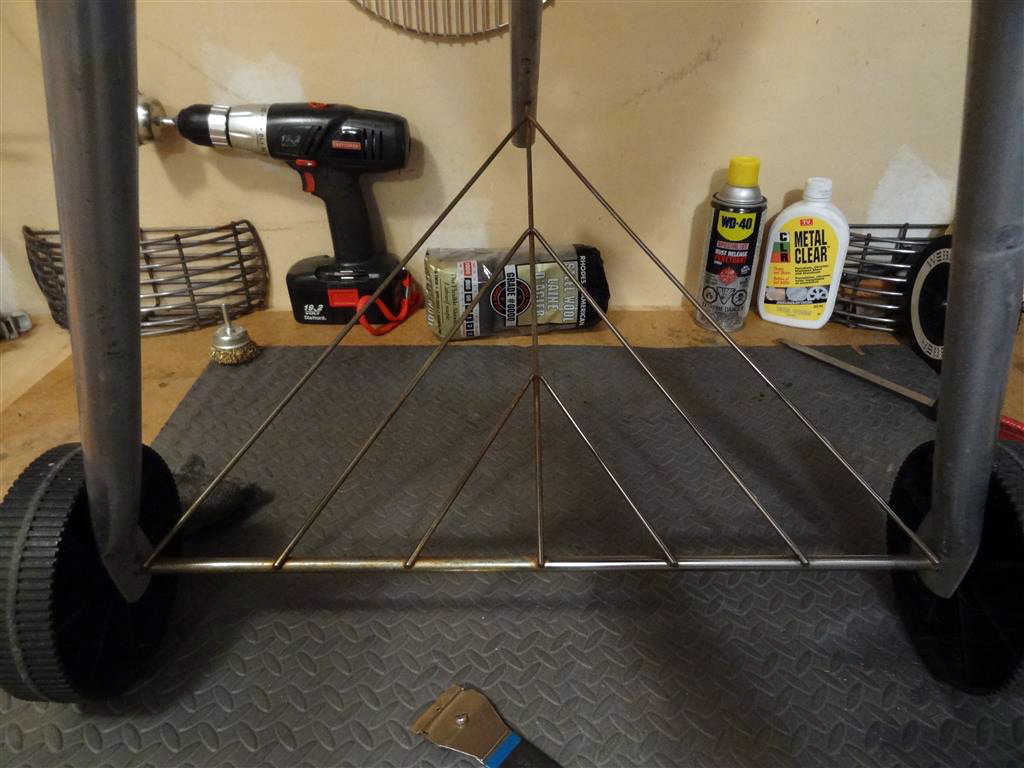
And here it is completely restored! You would be shocked and amazed at the results you can produce from a rusty old triangle and a little hard work.

Heavy Duty Cleanup:
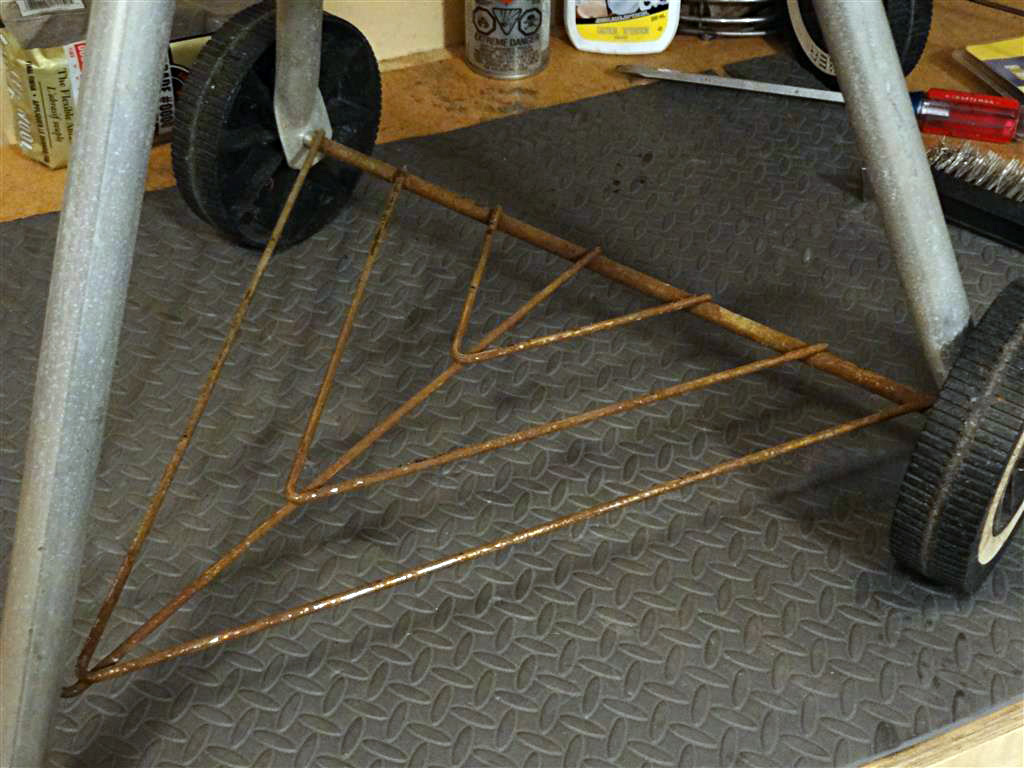
If the triangle you have is in extra rough shape like the one above – there are more aggressive options of removal that you might want to consider. The most common and effective in my opinion is the use of a bell style wire brush attached to a power drill. Be sure to proceed with caution here as the metal bristles of the brush are very rigid and it can chew up your skin pretty bad in no time flat. Safety glasses are also highly recommended!
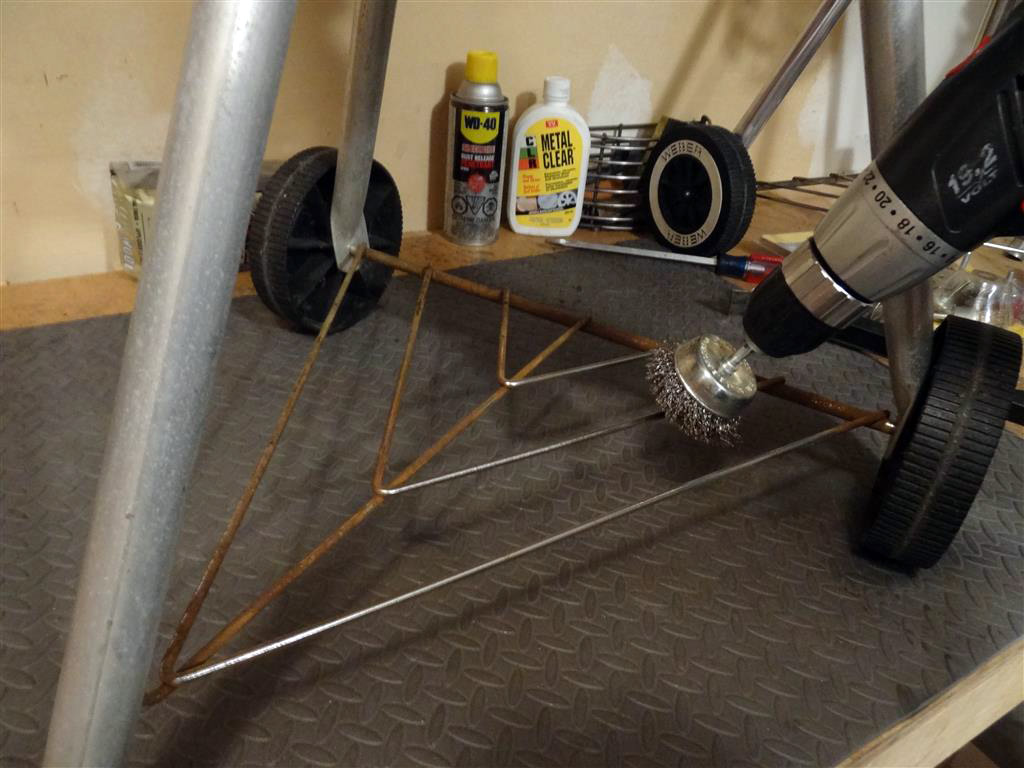
Holding the drill firmly with both hands, simply press the trigger and watch it eat away that rust with ease as you move up and down the wire rack. You need to be fairly strong to handle the drill as well as brace the triangle at the same time so get setup in a spot where you can work freely. If I can offer one tip here it would be to keep the bell speed consistent! This will help prevent it from jumping all over the place and possibly chewing up your hand in the process!
Conclusion:
Each triangle is different and requires it’s own gameplan in order to maximize the returns of your restoration efforts. Take the time to do the small test areas – this will give you a good indication as to which method will work best for you as well as confirm that you won’t be doing anything you might regret. Combining the methods described above, you will more than likely develop a quick cleaning strategy that works every time!
Stay tuned for more Instalments of the WKC Restoration Guide!!
Additional Tips and Resources:
Electrolysis – Member Hogsy has written up a FANTASTIC post regarding the use of electrolysis to clean rusty metals parts. Smart thinking like this takes most of the hard work out of cleaning up badly corroded pieces of metal, but keep in mind this procedure is a little more advanced and requires a bit more planning and setup time. You will also more than likely lose the “chrome” finish from the triangle during the process so painting or sealing may also be necessary.
If you can still see a decent amount of chrome showing through on your triangle I would suggest starting with the methods detailed in the guide above before moving onto electrolysis.
Hogsy’s Electrolysis for cleaning triangles & other difficult metal parts:
http://weberkettleclub.com/forums/weber-kettles-accessories/cleaning-rusty-triangles-using-electrolysis/
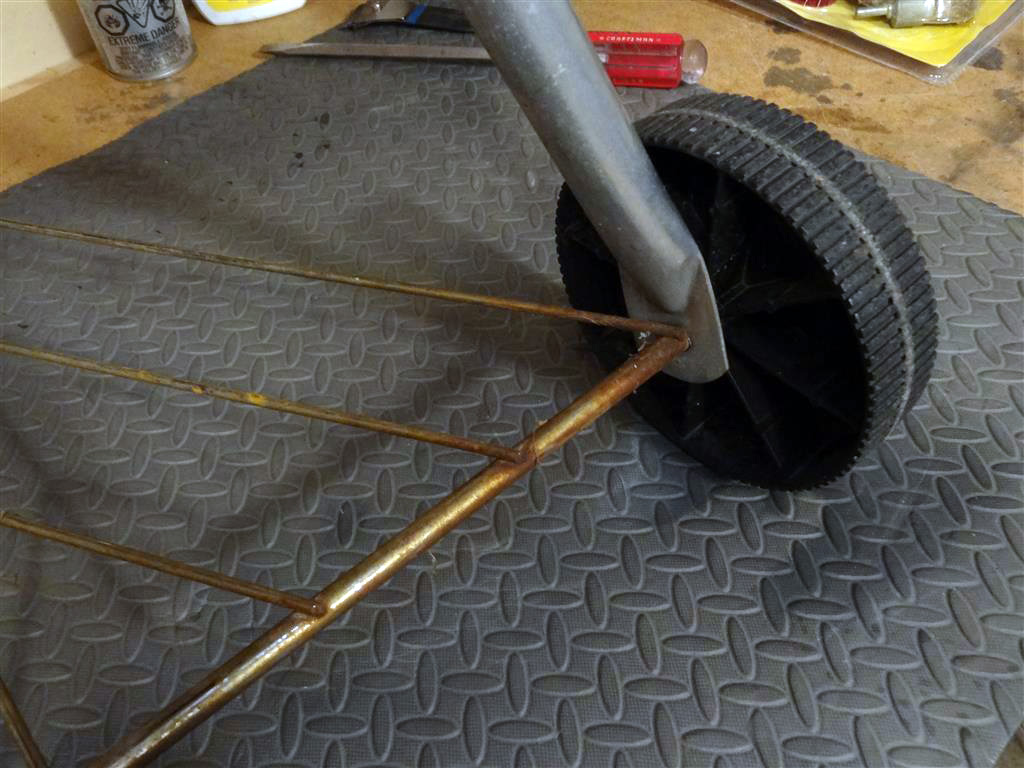
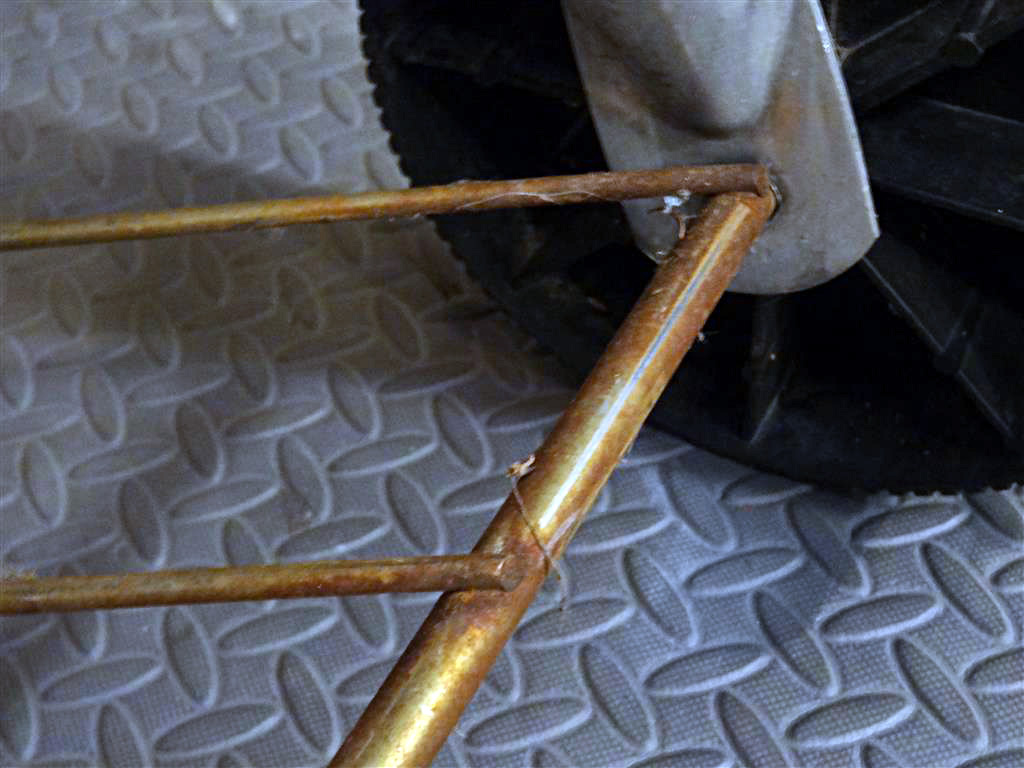
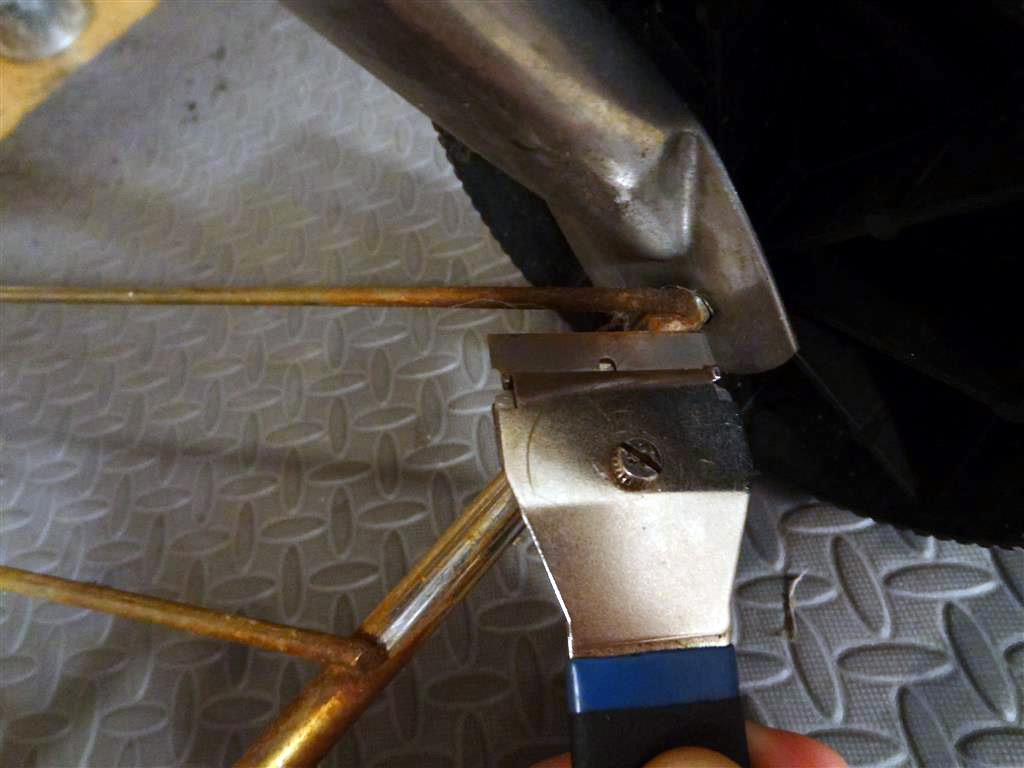
Wheel Removal – Removing the wheel from the triangle and legs is a very easy process. Simply grab a large flathead screwdriver and CAREFULLY pry the little wheel hub off the axle.
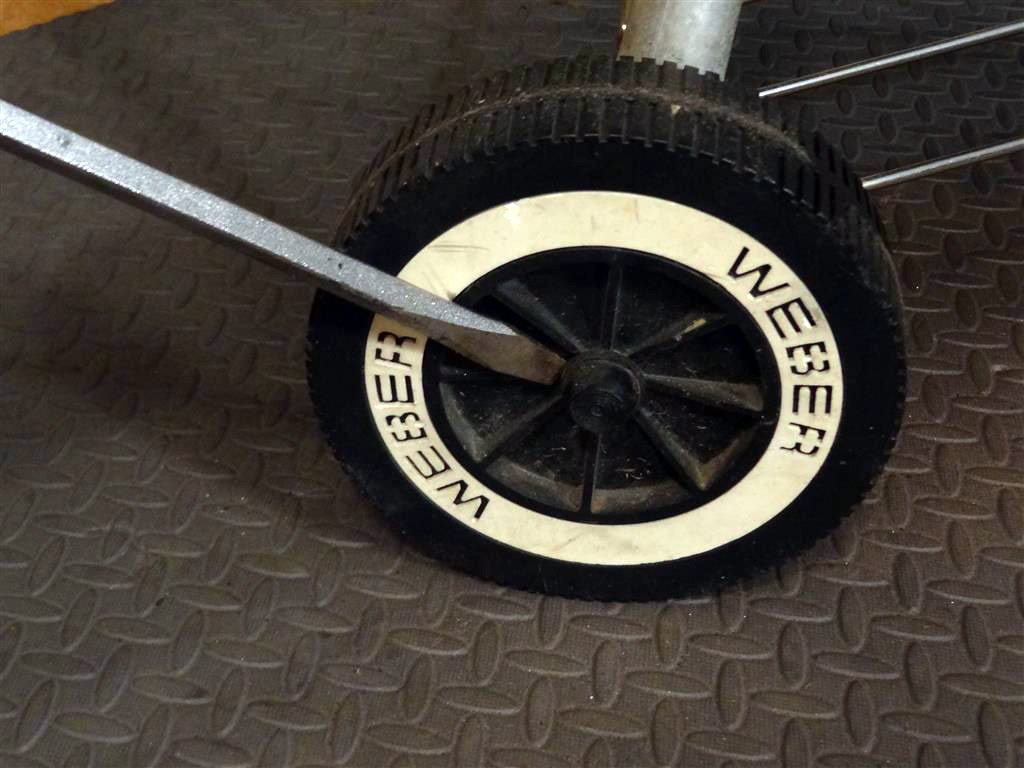
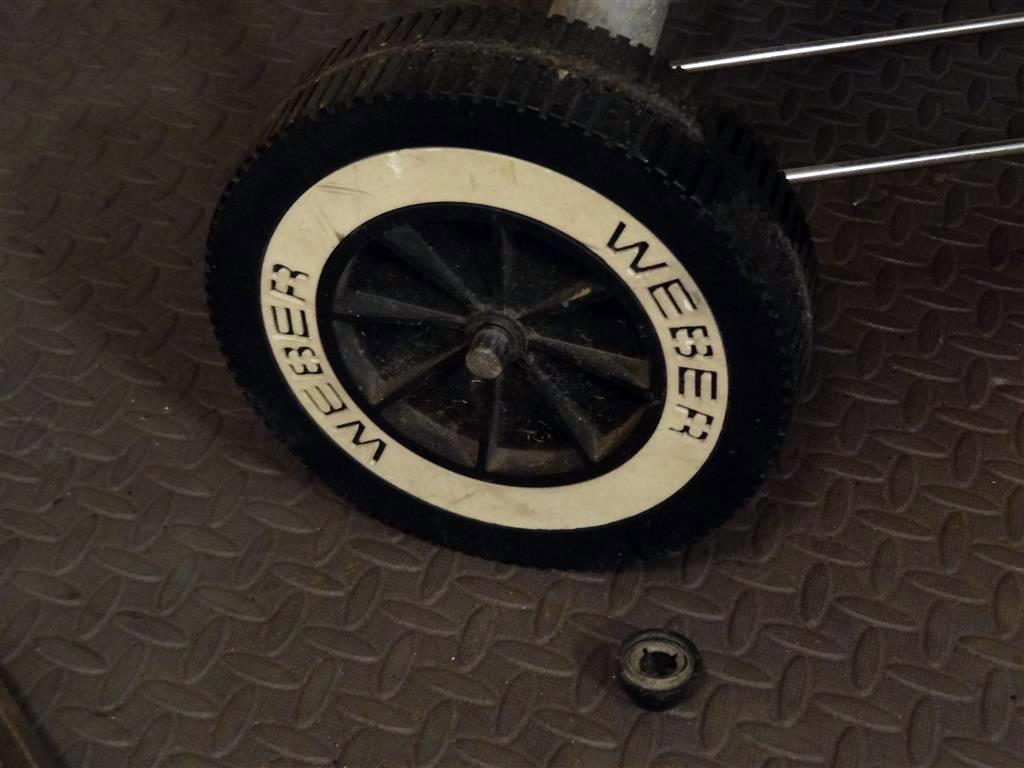
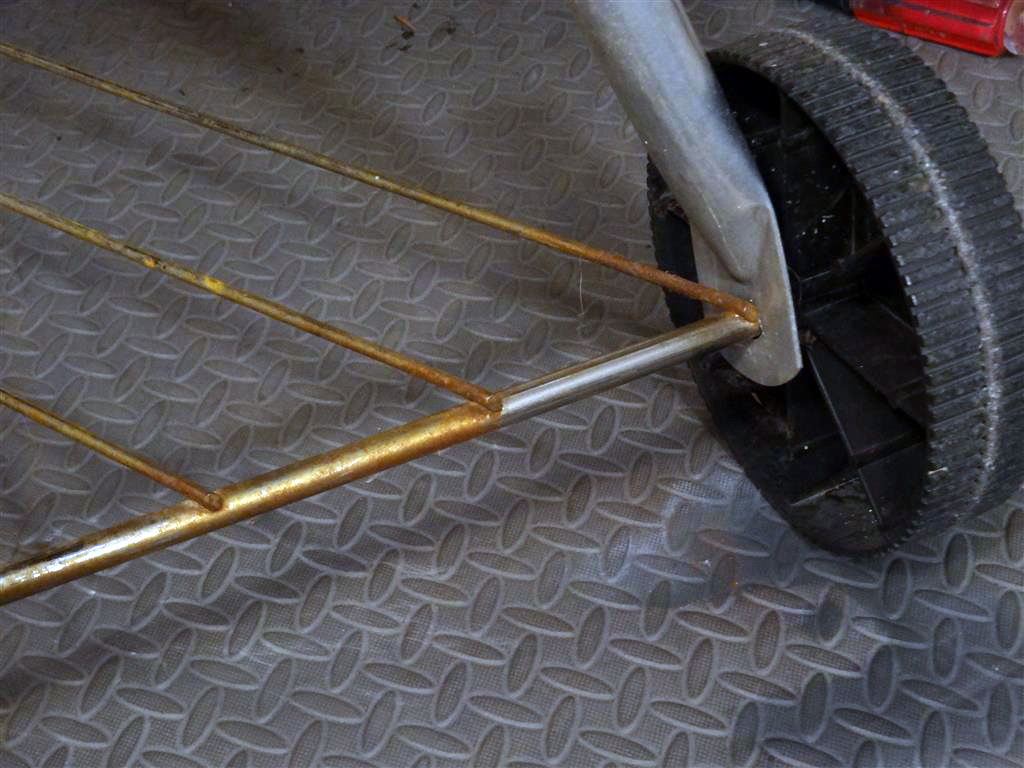
Once you’ve removed the retaining nut the wheel will just slide off the triangle…
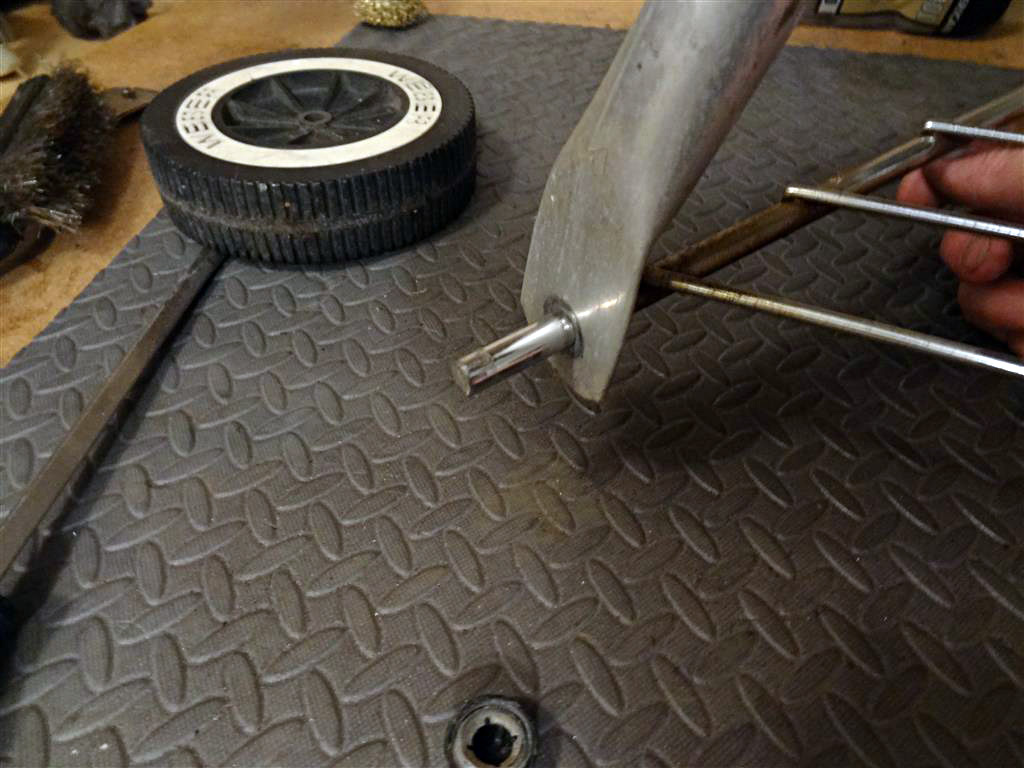
And then can be removed from the legs and wheels completely.