8 Easy Options for Smoking on a Weber Kettle
Update April 10, 2016 – We’re adding Slow’n Sear. The Slow’n Sear just outright spanks the Smokenator. We’ll leave the Smokenator listed for now.
We all already know that the Weber Charcoal Kettle is the ULTIMATE grilling machine. It grills, it bakes, it roasts – and it even smokes (true barbecue). While the standard Weber charcoal grill is often the gateway cooker for hardcore BBQ guys, with a little tweaking and practice it can churn out amazing BBQ just like the thousand dollar Jambos and other high quality smokers.
Ready to start doing some barbecue and smoking on your kettle?
Here are your options:
Free & Cheap Options for smoking on your Weber Grill
There’s no REAL reason to spend any money on gadgets and bbq mods. Here are the free and cheap ways to smoke on your Weber kettle.
1. Bank & Smoke:
Simply bank a dozen or so coals on one side of your grill and keep your meat on the opposite side of the grill. Use a wood chunk or two to get that true barbecue flavor. Add fresh, unlit charcoal every hour or so. Start with 12 unlit briquettes and add 4 lit and a wood chunk on top. Put your meat on when the smoke is a nice thin blue.
Cost: $0
Pros: no investment, relatively effective
Cons: small cooking area, no separator between heat source and food, have to open lid often to add fuel
2. Charcoal Baskets
The Weber Charcoal Baskets are freaking awesome. Not only are they incredibly handy for grilling and lighting charcoal (especially on a Performer with gas assist) – but they’re great for smoking on your grill. Just slide one of the baskets to the side of the grill, fill it with unlit charcoal, and add 5 or 6 lit briquettes to it. Toss a wood chunk on top of it all and you’re ready to barbecue!
Pros: Baskets aren’t uni-taskers. They’re great for grilling. Some members even use them to raise the grates for grilling pizza.
Cons: You’ll still be adding fuel every couple hours or more. No heat shield. Small cooking area.
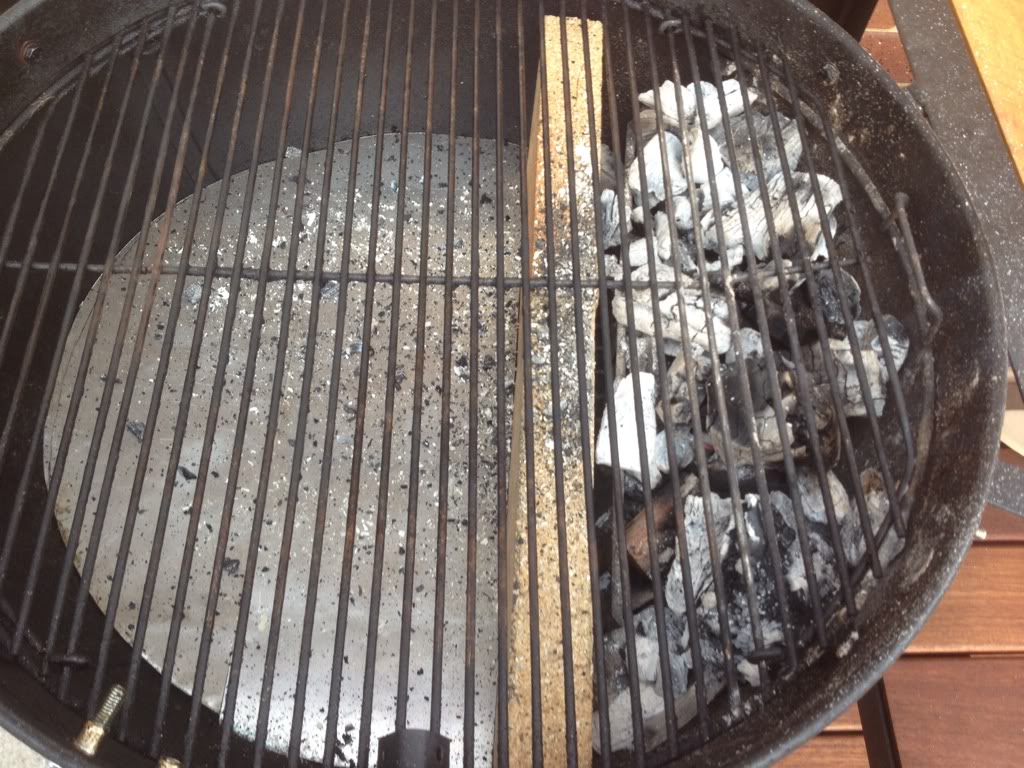
3. Bank + Bricks:
This is a slight upgrade to the banked coal smoke method of smoking- build a wall with a couple bricks. This wall will contain your lit and unlit fuel – as well as your smoke wood. Compared to banking the charcoal and baskets, this will hold MORE unlit charcoal, which means you’ll be adding fresh unlit charcoal less often. To be safe, you should use fire bricks – although dozens of members have used regular red bricks without issue. I know people have have been smoking on their grill like this for decades.
Cost: Less than $10 (more if you use fire bricks)
Pros: Holds more fuel than simply banking coals, bricks provide heatsink for more indirect cooking and temperature maintenance
Cons: small cooking area, still not much separation between heat and food, have to open lid to add fuel
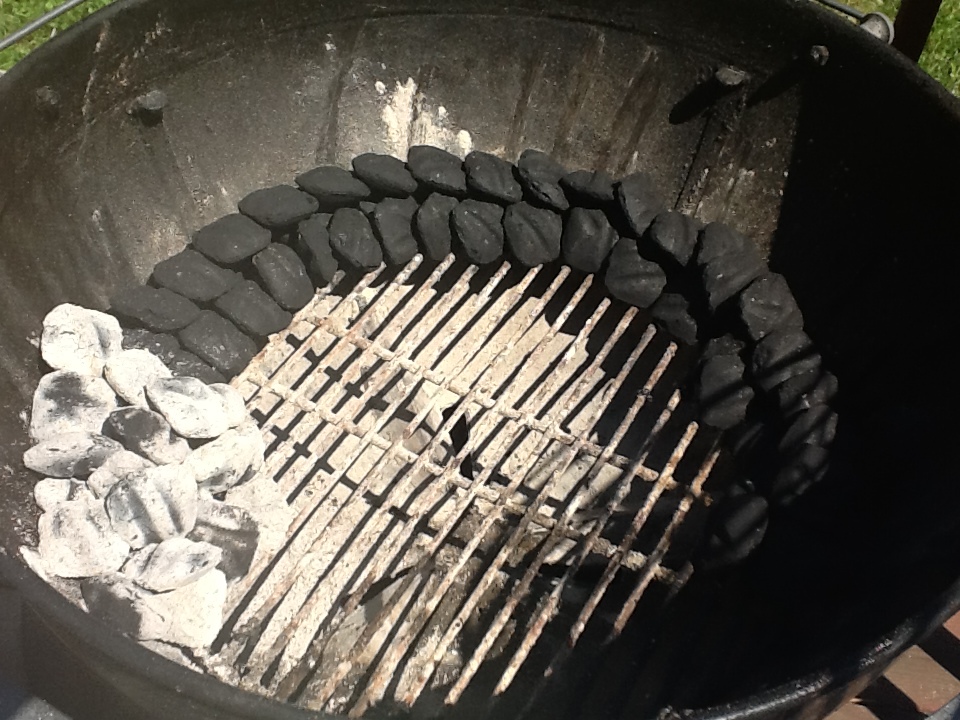
4. Fuse / Snake Method:
This is a fun one, and one of my personal favorites. Create a long fuse of unlit charcoal around the outside of your grill. Make the fuse/snake 2 or 3 briquette layers deep. Put your smaller wood chunks directly on top of the unlit charcoal snake. Start the smoke by adding 4 or 5 lit and ashed over charcoal briquettes to one end of your fuse. Place your meat directly in the middle of the C or U snake. This works better for butts and shoulders than it does for ribs.
Cost: $0
Pros: longer cook time before adding fuel, easy to see how much lit fuel you have. With a little practice, this is a set up that will allow you to walk away for several hours.
Cons: small cooking area, very little separation between food and heat, adding fuel is more tedious than banked methods (assuming you have a hinged grate)
Less than $100
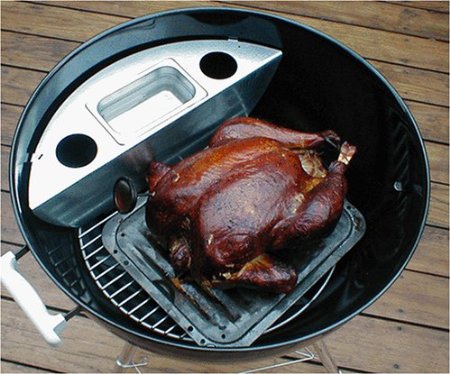
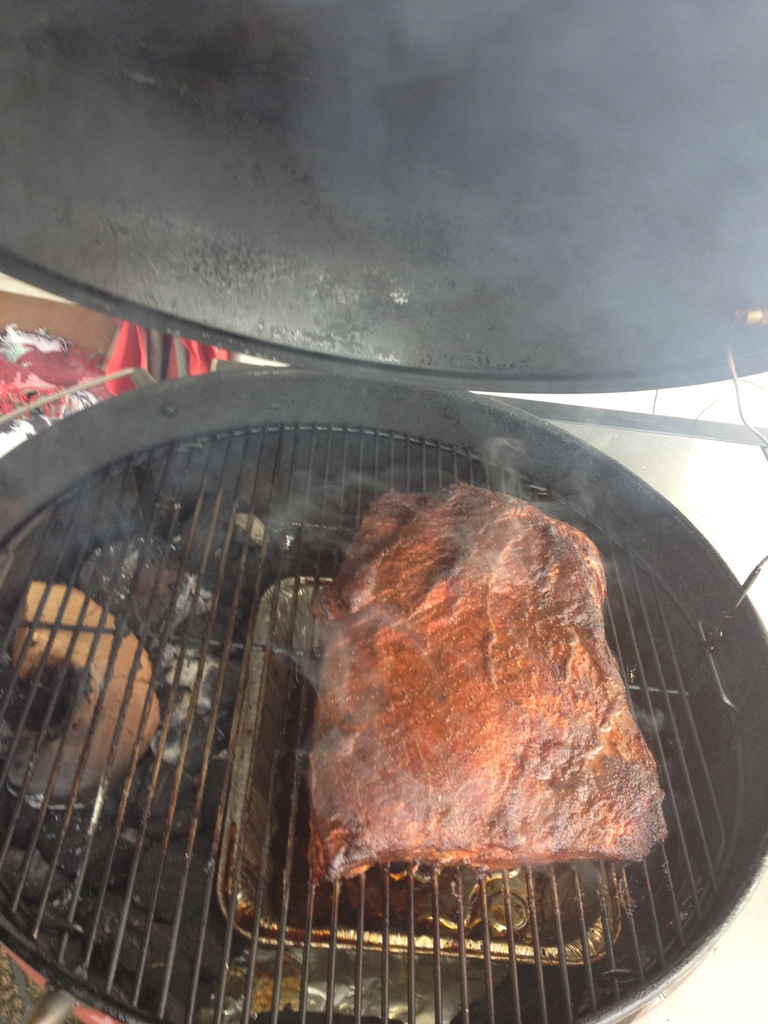
5. The Smokenator
For 60 bucks plus shipping you can pick up a Smokenator. It’s a metal baffle that dedicates about 6″ of space for charcoal and wood, leaving the rest of the charcoal grate wide open for food. It comes with a small water pan and a dedicated cutout for it. The big advantage of the smokenator is that it allows you to use a portion of the charcoal grate as a cooking space. The stainless steel serves as a heat barrier to reduce the direct cooking effect. I would personally skip the water pan and use that space for more fuel.
Cost: $60 on Amazon
Pros: makes cooking on charcoal grate easy, can still cook on half of cooking grate, there’s a layer of steel separating the heat from the meat, holds more fuel than most brick configurations. It also comes in an 18″ version and a 26″ version.
Cons: Water pan is tiny and mostly innefective. still can’t use full cooking grate, have to open lid to add fuel.
6. The Slow ‘N’ Sear

The Slow’n Sear popped on the scene last summer and has effectively curb-stomped the Smokenator. The Slow’n Sear holds more water than the Smokenator. It’s super easy to use. It holds temps for 8-10 hours without issue. It is useful for smoking, indirect grilling, and even direct high heat grilling. It is, quite literally, an accessory that can always stay inside your Weber kettle grill. It’s especially useful for vintage Weber grill users because it acts as a heat shield, which will help prevent damaging the porcelain on those vintage colors. You can pick up the Slow’n Sear from Amazon for $90 shipped. It’s 5lb of stainless steel, and its USA made. You can also read the full Slow’n Sear review
Less than $200
I personally think the $150 mark is the sweet spot.
7. Cajun Bandit Stacker
At $160 shipped, the Cajun Bandit Stacker is a high quality stainless steel ring fits PERFECTLY on your 22″ Weber Charcoal Grill. It raises the cooking grate up about 12 inches and allows you to use the whole cooking grate for food as well as the whole charcoal grate for fuel. This means you can cook a few pork butts, or several racks of ribs without having to roll your ribs or reload your fuel. The charcoal ring and heat diffuser is certainly worth the $20 upgrade – unless you have a nearby restaurant supply store, in which case just go buy a 20″ pizza pan to use as the heat diffuser. Another advantage with the Cajun Bandit Stacker is that it will ALSO fit your Weber Smokey Mountain Cooker or Cajun Bandit Conversion Kit if you ever invest in either.
With the stacker, you can get about 20 hours of low and slow without adding fuel.
Cost: $160 shipped
Pros: can load a LOT of fuel, can utilize full cooking grate, has metal heat shield to separate heat from meat
Cons: if you have to add fuel, you have to remove the whole stacker. Heat shield is a bit flimsy. No water pan. Heat shield doesn’t contain a lot of drippings, so you may need to improvise if cooking more than one pork butt.
8. Smoke-EZ
The Smoke EZ is an option similar to the Cajun Bandit Stacker. It’s another tube style barbecue extension for smoking on the Weber kettle. The Smoke EZ has some cool perks, like nice wooden handles and an included smoker hanging rack for hanging sausages or fish instead of (or in addition to) using the grate. The Smoke EZ has a version that will fit the 26″ Weber too – something Cajun Bandit hasn’t launched yet.
Pros: Can load a lot of fuel. Can utilize full cooking grate. Includes water pan and charcoal ring. Can also hang sausage, etc
Cons: Charcoal ring and water pan are smaller than expected.
Less than $300
DISCONTINUED 🙁
Cajun Bandit Weber Smoker Conversion Kit

Now you’re in the big leagues – this kit will convert your Weber Kettle into a smoker very similar to the Weber Smokey Mountain cooker / smoker. The Cajun Bandit – from the same company that produces the BBQ Stacker – is a full conversion kit. This the ultimate solution. It comes with a leg conversion kit to lower the bowl, a giant water pan, and a 2nd cooking grate. A Weber grill converted into a smoker with the Cajun Bandit actually has some advantages over the Weber Smokey Mountain – namely, it will still easily serve as a grill, and the hinged stainless door knocks the socks off the WSM crappy door.
The Cajun Bandit conversion will turn your Weber Kettle into a hardcore professional level smoker. There are KCBS BBQ champions using these units. A cajun bandit smoker will hold 6 giant pork butts and cook all of them evenly. I’ve cook 18 full slabs of pork ribs on my bandit and all of them cooked evenly. This is the real deal. It’s well made and fits the Weber kettle like a glove. Shipping will set you back about 40 bucks – but you’ll have no regrets with this smoker conversion.
PROS: Well made, fits perfectly together, holds a lot of meat, a lot of fuel, flexible and versatile
CONS: While you don’t HAVE to use the legs, you should – and that involves drilling into your kettle.
Sorry folks, the full Cajun Bandit conversion kit is no longer being made. 🙁


Awesome write-up Troy!!
I will share this with a few of my co-workers tomorrow. They have kettles but look at me like I am from the moon when I talk about the WKC!
-jcnaz
This is a great write up! I’m going to add a link to it from my blog so that folks don’t have to think that they have to buy a Smokey Mountain to make good ‘Q.
One thing I would have added to the list is the mini-WSM. That falls into the $100 category and uses the Smokey Joe which is still a kettle, no?
As of January 2014 they no longer make these! I was emailing the owner and he said most folks were buying the less expensive extension ring so he decided to stop making this model – which is too bad!
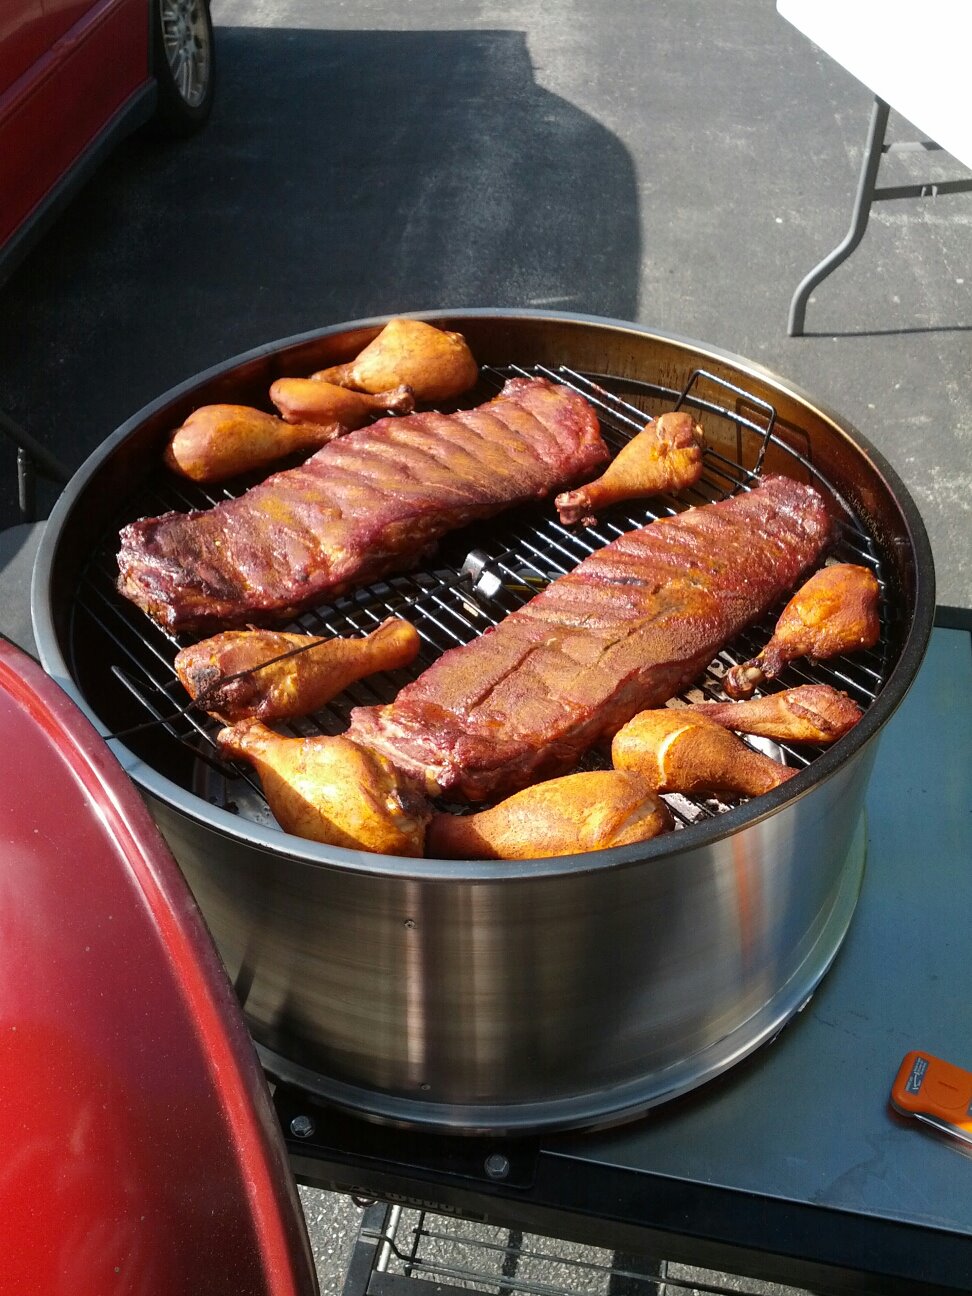
There is trick I learned years ago that I have never seen mentioned on any bbq forum that works really good: You attach a Weber 7402 charcoal rail on one side of a selected charcoal grate rod, but place it to the left rather than on the center of the rod. Then attach another 7402 rail on the opposite side to the right of the first rail so that the front end of both rails touch. You want to have both rails facing each other with one rail to the left and one rail to the right. You end up with one long rail on the charcoal grate. You can then cover this rail with aluminum foil to create a heat shield. I have used this method long before there was ever a smokenator and I have never felt a need to own one or a need to bother with bricks. Easier to do than to explain but it does work well if you want to split the grill into two sections and create a separate smoking section similar in size to the smokenator. In fact I place food on the charcoal grate similar to picture in item 5.
The Cajun Bandit Weber Smoker Conversion Kit is no longer available as they have stopped making them. I sent an email out to the company end of summer of 2013 and was told at this point they are not producing them any more. Too bad…….
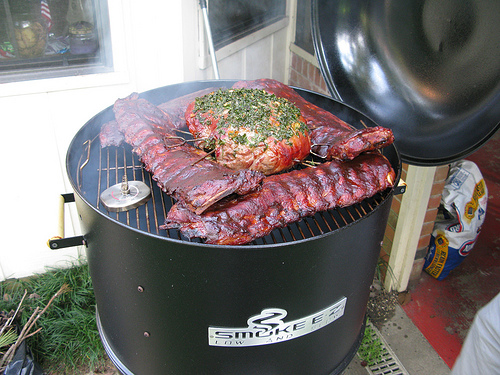
Wonderful, informative article. Thanks. I like the idea of using a large pizza pan size pan on the bottom (Photo 2). that would be good for the one-touch which is somewhat difficult to control air flow with.
This is what I do to convert my weber kettle grill to a smoker is to plug up 2 of the 3 vents. I use 6 magnets to hold a folded piece of foil over each hole. I picked up the magnets at a hardware store.
Now I can point the open vent to the wind, if there is any.
I bank 50 pieces of unlit charcoal over the open vent. add a dozen pieces of lit briquettes over them. I use a hardwood log to hold everything in place. Hickory for pork, red oak for beef. I then use my probe thermometer inserted in a half potato to monitor temps.
the logs slowly smokes and with the drip pan under the meat opposite the fire I’m ready to go. I usually get about 6 hours before I have to add anything. naturally the lid vent goes over the meat.
Try it out. I’ve tried a lot of gadgets but this works best. So good in fact, I sold by ’04 WSM my daughter gave me, because I never used it. If someone shows me how to attach a photo to this comment, I will show you.
I told my significant other (S.O.) weeks ago I wanted to set up a smoker and that I thought the Weber kettle (large one) would be perfect. Not much interest shown by S.O. so have decided to do it myself.
So – with little knowledge, here goes: what sort of wood do I get for smoking chick peas. OK May seem like a “Chick” question – but have you ever tasted smoked hummas – to absolutely die for! That’s the first thing I will do – I have a list of other things, mostly meats but want to start small. Any hints for a newbie? C
Hi Carol,
I need to try smoked hummus! Do you smoke the chickpeas after they are boiled? ( Google says after boiling…) I saw one article that suggested using mesquite which is the strongest smoke flavor. I would suggest trying what you have on hand and just keep testing the flavor until you get what you want. Given what I have on hand, I would also try oak, apple, maple, cherry… Cherry has the interesting property that you can taste the cherry flavor in foods smoked with cherry wood.
Why is there a sheet of metal covering the charcoal grate on the bank + bricks? It’s never mentioned nor accounted for in the costs. Nor does it appear in any other method though there may be one in the bank + smoke method.
The sheet metal covers the charcoal grate to not allow air coming in through the bottom vents to not cool the smoking meat area down. It means fresh air is only able to go to the coals. I have used the banked method with fire bricks a lot and have used aluminium foil for this. Just remember not to cover the charcoal grate beneath the coals.
I bought a Smokenator last month for my 22″ Webber and smoked a three pound brisket. It worked well, but I still needed to add charcoal and water every hour. I’m going to try a boneless turkey breast next.
Cajun bandit conversion kit no longer available.
Only the stacker
You should add the Vortex to this list. A great gadget for under $50. You can go indirect, direct and even create an infrared like sear. It’s particularly great for smoking wings, but I use it far more than my Smokenator. He’s got a Facebook page, but some of the better info is from what of the distributors: http://owensbbq.com/vortex.html.
I’ve been using the Smokenator for a couple of years now. We do up to 50 pounds of bacon every month on my 22.5 OTG with the Smokinator installed. I also use it for turkeys during the holiday season. Works great, though there are other ways of doing it.
I definitely use the water pan, but sit it on the grill grate above the cutout for it. I simply slide it over, flip the grate “door” open and add charcoal or a pouch of chips. One guy I saw found metal cups that sit in the “charcoal” holes and puts water in those, leaving the larger water pan cutout open. I will do that if I ever run into the metal water glasses that will fit the round cutouts and not drop through.
The water pan helps keep the temperature shifts down, at least some. I monitored my Weber/Smokenator setup with dual probes when I first got it constantly. I found it to be less “bouncy” with the water pan in.
If you want a simple setup for occasional smoking on your Weber Kettle, I highly recommend the Smokenator.
In place of a smoker stacker ring as you described above, I use my trusty Weber Rotisserie ring. Forming the coal snake on the coal rack, then using two Weber warming racks on the regular cooking grid and an 18″ cooking grid on top of them, I can cook 2 10 pound pork butts no problem.
In place of a smoker stacker ring as you described above, i use my trusty Weber Rotisserie ring. Forming the coal snake on the coal rack, than using two Weber warming racks on the regular cooking grid and an 18″ cooking grid on top of them, I can cook 2 10 pound pork butts no problem.
I have one of the stainless steel Wok inserts for my 22.5″ Kettle. I also have a Stacker from Cajun Bandit. I did not like having to sacrifice grill space to hold a water container.
So, i start the charcoal as they suggest, but without their ring. Once that is going, I put my old Weber Kettle Wok in place, fill it with water up to the rim, and put the stacker in place. The wok and water do a much better job of keeping steady heat, and moisture. And I can lift the lid to check the meat, and add or remove meat, without the fat drippings flaring up in my face.
Note, this is not the new Wok/grate combo thingy, this is the old wok that replaces the grill entirely.
I just wanted to thank you for the Wok suggestion. I use this with a Smoke EZ on Weber Performer and it allows for a very consistent 225 degrees. You can pick these up on ebay right now for about 15 dollars shipping included.
I love the smokenator. I think the water pan is effective. You do refill every hour but that’s expected. And it’s an easy refill. The pan being amongst the coals means a rapid boil which will benefit the meat. So you can cook low temp and create a lot of water vapor. Best accessory I’ve bought.
Great info, I appreciate it. I was able to get three bricks, that have three holes on the wide flat side of the bricks. Lined them up long ways on the narrow edge, so the holes are horizontal, placed briquettes on one side, and aluminium foil over the lower rack on the side where the meat will drip down, above the Aluminium I put a small container of water….it works well, and it didn’t cost me anything.