The wheels featured in this article were in pretty bad shape. Depending on the condition of your wheels, some of these steps may not be needed. These wheels ended up being a worse case scenario.
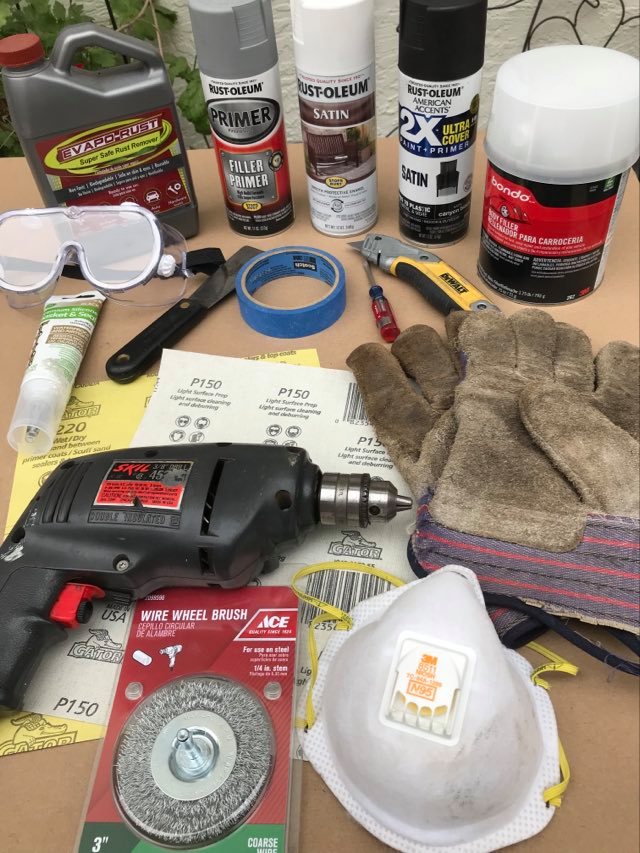
Tools and Materials Needed
-Evapo-Rust / blue painters tape
-Hand drill / dust mask
-wire wheel attachment / eye protection / leather gloves
-Rust-Oleum primer/filler, black and white satin spray paints
-small hobby/model paint brushes
-razor knife, razor blade or X-Acto knife / small flat blade screwdriver
-220 grit sand paper
*Depending on the condition of your wheels, not all of these materials and steps may be needed.
If the metal on the wheels are rusted, the first step is to soak the wheels in Evapo-Rust. If your wheels have only light surface rust and the paint is in good shape, try soaking them for only an hour or two. Remove them and rinse with tap water. Several rounds of soaking can be done like this in short duration. If the rust has been removed and you wish to retain the original black paint and white walls, stop at this point.
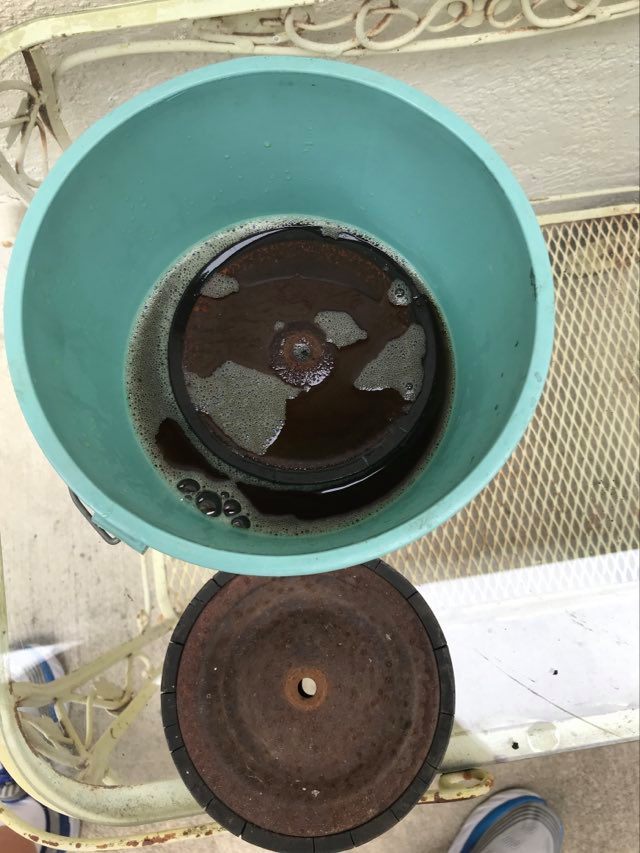
Evapo-Rust will not harm the rubber treads but may end up removing the paint when soaked for long periods. These wheels required several rounds of soaking. I don’t think there was any paint left to damage. The wheels were soaked for several days then removed and the Evapo-Rust was changed out. They were then soaked for a second time in fresh Evapo-Rust for an additional 2-3 days. After the second soaking in Evapo-Rust, the wheels were removed, rinsed with water and allowed to dry in the sun for several days.
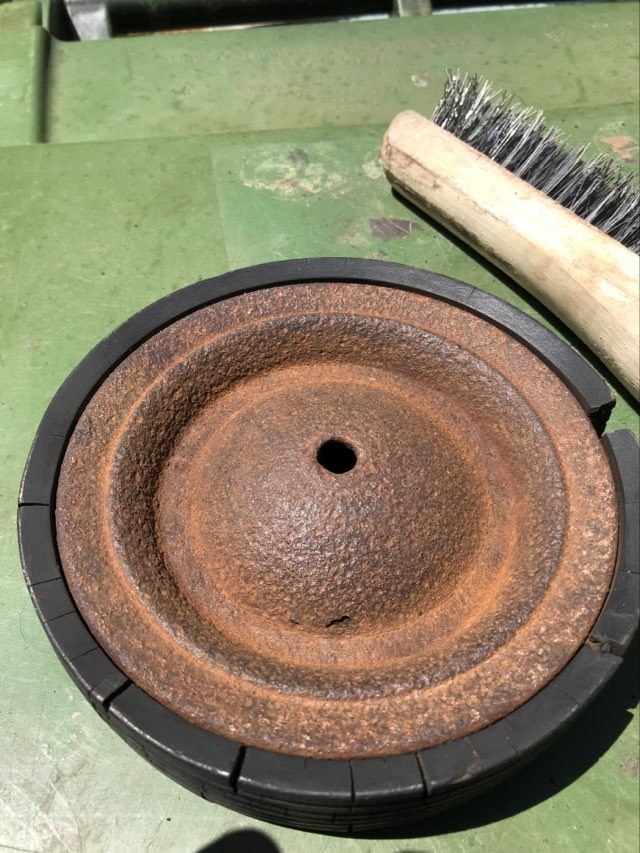
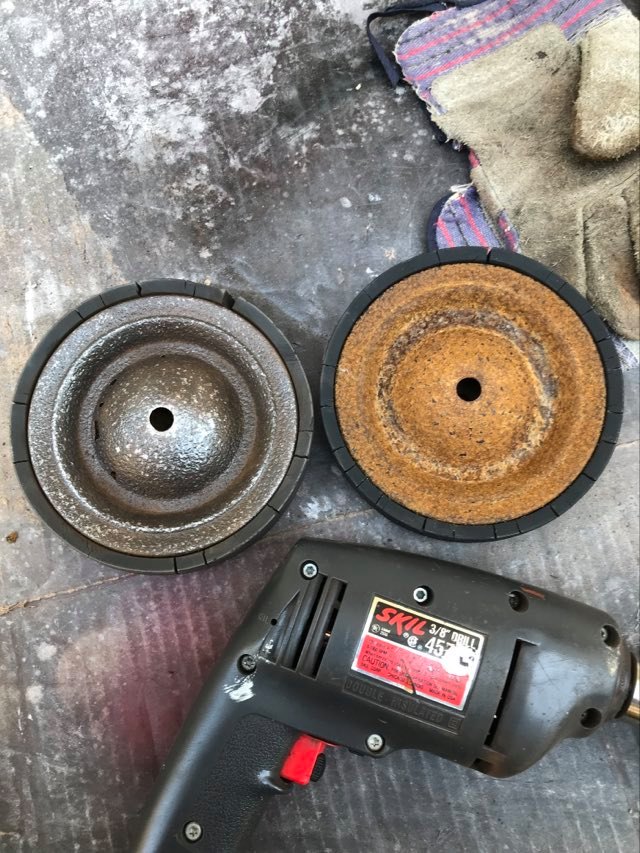
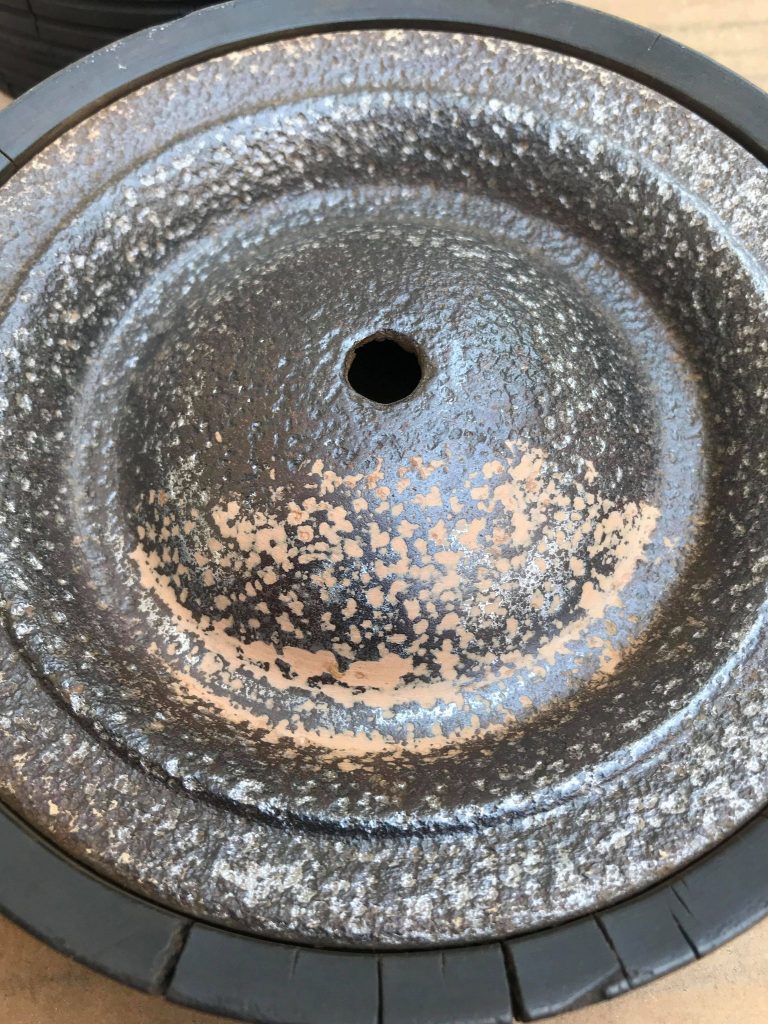
If the wheels you are restoring are not this pitted you can skip this next step and just sand them with 150 or 220 grit sandpaper to remove any residual As you can see, there was still a considerable amount of rust left on the wheel. I used a drill and a wire wheel attachment to remove the rust not removed by the Evapo-Rust. Wear leather gloves and eye protection when using the wire wheel. The wire wheel is not kind to bare skin and occasionally a wire will come loose from the wire wheel and shoot off at high speed. The wire wheel will grind and leave marks on the rubber so be careful when using it near the rubber treads.
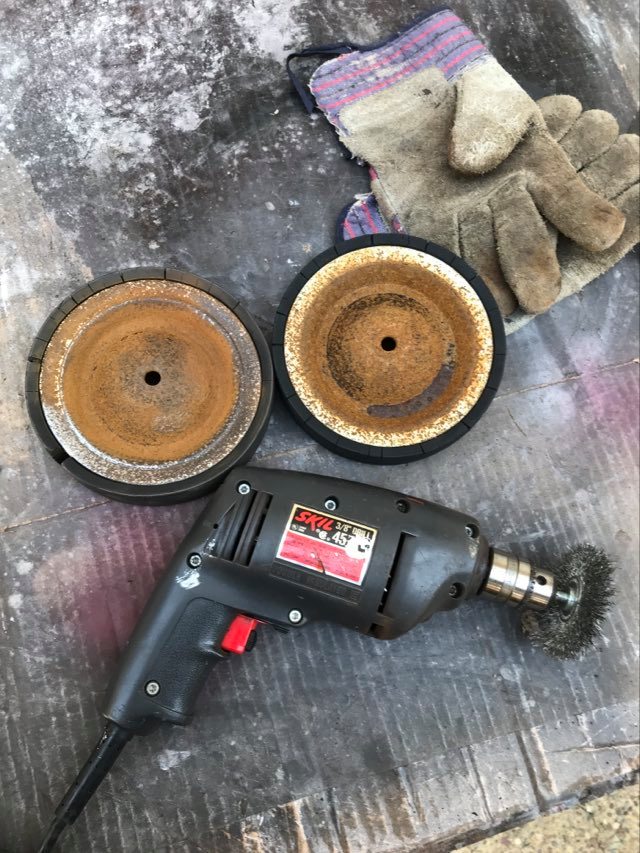
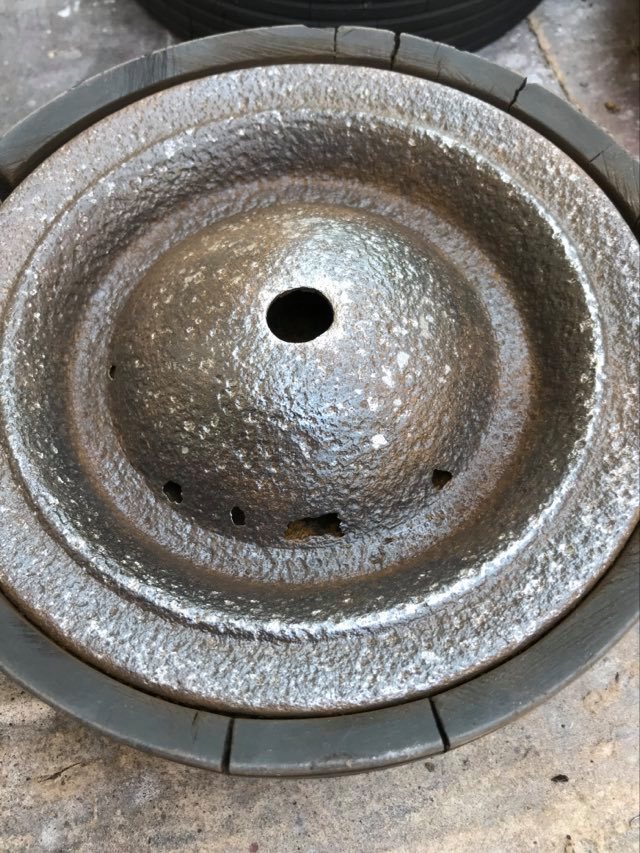
It was at this point I found how badly the rust corrosion had damaged the metal. What thin layer of metal was left did not stand up to the wire wheel. Holes appeared in the metal on both sides of each wheel
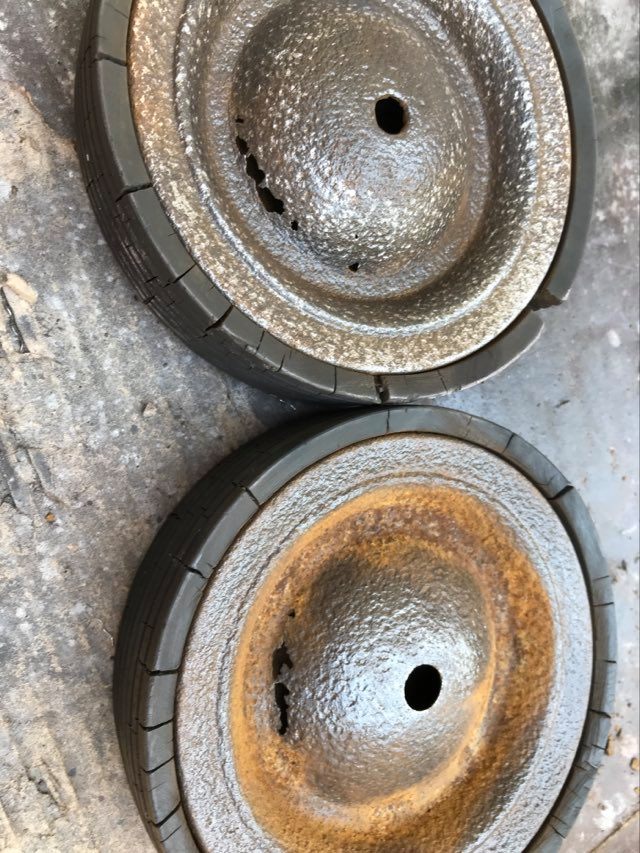
This was now “uncharted waters” for me. An old carpentry trick I’ve used to repair small areas of dry rot wood damage came to mind. I filled the holes using Bondo. Follow the mixing directions on the can and apply with a small putty knife. Use as little Bondo as possible as leaving excessive amounts of Bondo on the wheel will create more sanding time.
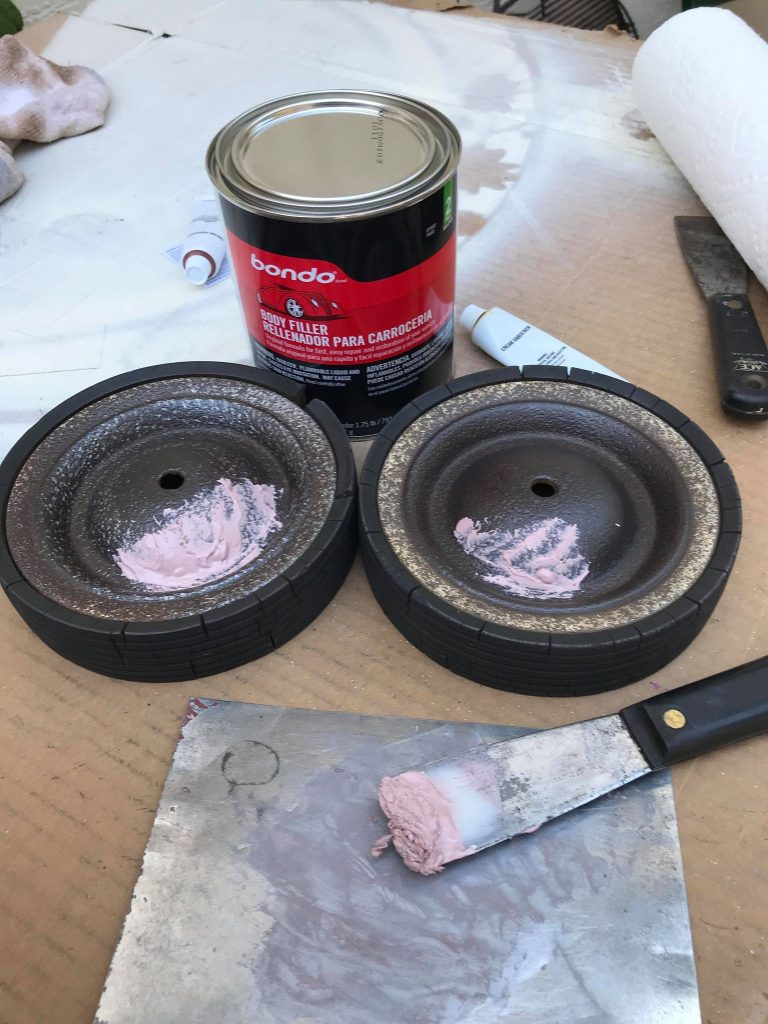
When the Bondo dries, sand to a smooth finish using 220 grit sand paper or emery cloth. Cut the sandpaper into small 1″ x 3″ strips. It is much easier to use on the wheels. Wear a dust mask when sanding the Bondo. Wipe the wheels with a clean cloth to remove all sanding dust.
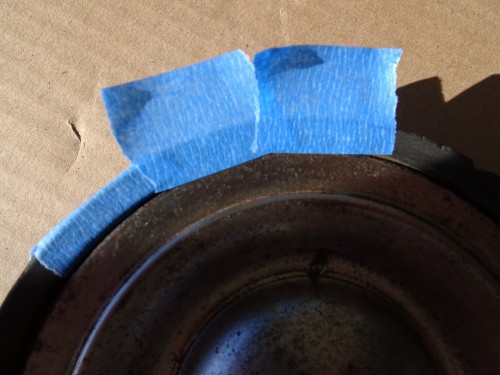
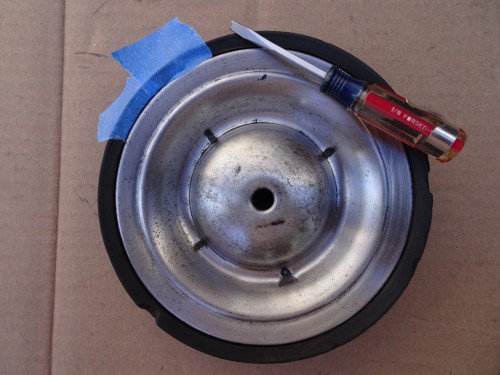
Now the wheels need to be prepared for priming and painting. Using about 1″ sections of blue painters tape, slide the tape between the rubber tread and metal wheel, folding the tape back over the tread. Sometimes the tape has to be pushed between the tread and the wheel using a small flat blade screwdriver. Repeat this process until the entire tread is covered. Flip the wheel over and use the same procedure on the other side of the wheel.
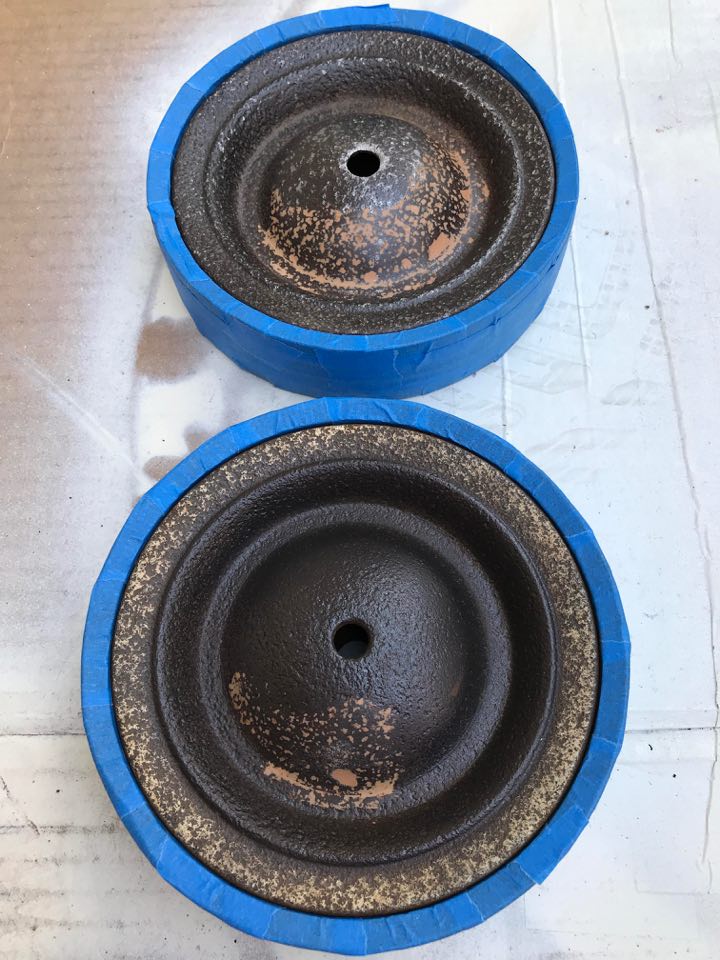
The wheels are now ready to be spray painted with Rusto-Oleum Primer/Filler. If the wheels are heavily pitted like these, apply several light coats. Allow each coat to dry for several minutes and then apply the next coat.
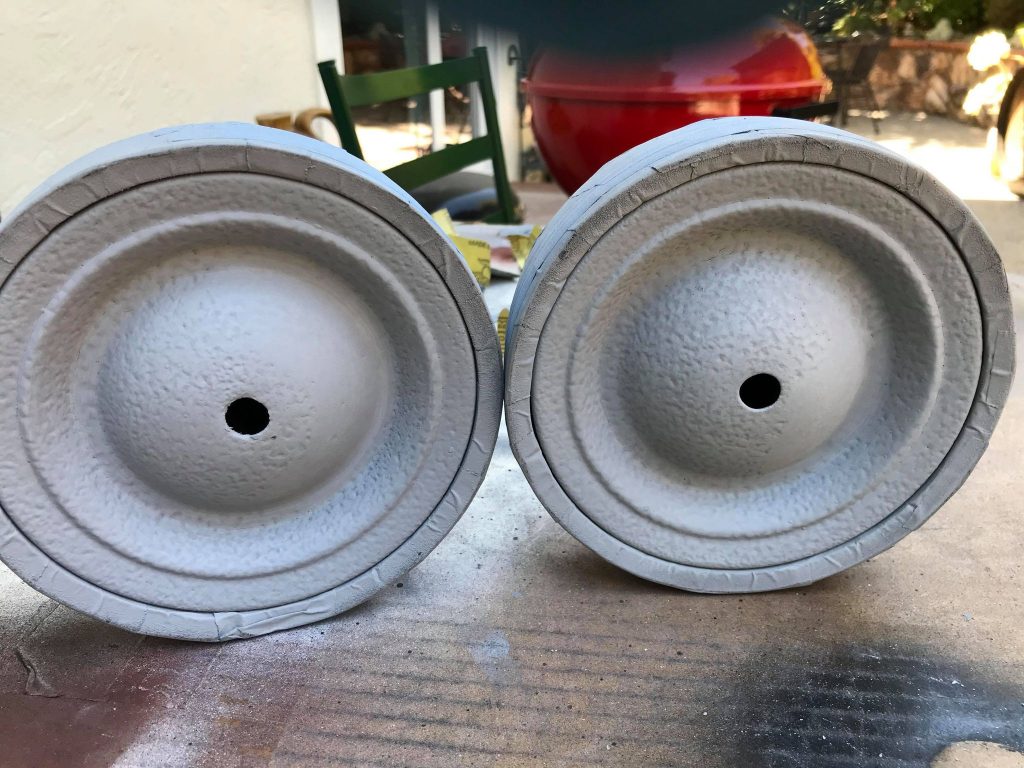
These wheels belonged to WKC member inkaddictedchef1 and he wanted the patina or pitting on the metal to be left visible on the outside of the wheels. If a more original looking smooth surface is desired, the primer can be sanded with 220 grit sandpaper until a smooth surface is obtained. If needed, another application of primer can be applied, allowed to dry and then sanded again. In the comparative photo below, the wheel on the right was sanded after priming to achieve a smooth surface.
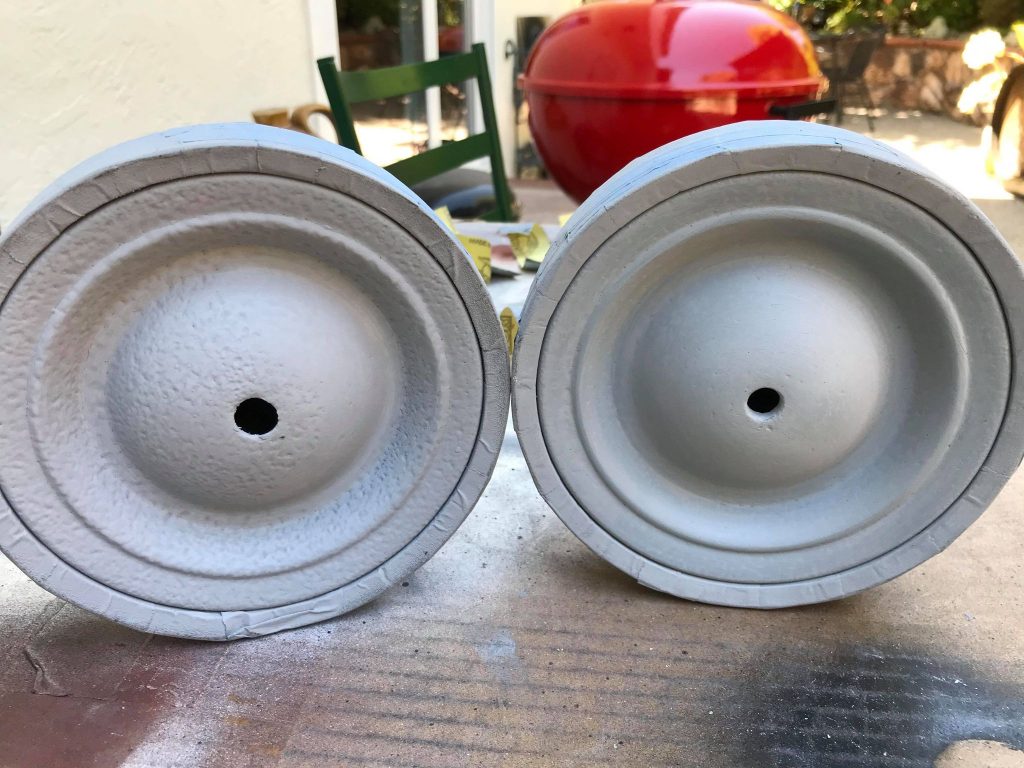
Once the desired texture is achieved, apply two light coats of black Rusto-Oleum spray paint to all sides of the wheels. I used satin but semi-gloss or gloss may be used.
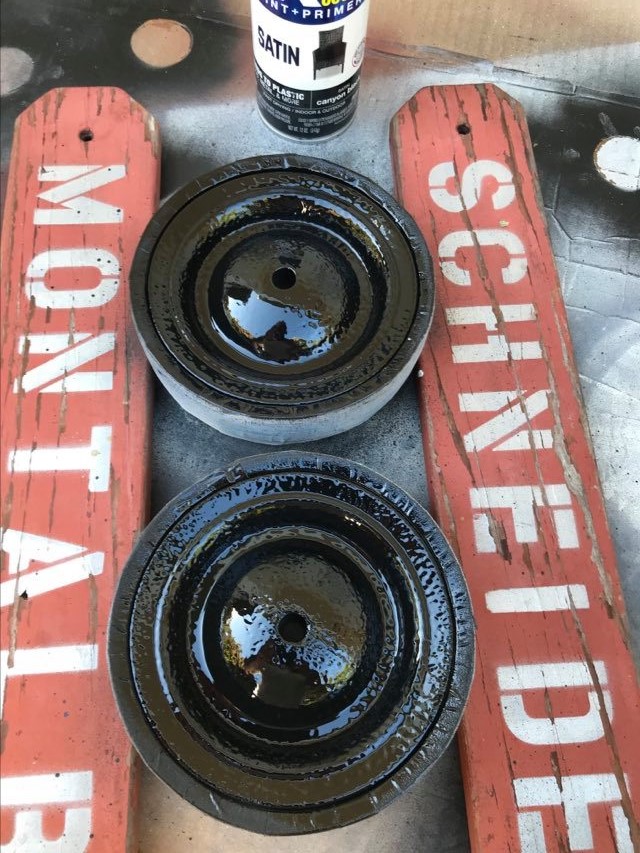
The inside of the wheels were sanded prior to receiving the finished black coats of spray paint. These had the same texture or pitting of the metal as the wheels in the photo above. I wanted to give you an idea of how the primer/filler can be sanded to a smooth finish.
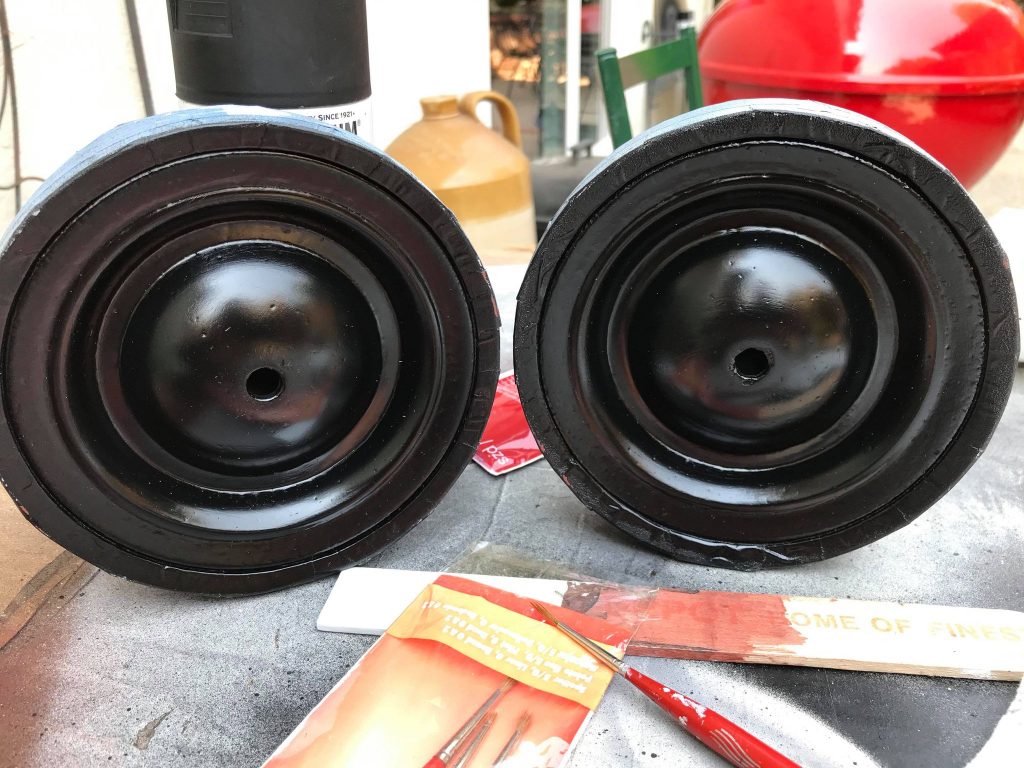
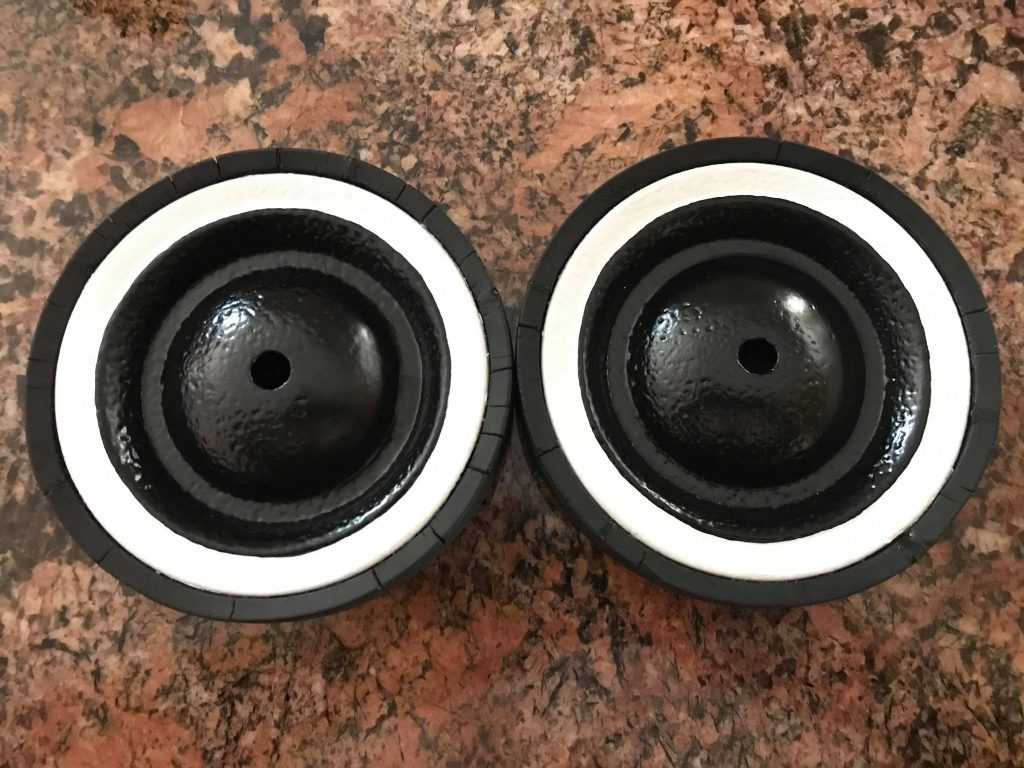
Let the black paint dry for at least a day then apply three hand painted coats of white paint to whatever side you designate as the “white wall side”. The paint can be sprayed into the plastic top of the spray can. This allows you to dip the brush into the accumulated paint in the top. I use two different size hobby/model paint brushes. One very small brush for cutting touching up and one flat brush with a tip about 1/4″ wide to apply the main white stripe. Don’t worry about being perfect on the first application. I usually have to touch up several times going back and forth with black and white paint until the lines are neat and crisp.
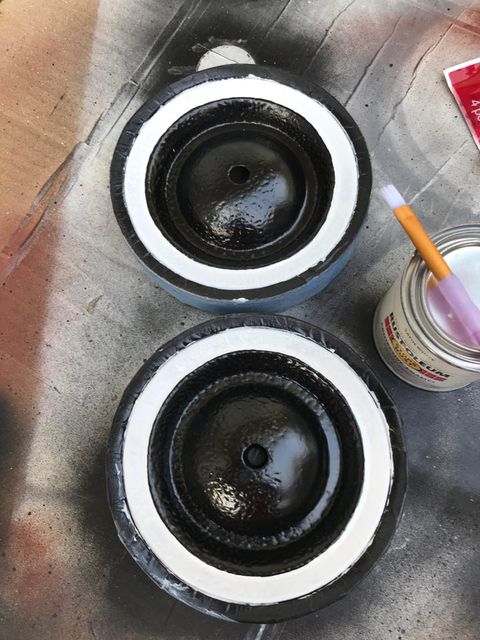
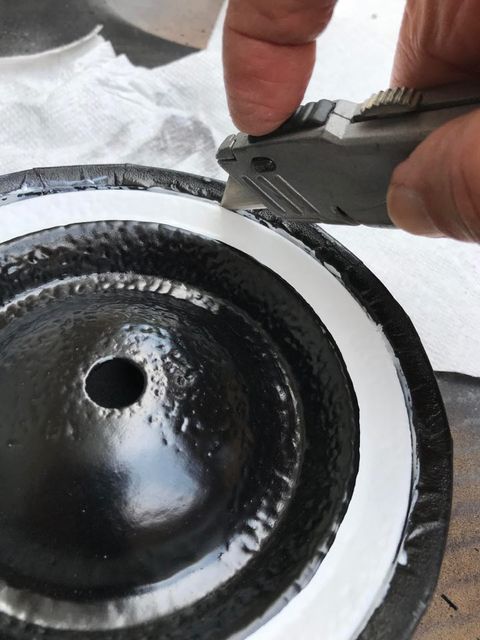
When removing the tape, it can sometimes pull the fresh paint off the white wall area. Scoring the area between the metal wheel and the rubber tread with a razor knife prevents this from happening. Any area damaged when removing the tape can be easily touched up with the small detail brush.
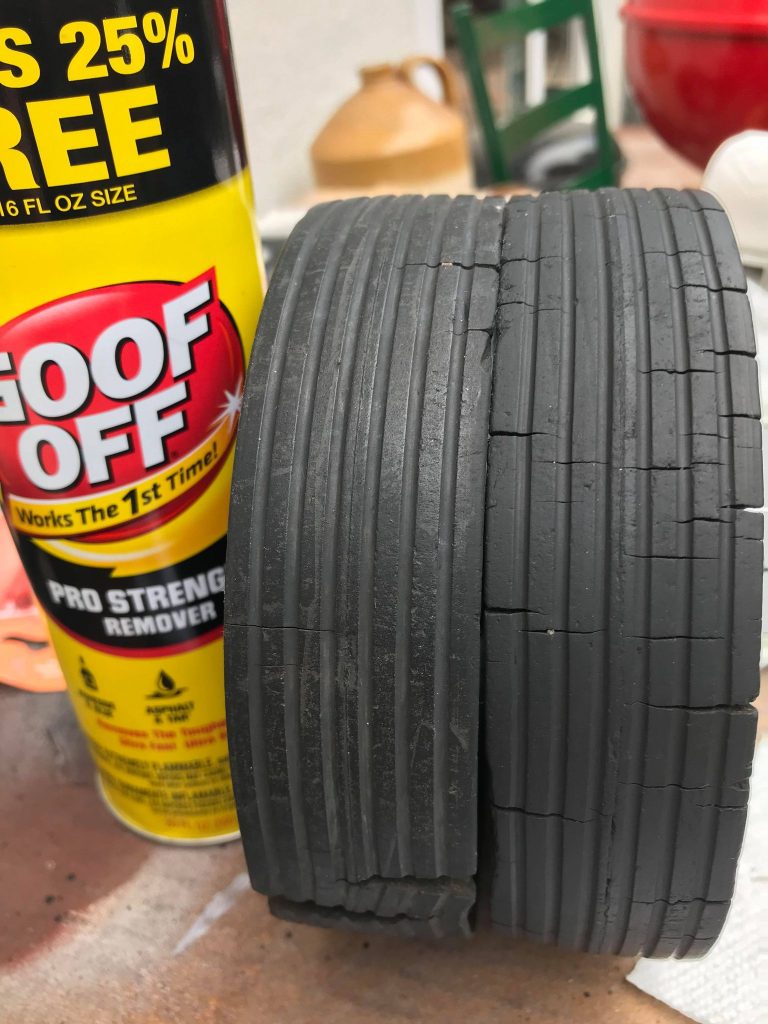
These older rubber treads tend to develop a hard, shiny surface on the rubber treads. Wiping the treads with a soft rag dipped in Goof Off removes this hard crust and returns the original rubber look to the treads. In the photo below the left wheel is before being cleaned and the wheel on the right has been cleaned with Goof Off.
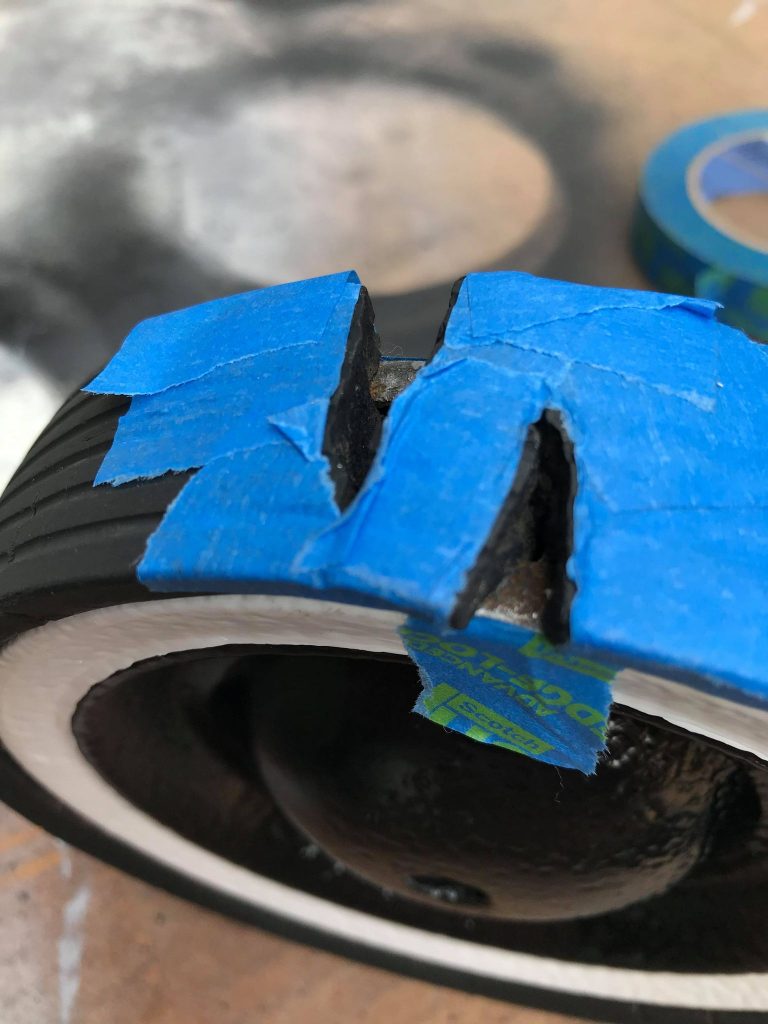
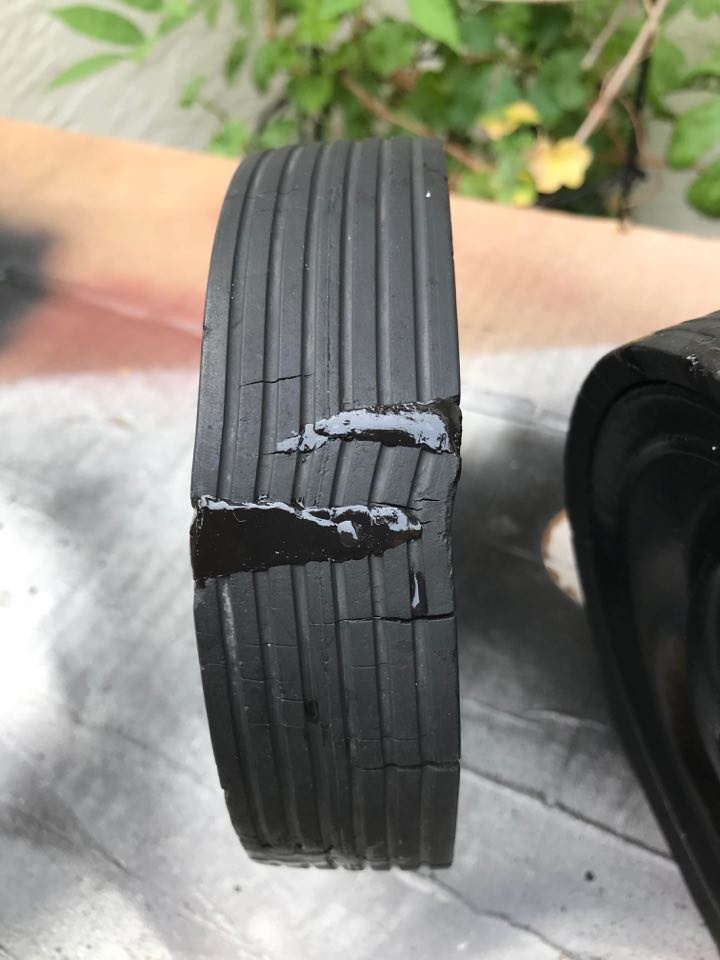
These wheels had very large splits in the rubber treads. So big that I feared the treads would separate from the wheel if left untreated. The largest cracks were taped off using blue painters tape and then filled with black GE Silicone II gasket and sealant caulk. Apply the caulk until it reaches the level of the tread (don’t over apply) and then wet your finger and gently smooth the caulk to the edges of the tape. Remove the tape before the caulk dries. The edges of the caulk can be smoothed again with a wet finger.
Not every step in this guide may be required or needed in restoring your metal wheels. The depth of your restoration will be guided by the condition of your wheels and how you want the wheels to look when finished.
R R R
