
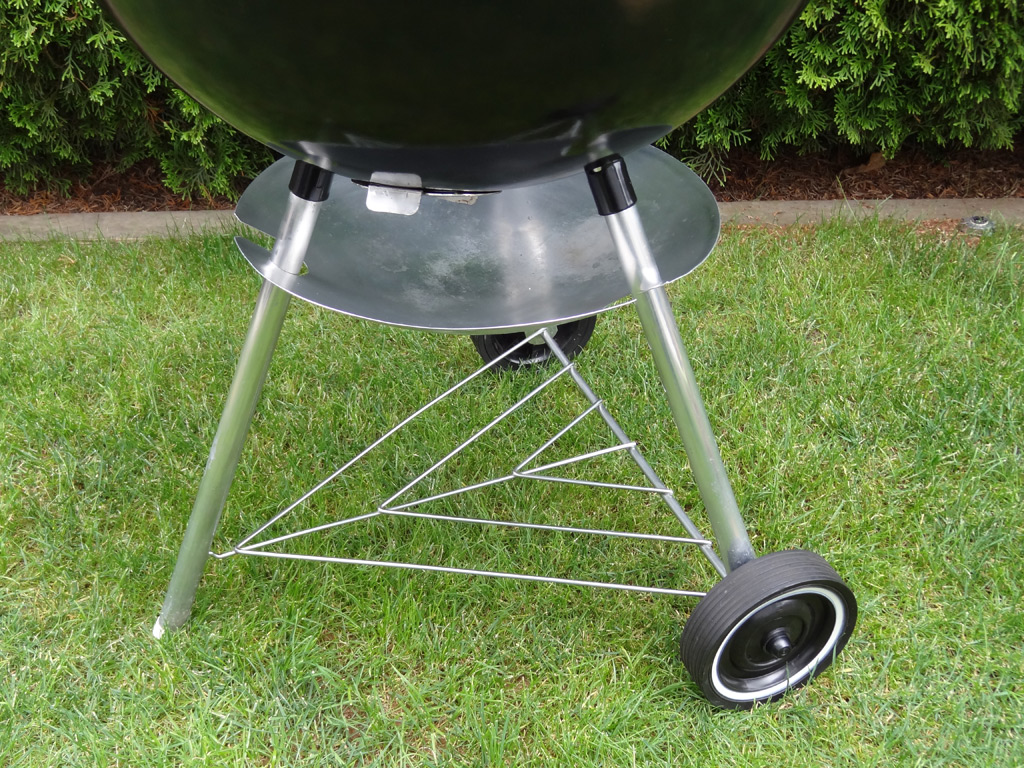
Restoring a Weber kettle can be an extremely rewarding process, and one important piece to the puzzle is the maintenance and clean-up of the iconic Weber tripod leg set. Spending time to properly clean and refinish the aluminum legs will not only give you the benefits of cleaner looking grill, but also help to extend the overall lifespan of your Weber kettle.
Here is how to clean and polish those weathered Weber legs and help breath life back into your old grill!
*** IMPORTANT: PLEASE READ BEFORE PROCEEDING ***
Please be aware that this process will only work on old (pre 2013) style ALUMINIUM legs! The newest legs being produced by Weber are plated and cannot be refinished. Additionally, some of the really old metal top handle kettles came with steel legs and therefore would not benefit from this procedure!
If you have a feeling your legs might be steel you can always double check with a magnet. Magnets will stick to steel but fall away from aluminum! It’s also a good idea to try a small test area on the leg before diving in head first. I like to use the top 1.5″ of the leg that will be hidden up in the socket when assembled. Once satisfied you know exactly what’s in front of you, proceed to the guide below!
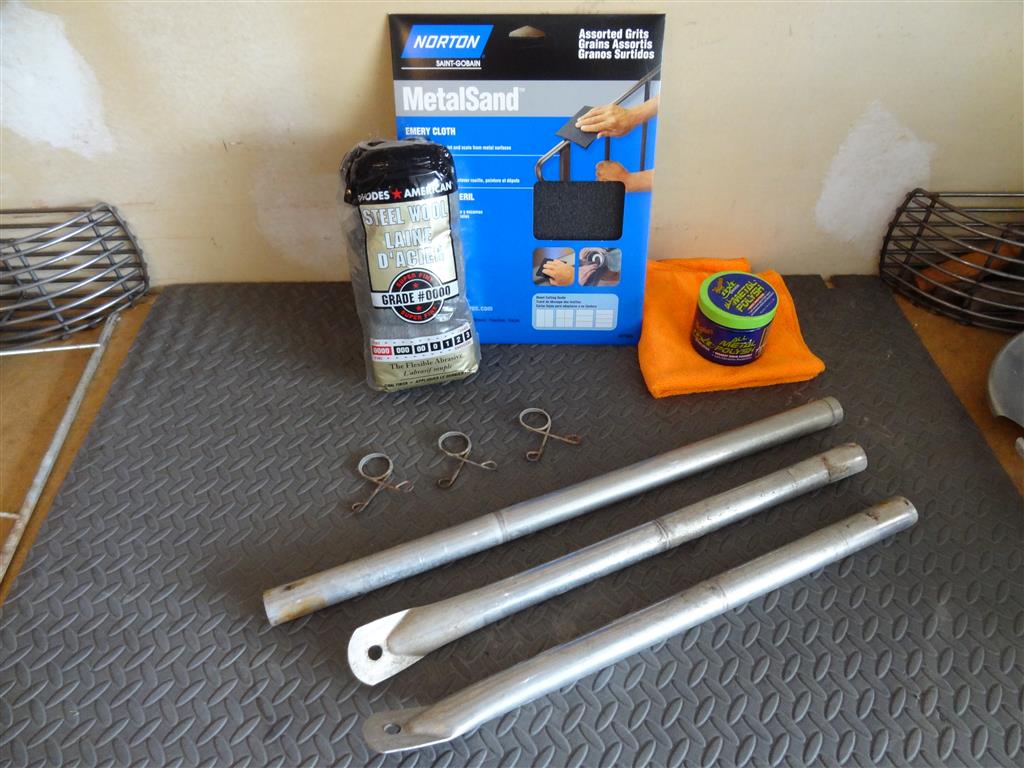
Weber Leg Restoration Required tools and products:
– #0000 extra fine steel wool (3 pcs)
– Assortment pack of emery cloth (fine and medium generally sufficient)
– Scissors or utility knife
– Metal Polish
– Cotton or Microfibre polishing cloth
Overview:
The basic procedure of cleaning up the legs is very simple! Essentially you start out with a moderate grit emery cloth or sandpaper and work in long directional passes to slowly “sand” off any corrosion. Your goal here is to make the metal surface as uniform as possible and then move down to the next finest grit before finishing off with steel wool and finally metal polish. Keep in mind that every kettle restoration is different and you may need to adapt your techniques to suit your circumstances.
Step 1: Removal of the Legs
If possible remove the legs from both the kettle and the triangle/wheels as this will give you much more freedom in turning the parts around and working at difficult to hit areas. Once removed have a good look and identify problem area’s that may need some special attention and come up with a plan of attack. At this point the triangle and wheels can be set aside. Cleaning and restoration of these components will be the focus of our next restoration article!
Step 2: Removal of Surface Contaminants
Grab a piece of emery cloth and get to work! If your Weber legs are quite rough, start with the medium grit (roughly 150 grit sandpaper) otherwise for most “standard” clean-ups you can begin with the fine grit (closer to a 320 grit sandpaper). The goal here is to remove all heavy corrosion and pitting in the leg thus creating a smooth finish or “grain” so to speak in the aluminium. It is very important to try to keep long vertical strokes down the entire length of the leg. If you scratch the sandpaper around in all directions you will only be creating more work for yourself to buff out in the end. You want to keep the faint scratching you are creating in the aluminium as straight as possible.
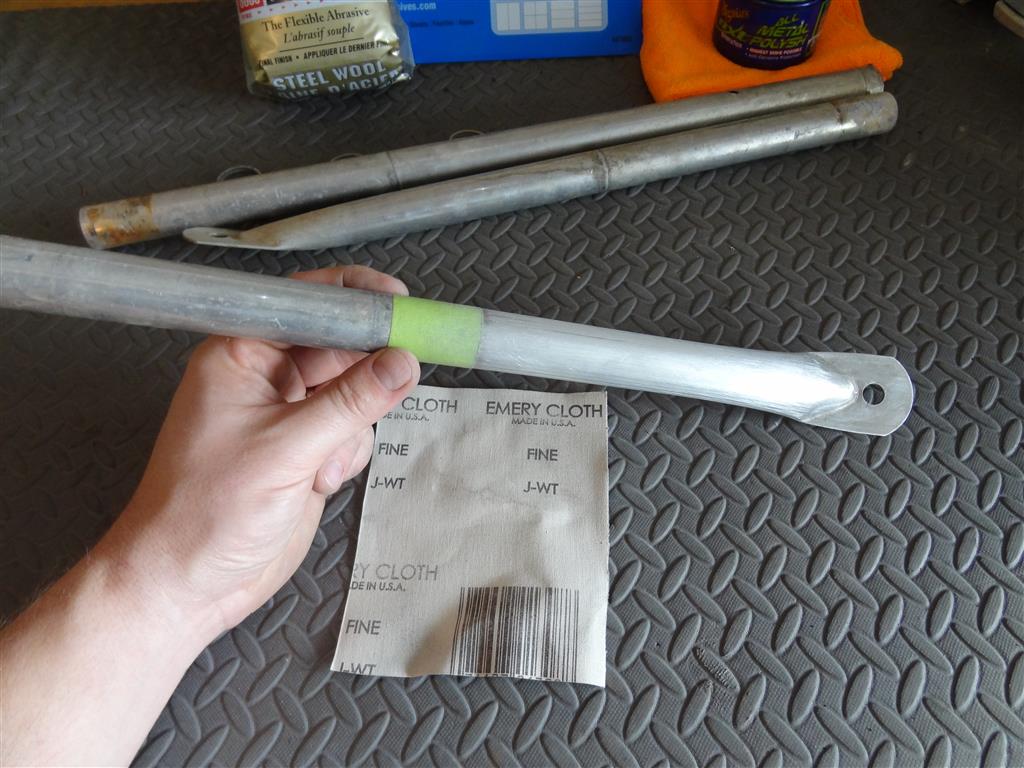
If you started with the medium grit, only move down to the fine grit once you are satisfied that all large contaminants have been removed and smoothed out. Repeat the same procedure with the fine grit. Try to make as consistent a surface as possible over the entire leg. The more time you invest at this stage the better the legs are going to look in the end.
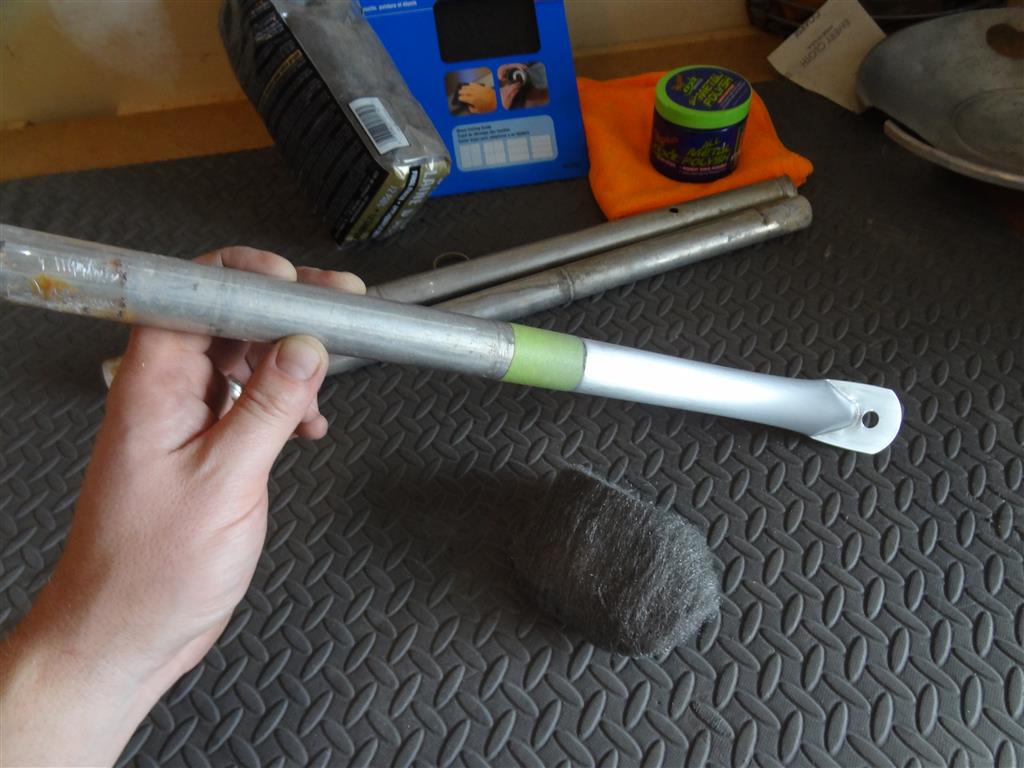
Step 3: Steel Wool Surface Preparation
Now that you have brought the surface back down to it’s original base, you can then switch to the steel wool and simply keep rubbing until the whole leg becomes smooth. The steel wool is going to take down those super faint scratches you created leaving you with a dull metallic finish. Remember to stick with long, even sanding strokes as to not introduce horizontal scratching against the grain. Many people will actually stop at this point if you prefer the old style look which was more of a plain brushed finish. Otherwise, if you plan to polish them right up proceed to step 4!
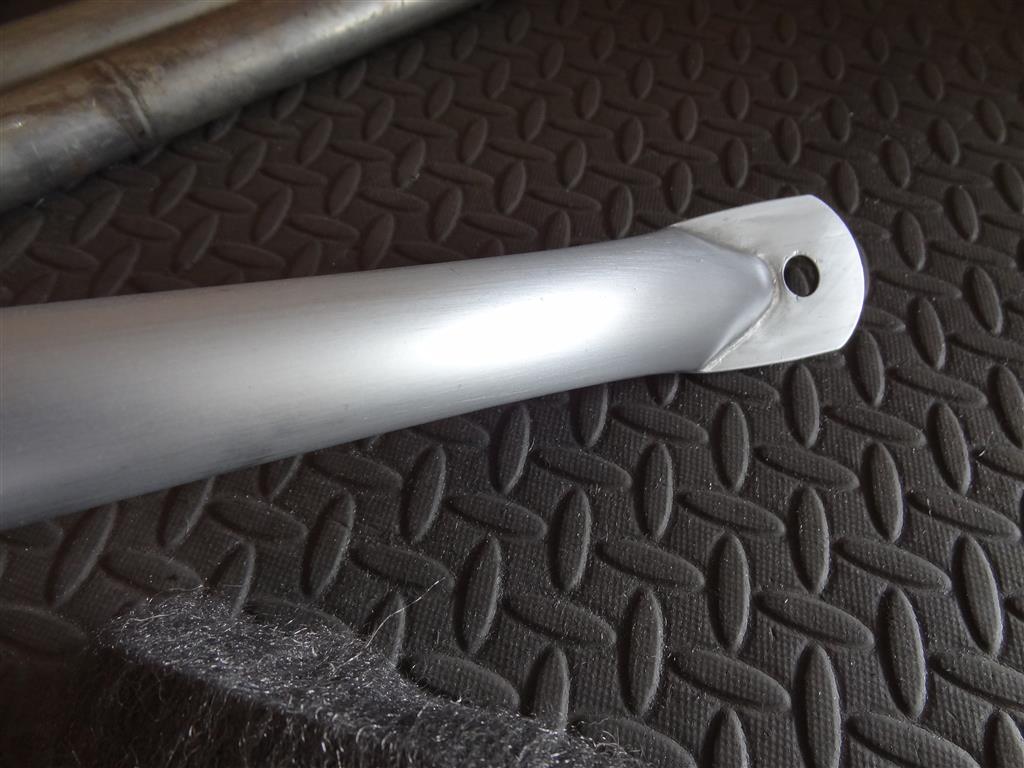
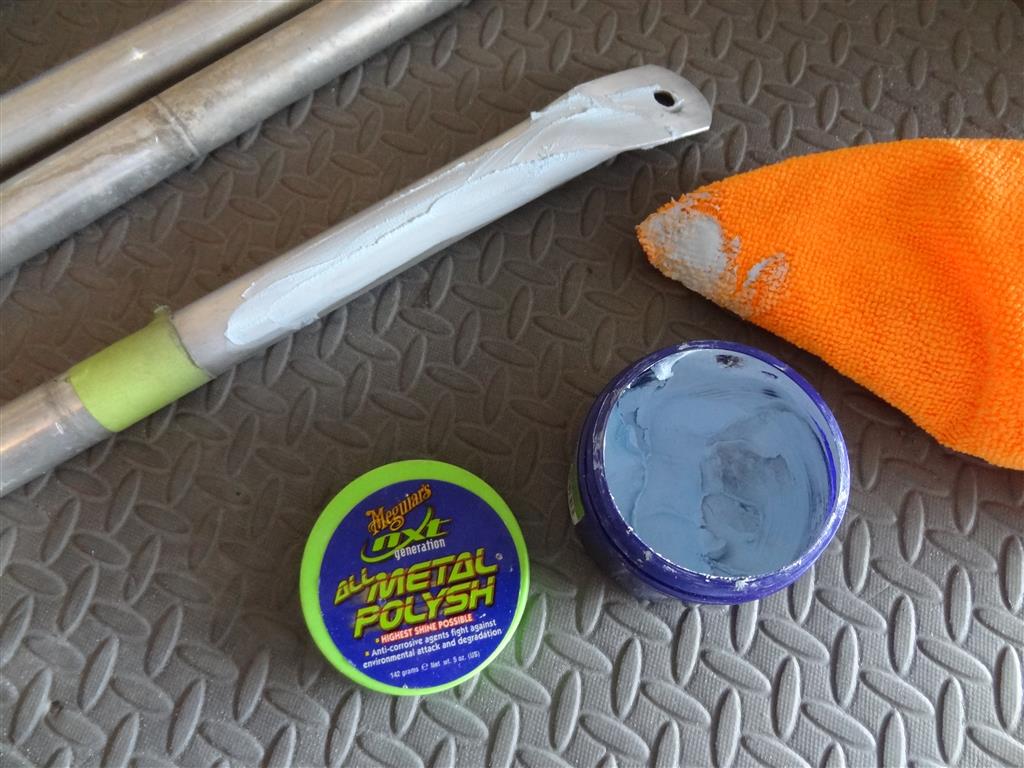
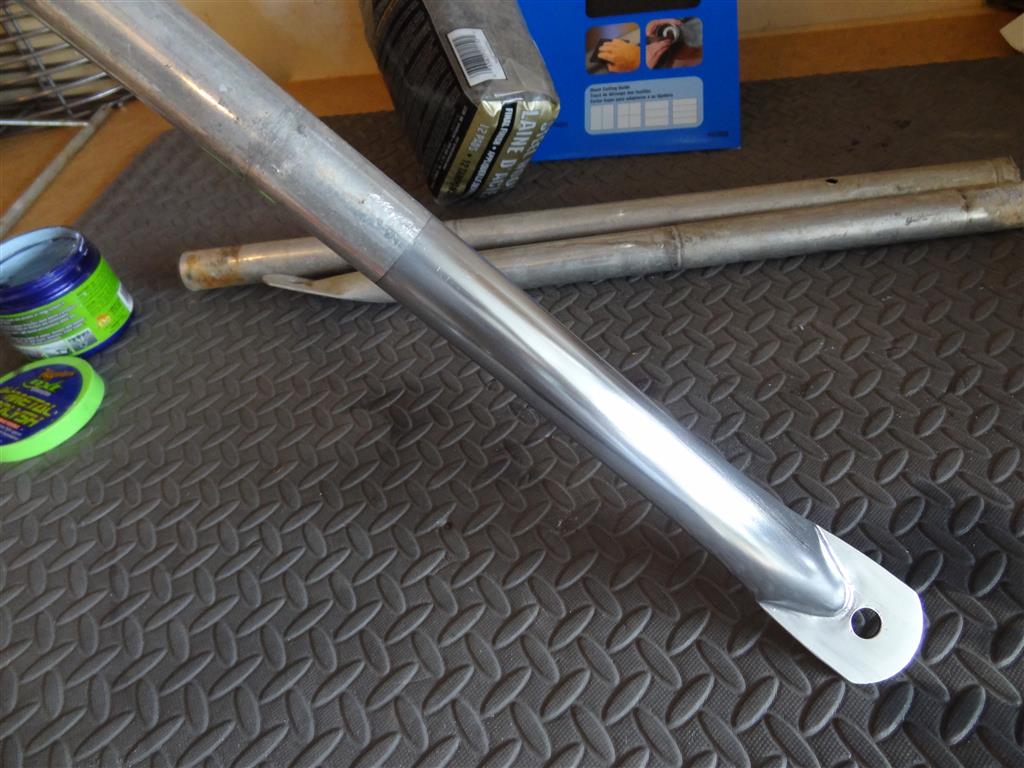
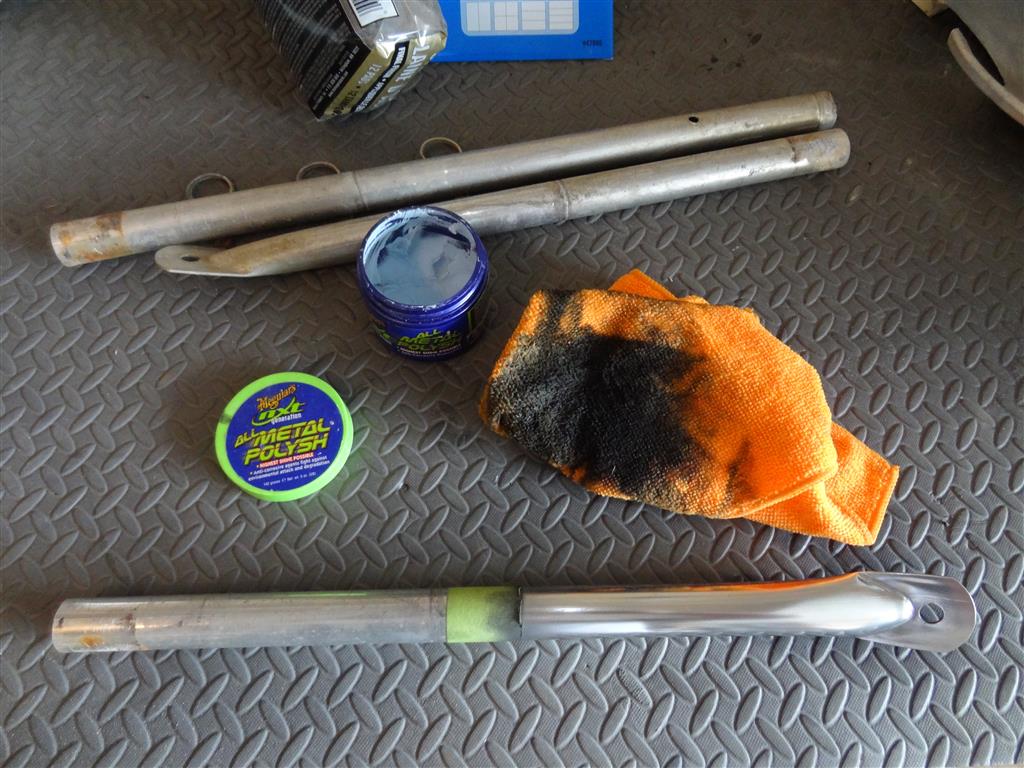
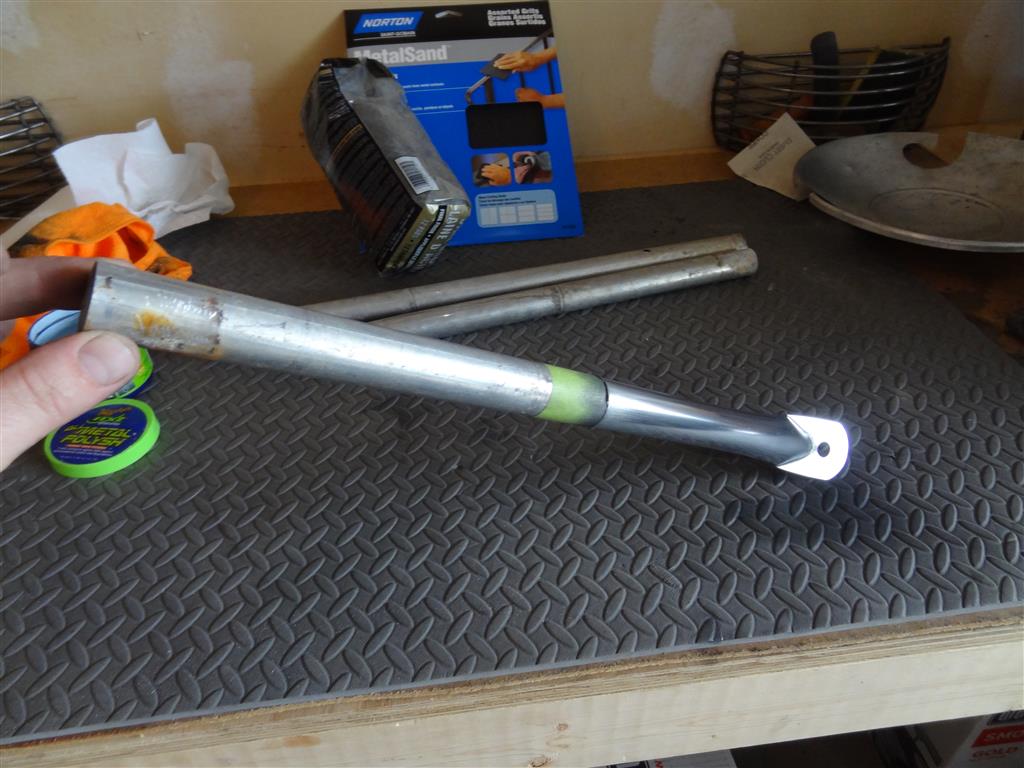
Step 4: Final Polish of Weber Legs
Using your favorite metal polish, smear a healthy amount all over the leg you are working on. You don’t need to go crazy here but there should be ample amount of paste to cover the entire leg. Once complete, proceed to take the Cotton or Microfibre cloth and start polishing! I have taped the example leg to illustrate the difference from start to finish in the next few shots. This does take some elbow grease but you will be thrilled with the end results!
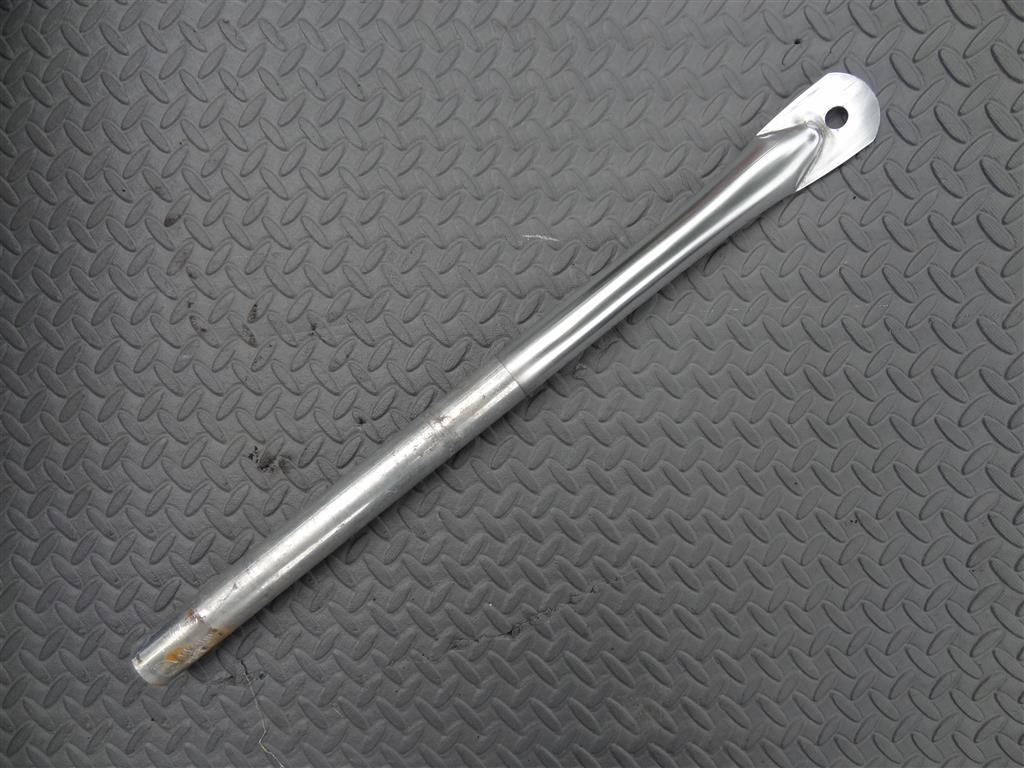
Take a look at the difference! – The legs are now polished up good as new. Simply repeat the same process on the other two legs and then enjoy your finely detailed kettle!

… Stay tuned for more installments of the WKC restoration guide in the near future!
R – R – R