Weber Grill Mod: Adding Gas Assist
How to add a Touch N’ Go gas assist to a kettle
The Weber Touch N’ Go gas assist is a nifty feature that uses a small propane burner to start the charcoal in your kettle. It’s simplifies the charcoal lighting process and keeps things clean and safer by now have to mess with lighter fluid or a hot chimnet.. The Touch N’ Go gas assist feature comes on most Weber performers. The older style gas assist used a refillable 5lb propane tank but in 2005 the new performer model came with a connection for a disposable tank. Short of the regulator and propane fitting, the components are the same.
There are a few reasons why you may want to add a gas assist:
-You bought a performer model without the gas assist feature.
-You want to make a kettle mounted table with built in gas assist and want a propane starter.
-You want to transfer a gas assist from one kettle to another that you already have.
-Finding a performer in your area is rare and expensive
This mod isn’t for everyone. It’s better to just procure a used performer that has everything turnkey. Buying new is extremely expensive. The oblong hole on the curved surface also needs to be precisely fit otherwise the kettle bowl will leak air making temp control and shutdown difficult or impossible. I highly recommend a permanent installation under a table, cart, etc. You don’t want a propane tank flopping around under a kettle and being exposed to ash and embers.
Parts needed:
– Burner tube, burner tube mount, igniter assembly Weber part #10469 ~$26
– Propane hose/regulator, orifice #74237 ~$32 or (New style performer with disposable tank) #62642 (SS performer style to 5lb tank) ~$110 (!), and retainer clip #890415
– Propane tank
– Misc. bolts and mounting brackets if you are doing a retrofit.
– Kettle bowl
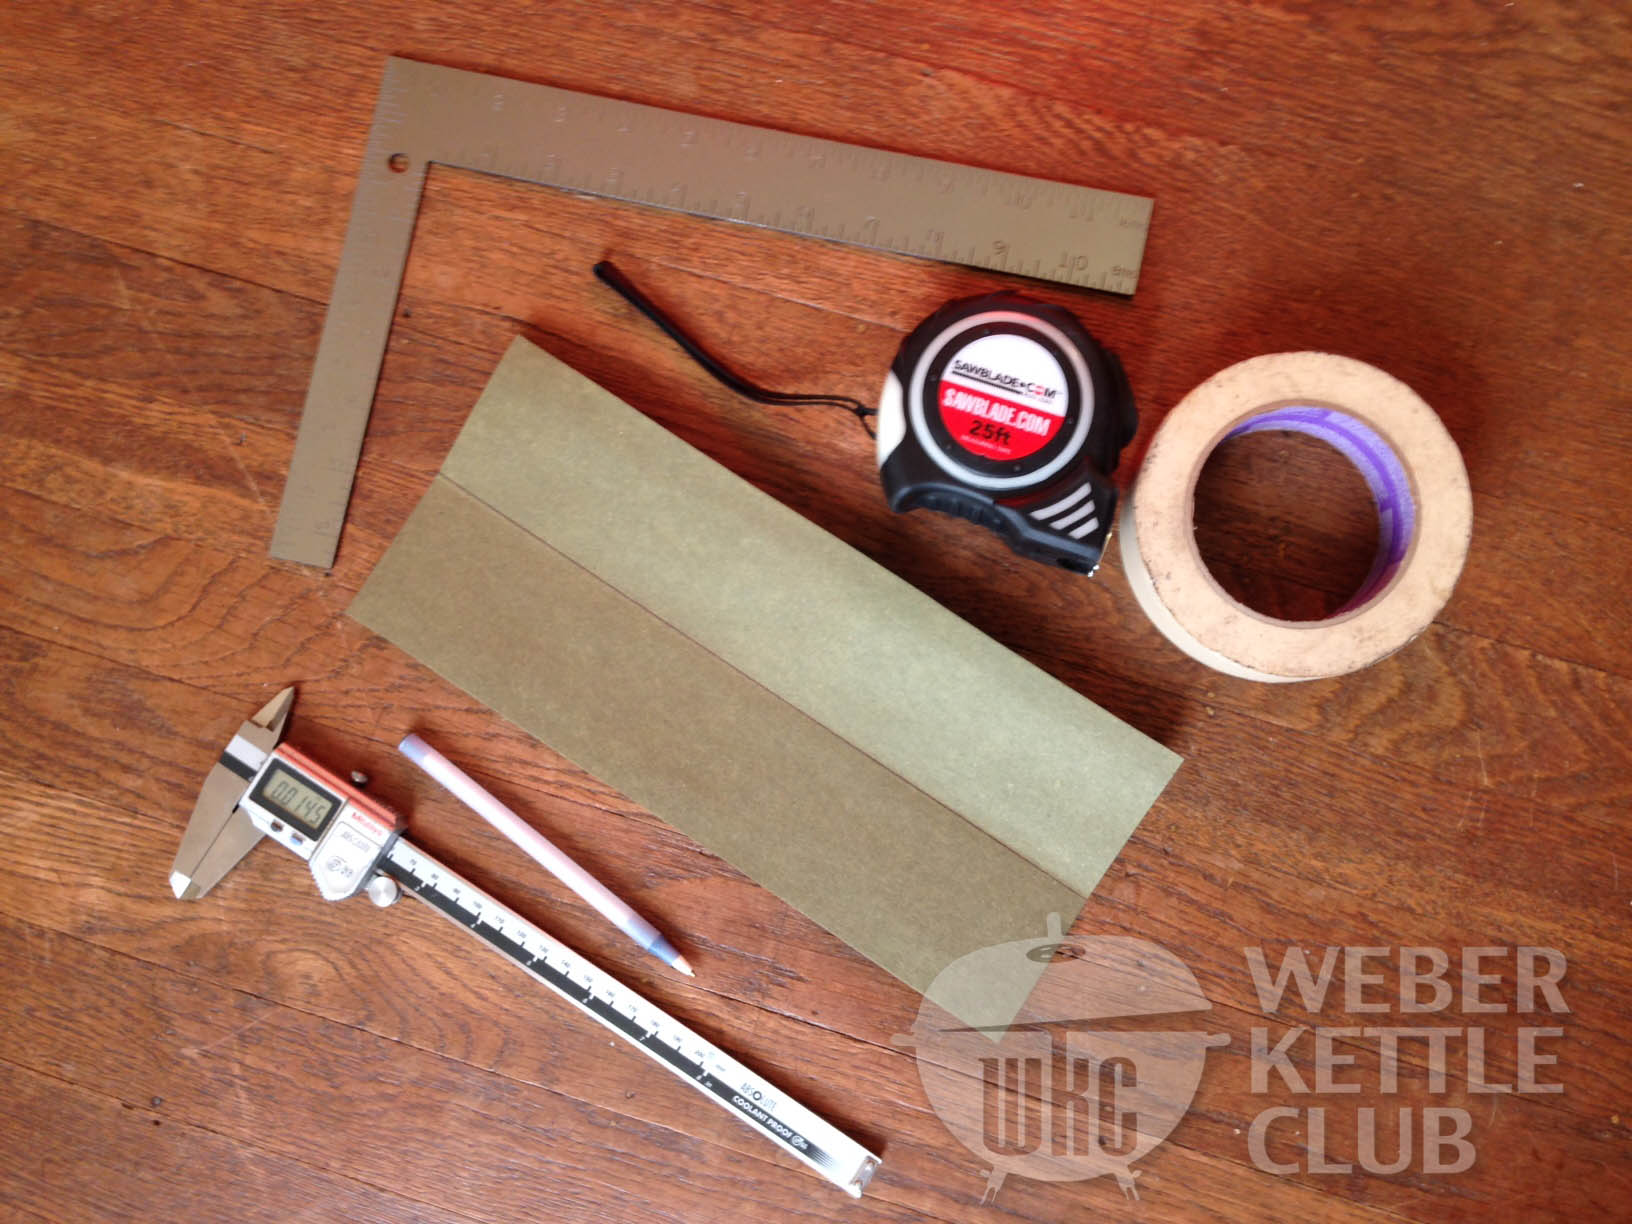
Tools needed:
Masking tape
Measuring tape
Exacto or utility knife and cutting mat
Dremel with cutoff wheel and sanding drums or file
Drill
Pliers/philips screwdriver
Safety glasses and respirator
Gas Assist hole template

Disclaimer: Modify your kettle at your own risk. Tools and propane can be dangerous.
How to add a Touch N’ Go gas assist to a kettle
I was lucky enough to have two bowls, one with gas assist from a SS performer, and one without from an old style one touch platinum. So I was able to use performer bowl to make a template- which I will update/upload when I feel like it.
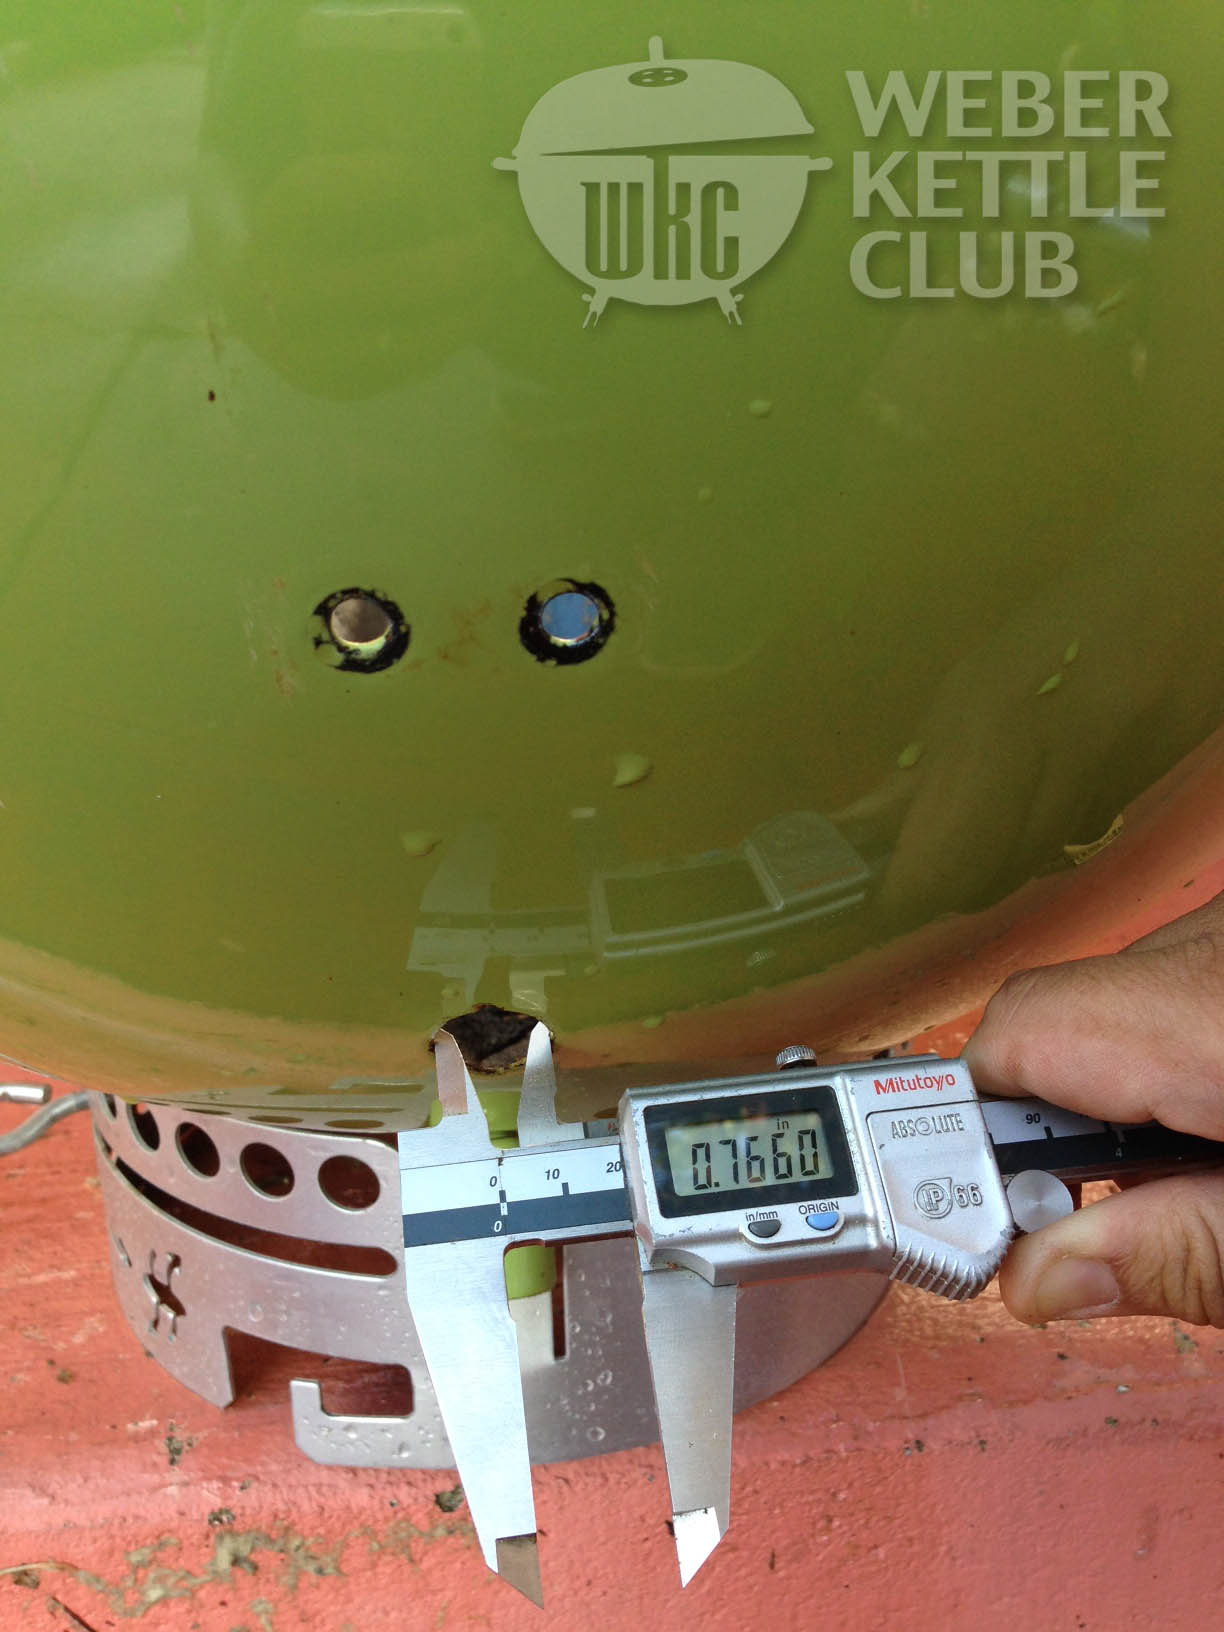
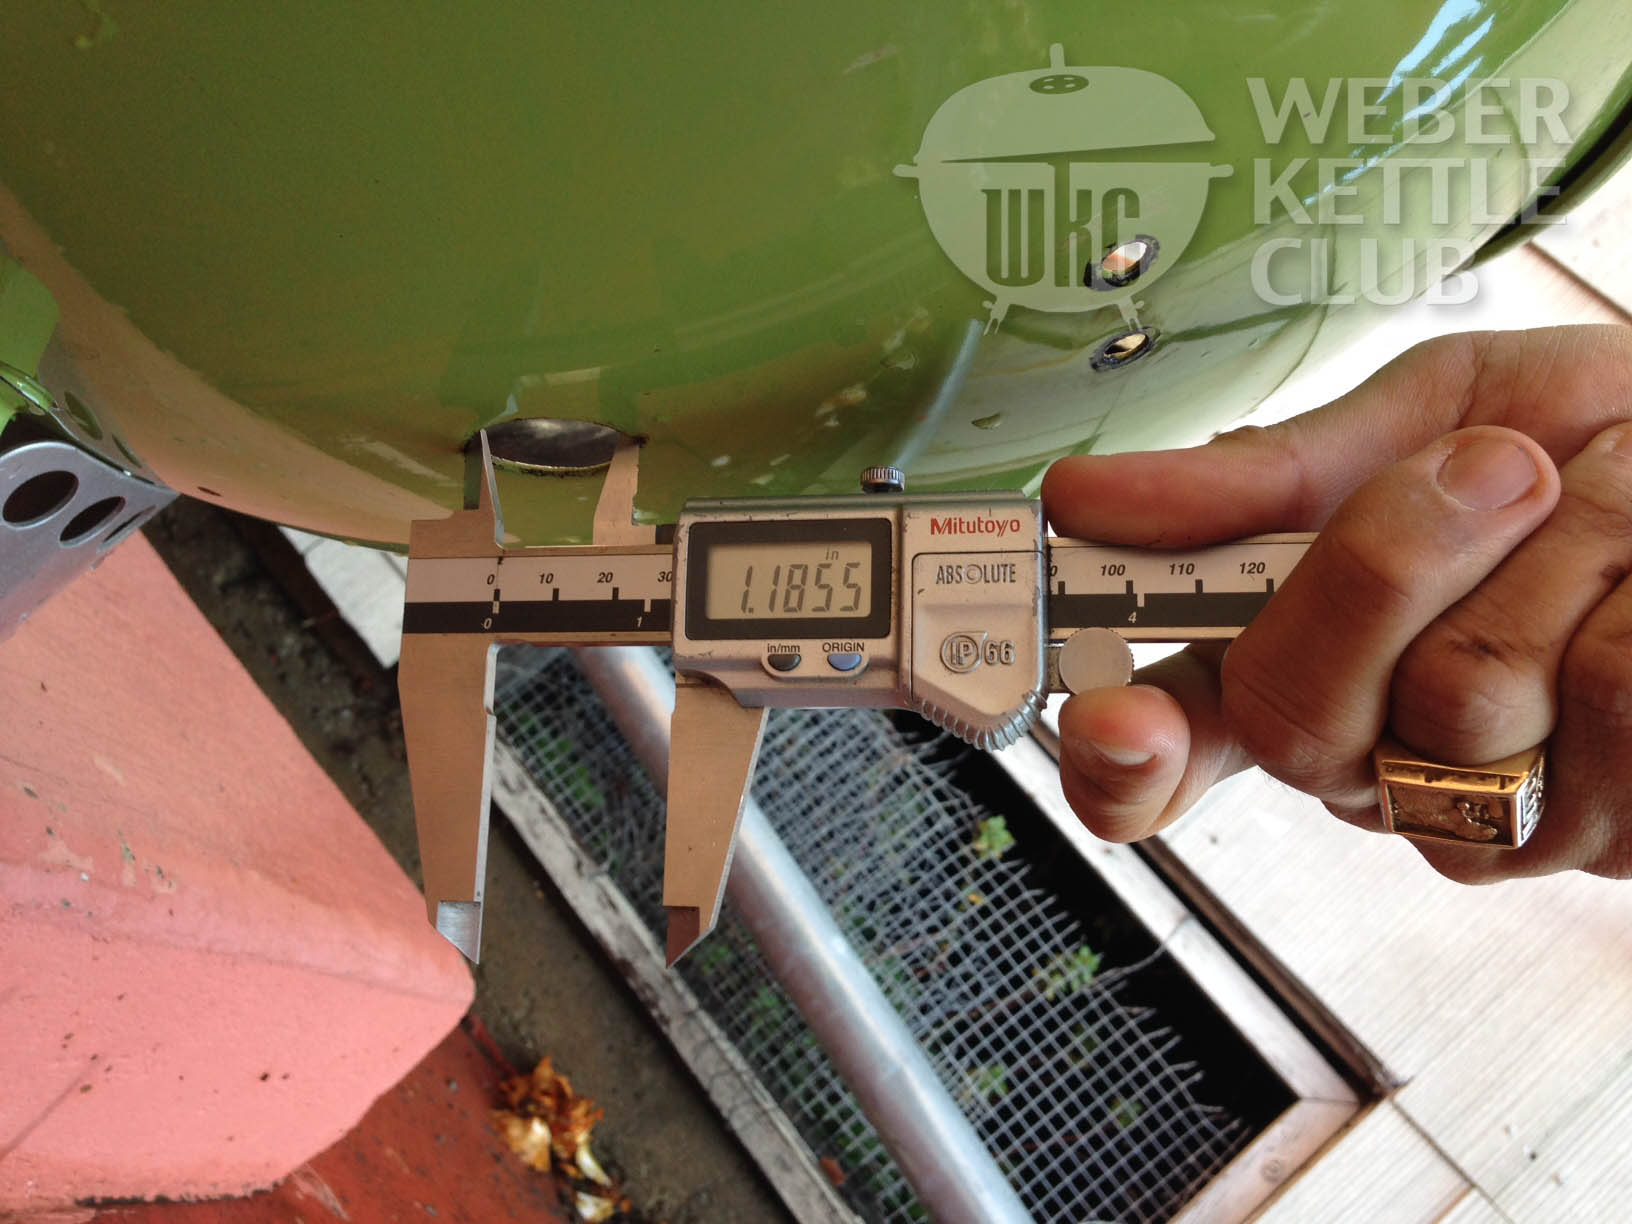
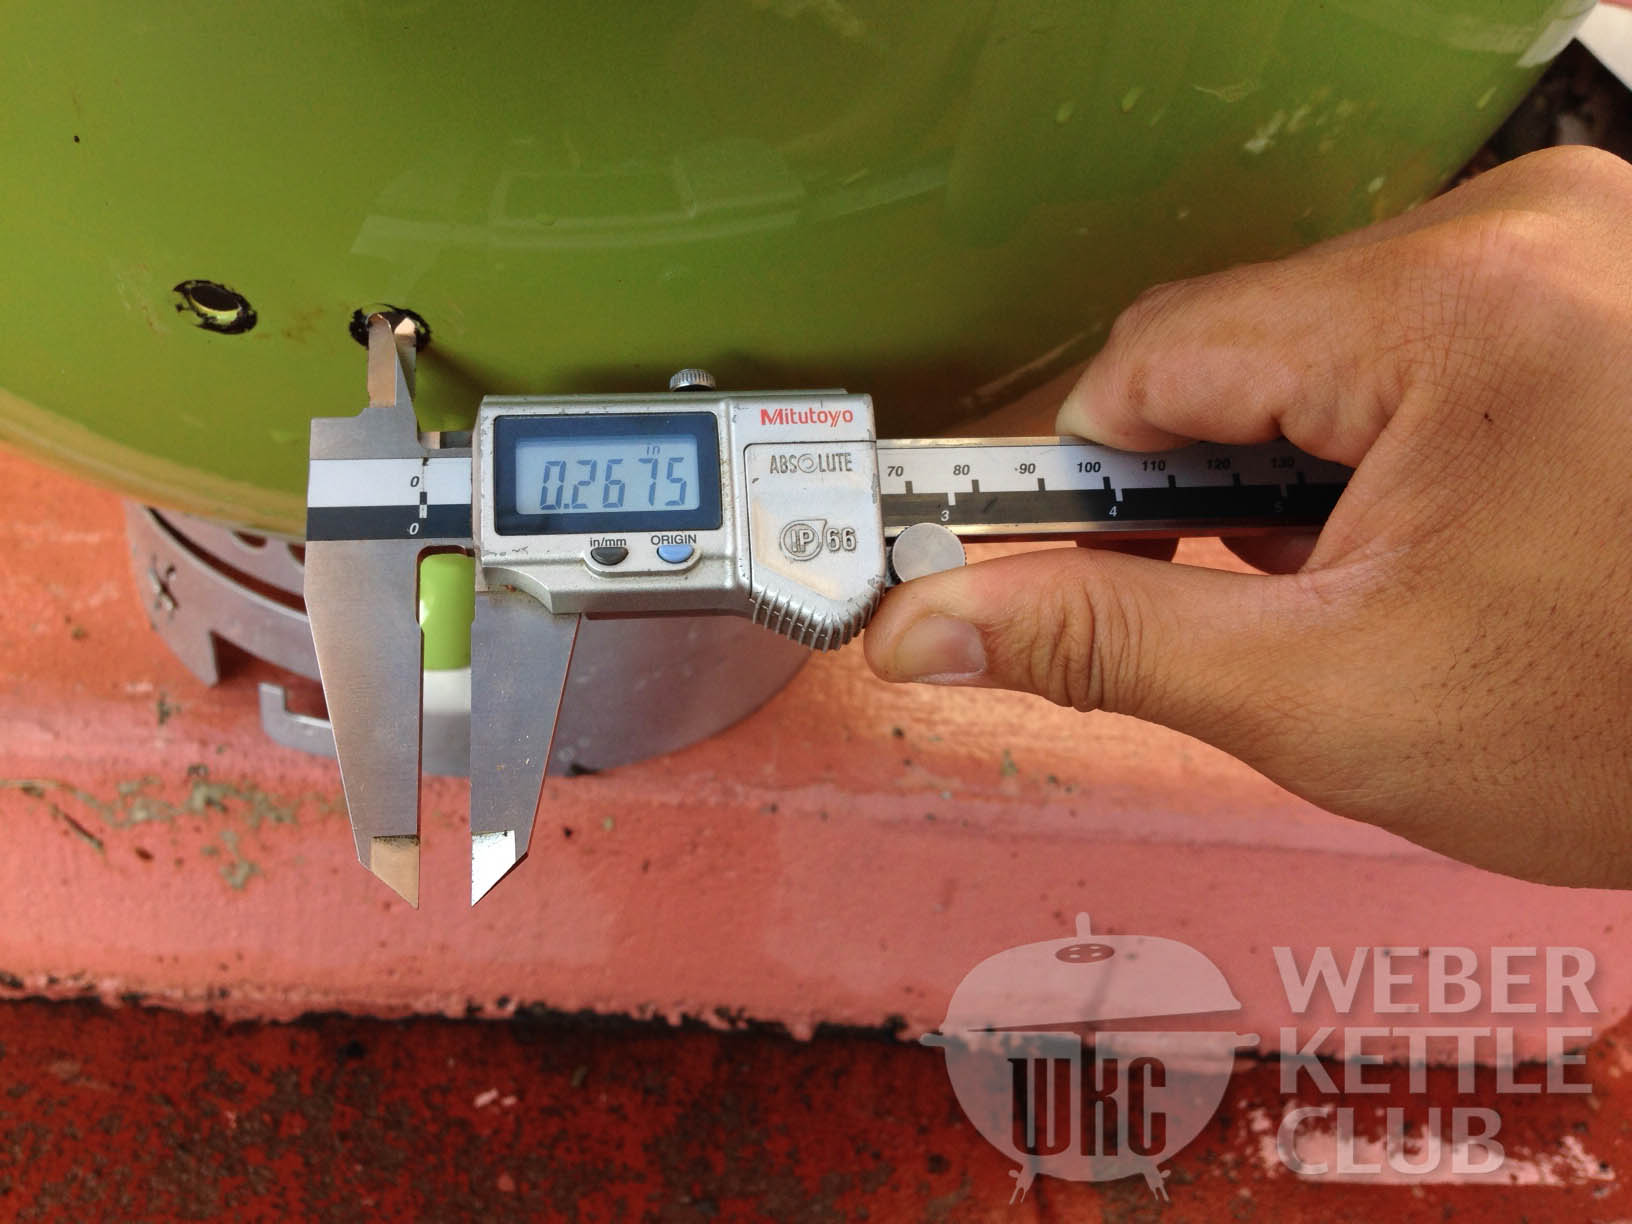
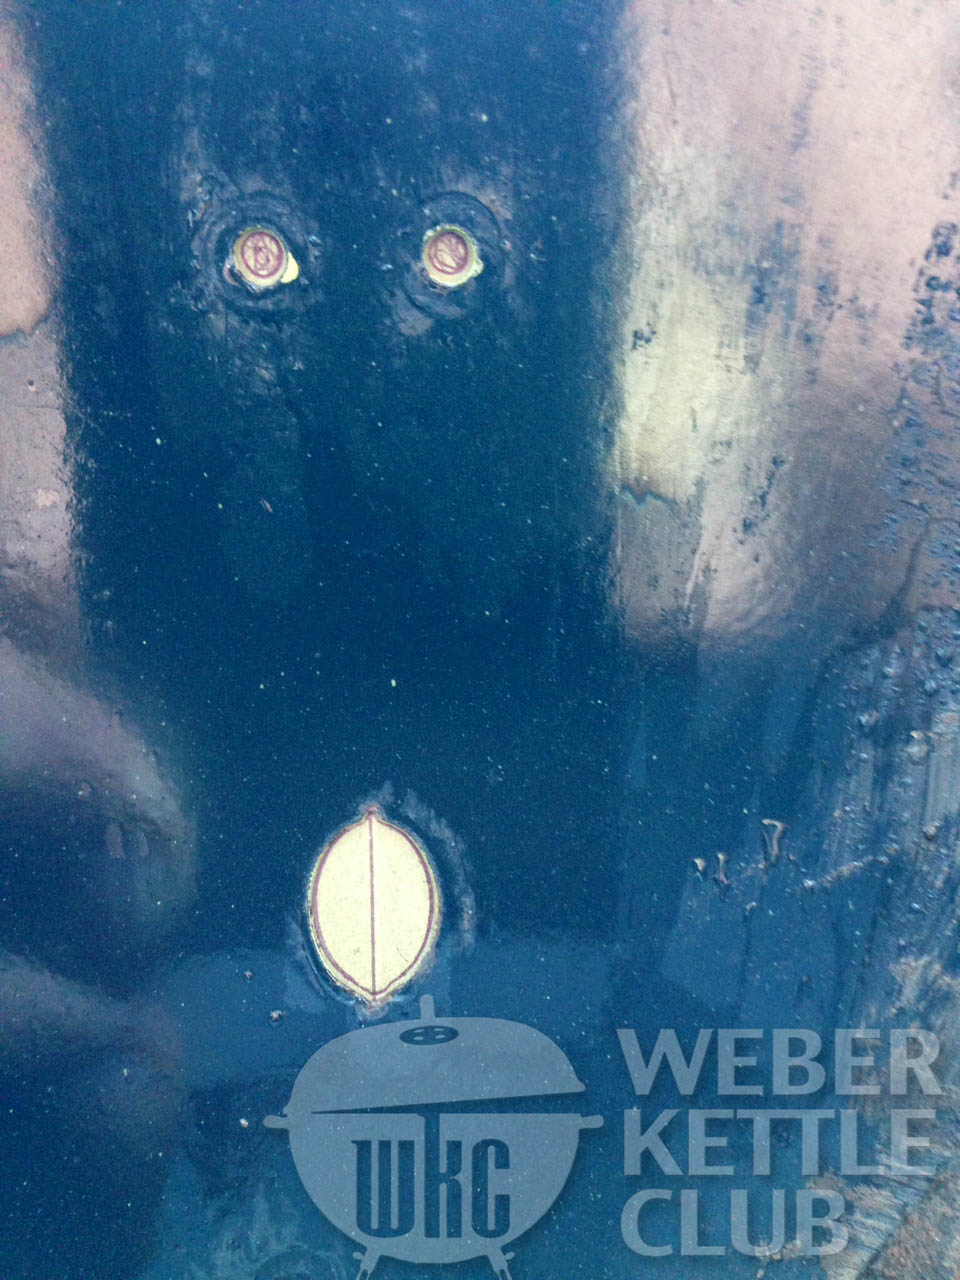
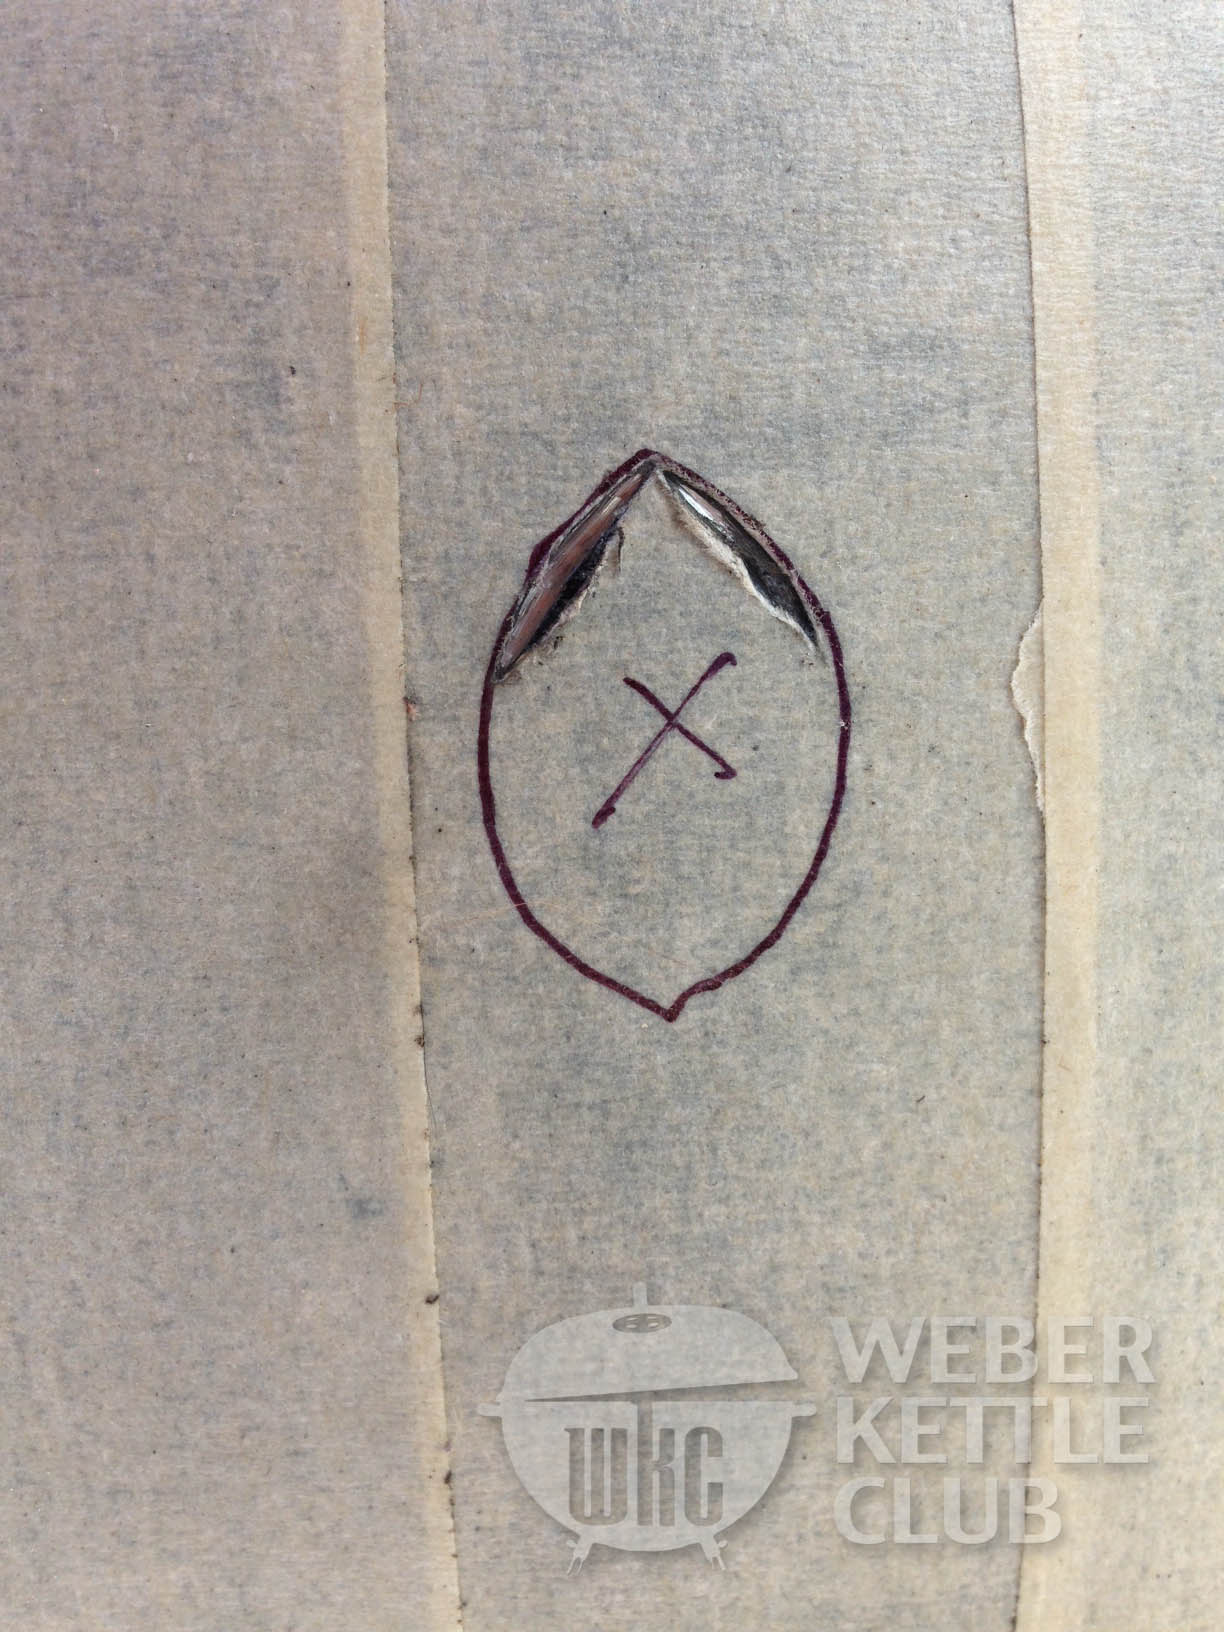
I took some preliminary measurements of the burner hole, and screw holes. The oblong burner hole has a major axis of 1.185″, minor axis of .766″, and the bolt holts have a diameter of .267″, 1/4-20 clearance hole.
I made a template of the holes by tracing the holes from the inside and using the kettle lip as reference. Since the bowl has a curve in 2 directions, I would encourage you to keep the middle of your template flat long the kettle. It’s ok if the sides stick out a bit as we won’t be doing anything that far off center. I marked a middle line on both sides for reference and lined it up from the hole on the inside. Note that the burner hole isn’t actually a perfect oval. It has pointyish tips as the end. I think this is a manufacturing feature to get a better cut on the sheet metal during stamping. It also allows for just enough clearance to install the flat part of the burner from either side.
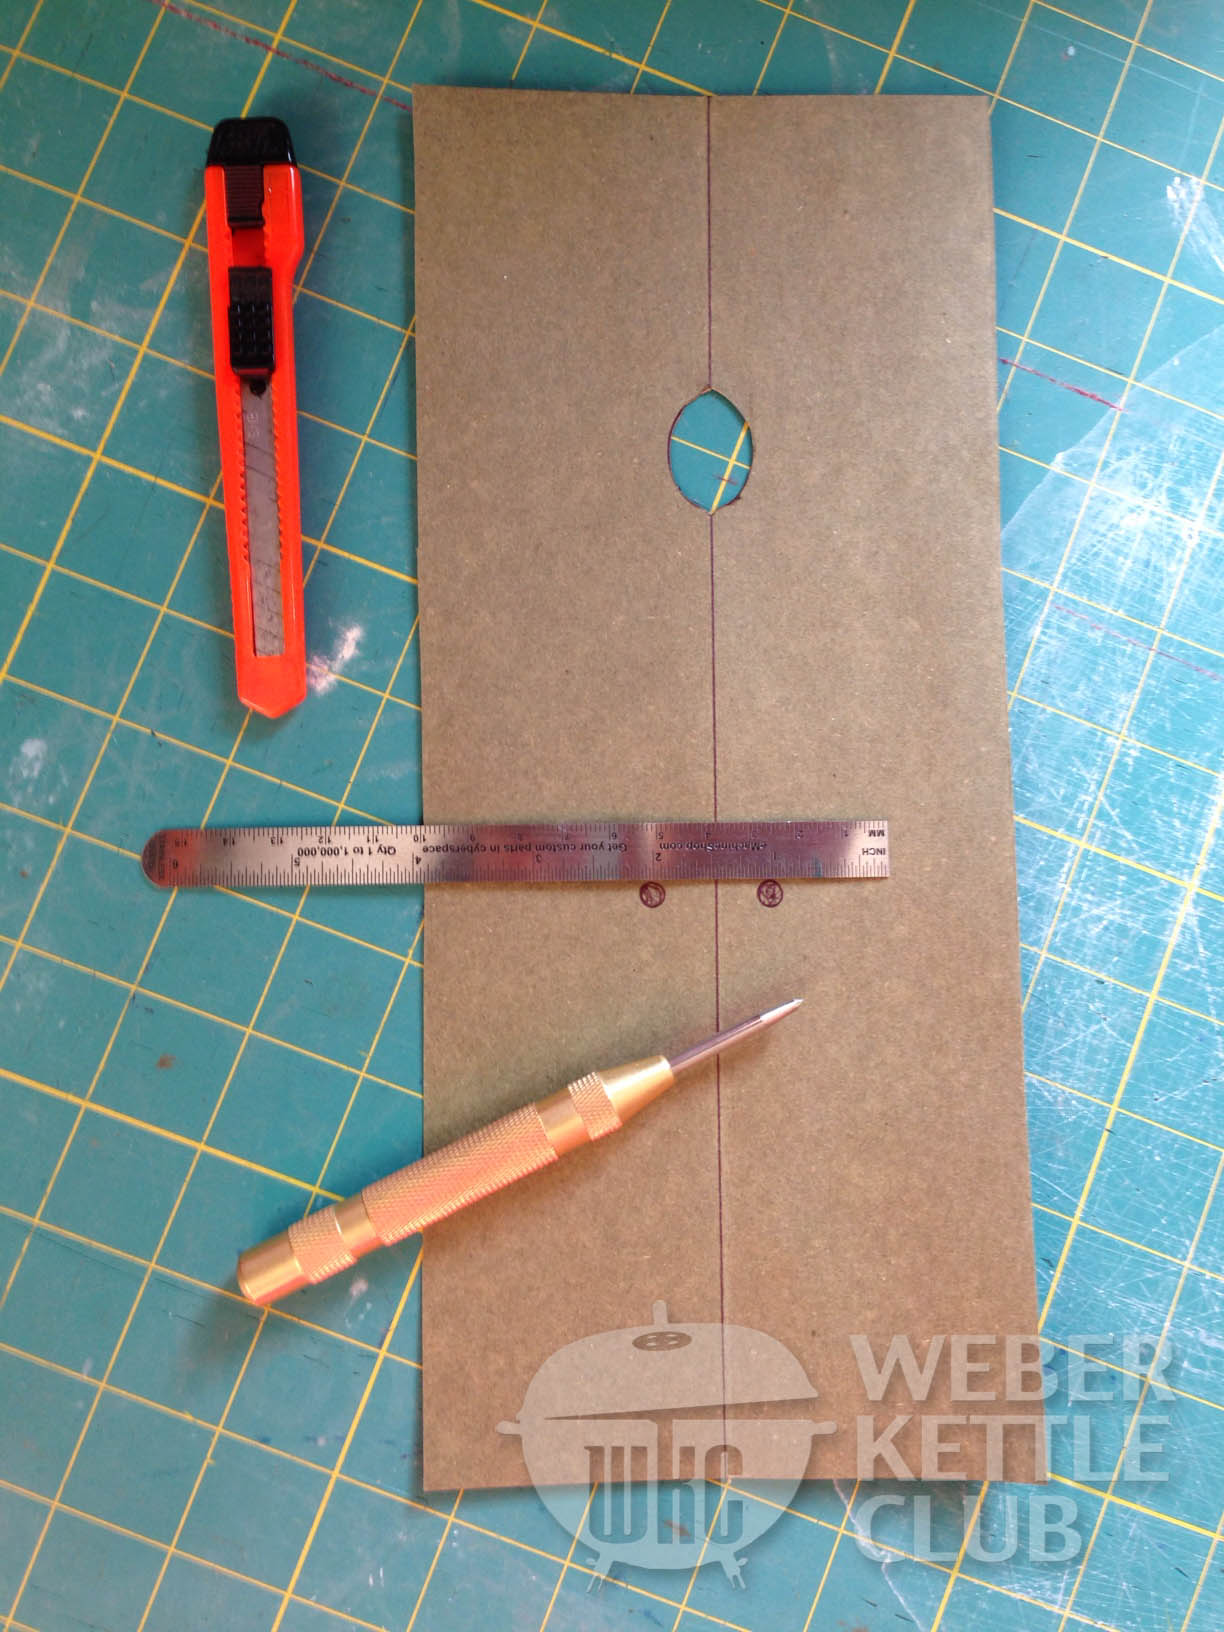
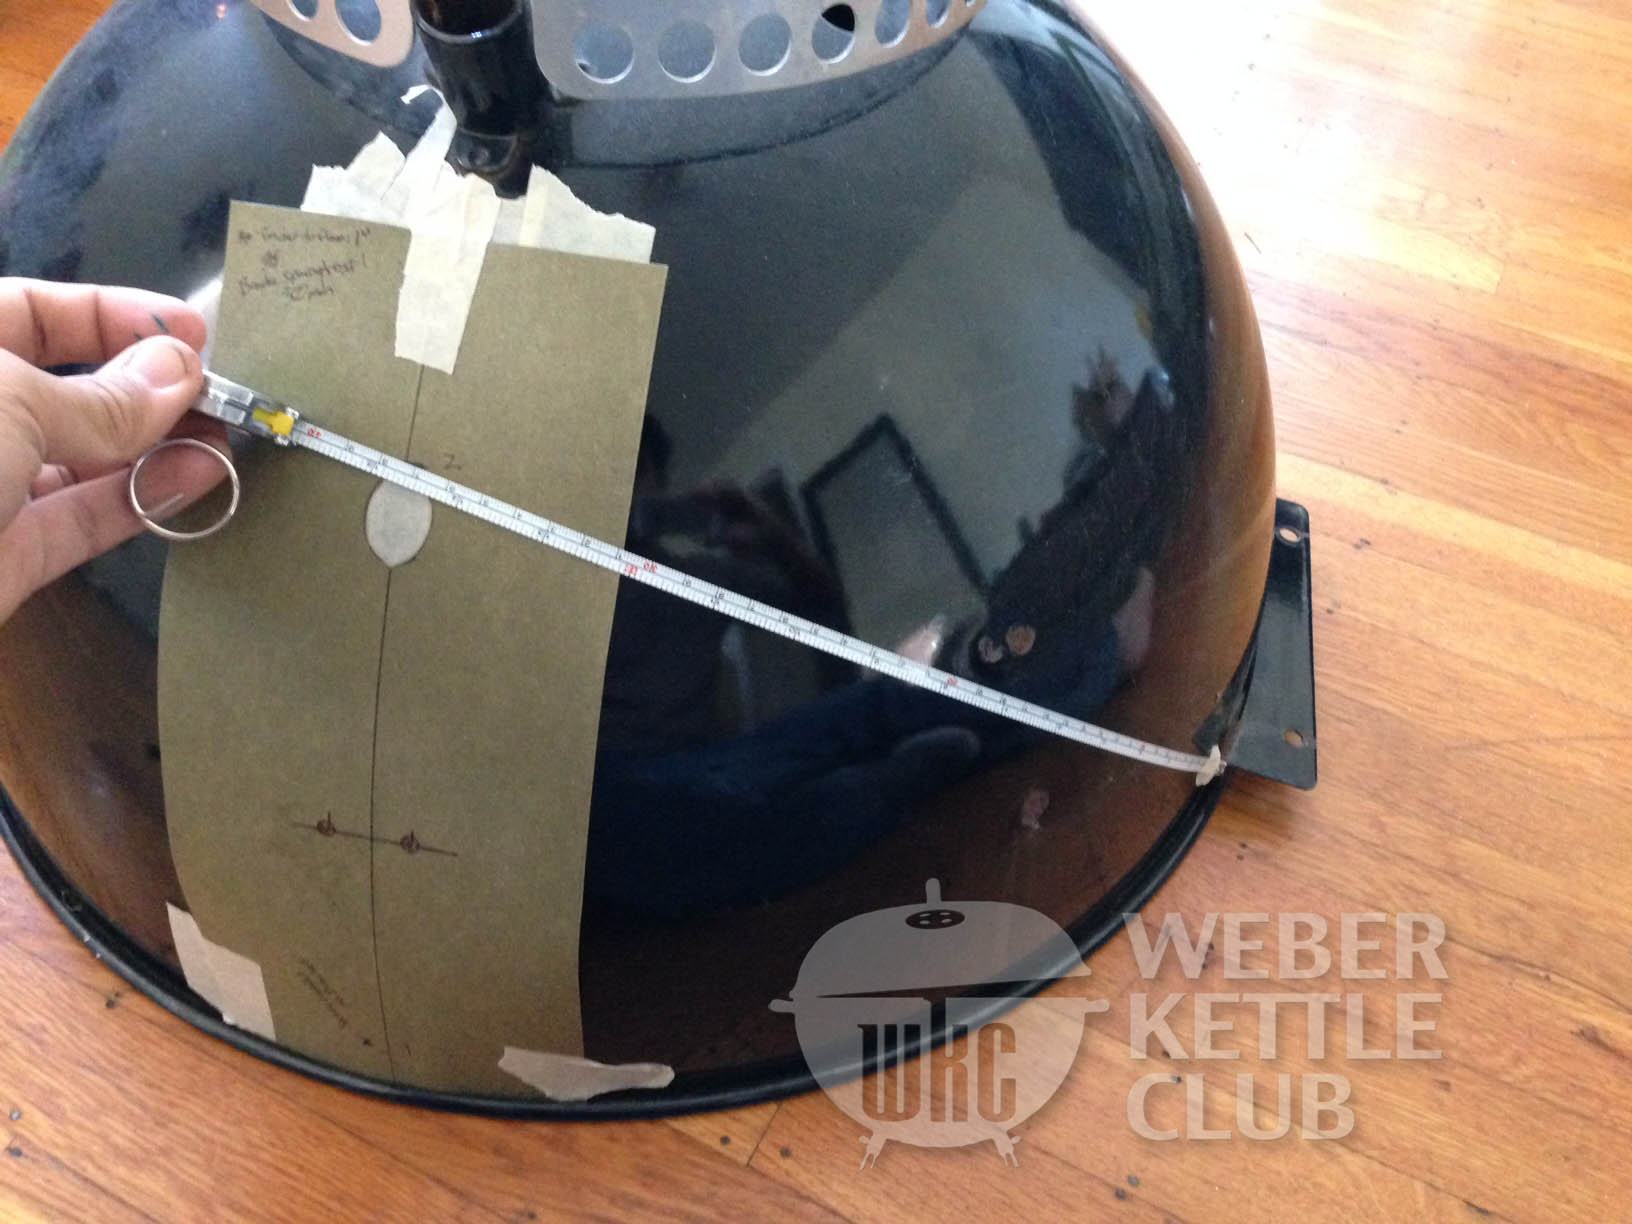
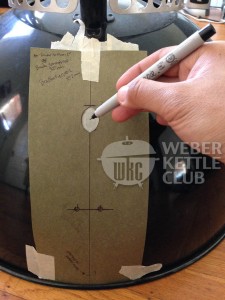
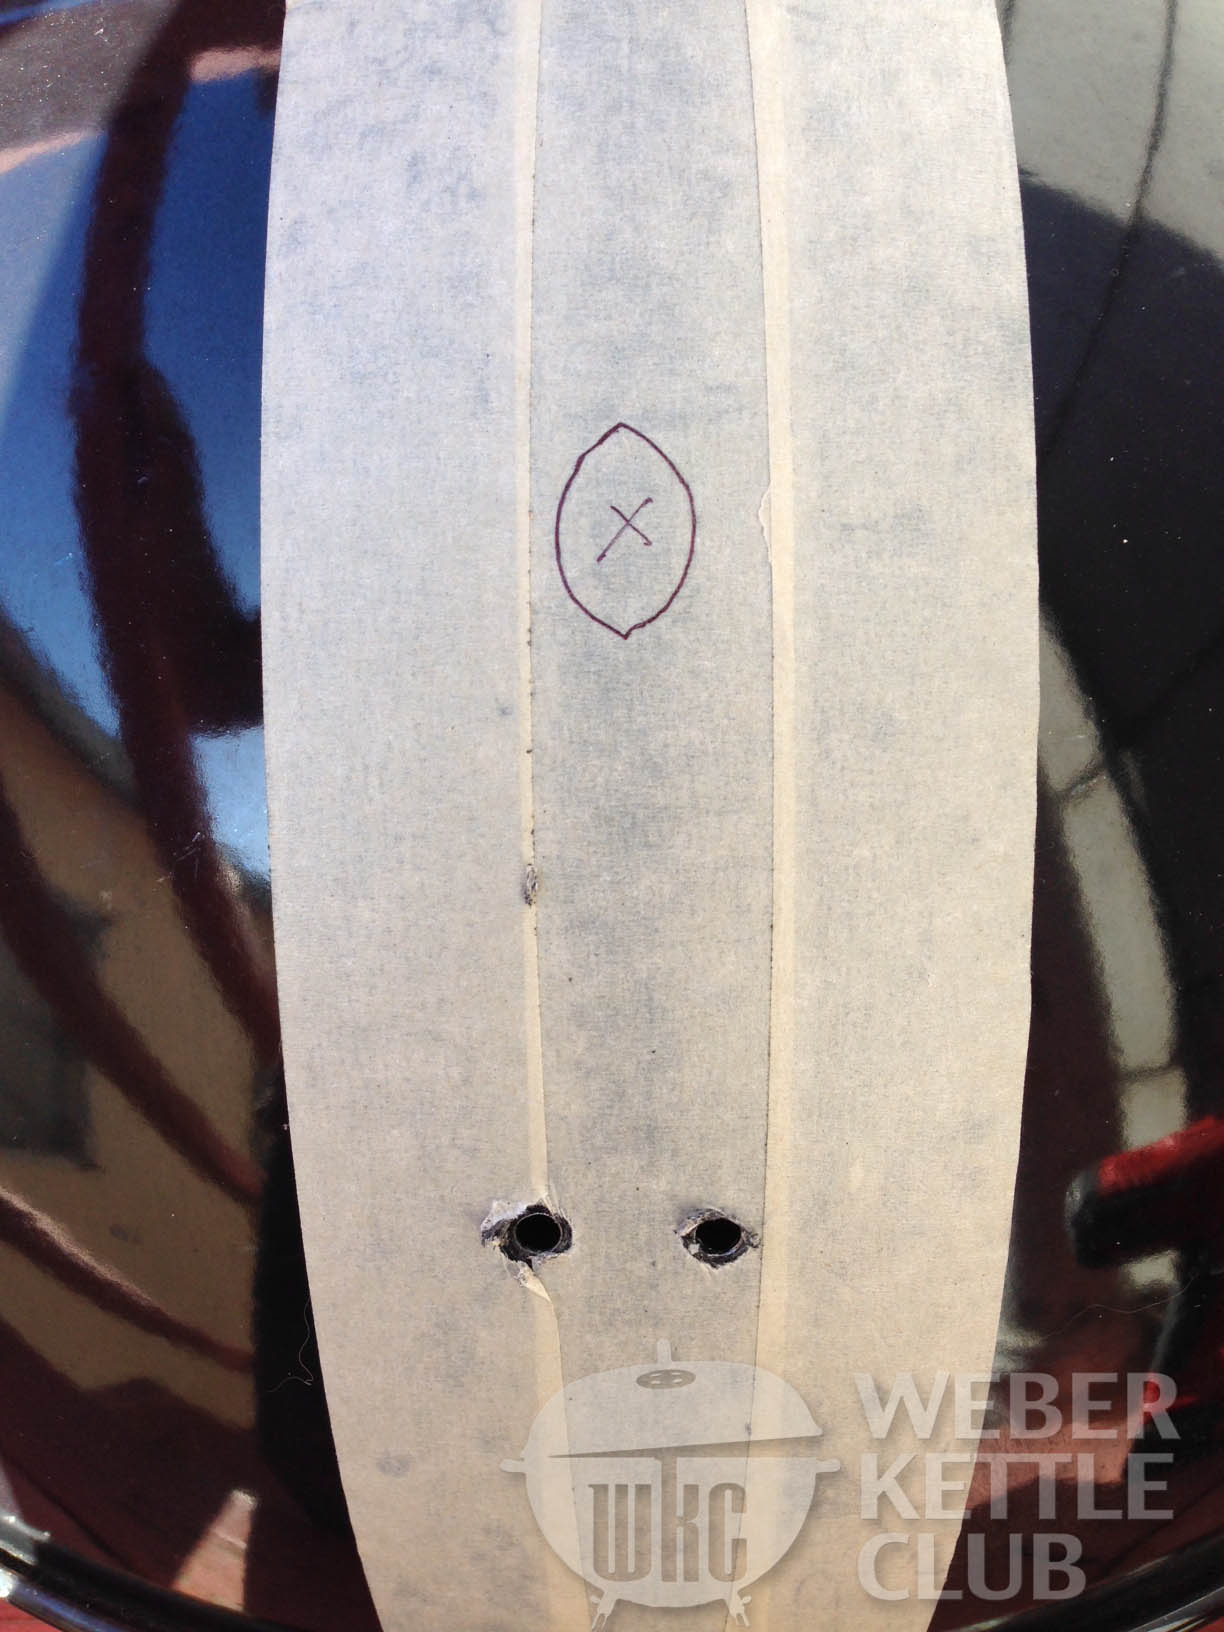
This is my template. Download yours here (Upload tbd). Print it out, cut it out and tape it to your kettle. Make sure to check the scale is correct by measuring the reference dimension. The hand traced one was kinda rough, so enjoy the cleaned up one I made for you. I cut out the burner hole with a utility knife. Instead of cutting out the mounting holes, I just marked their centers with a punch so it’s more precisely located for the transplant. The holes are 1″ spacing from the center.
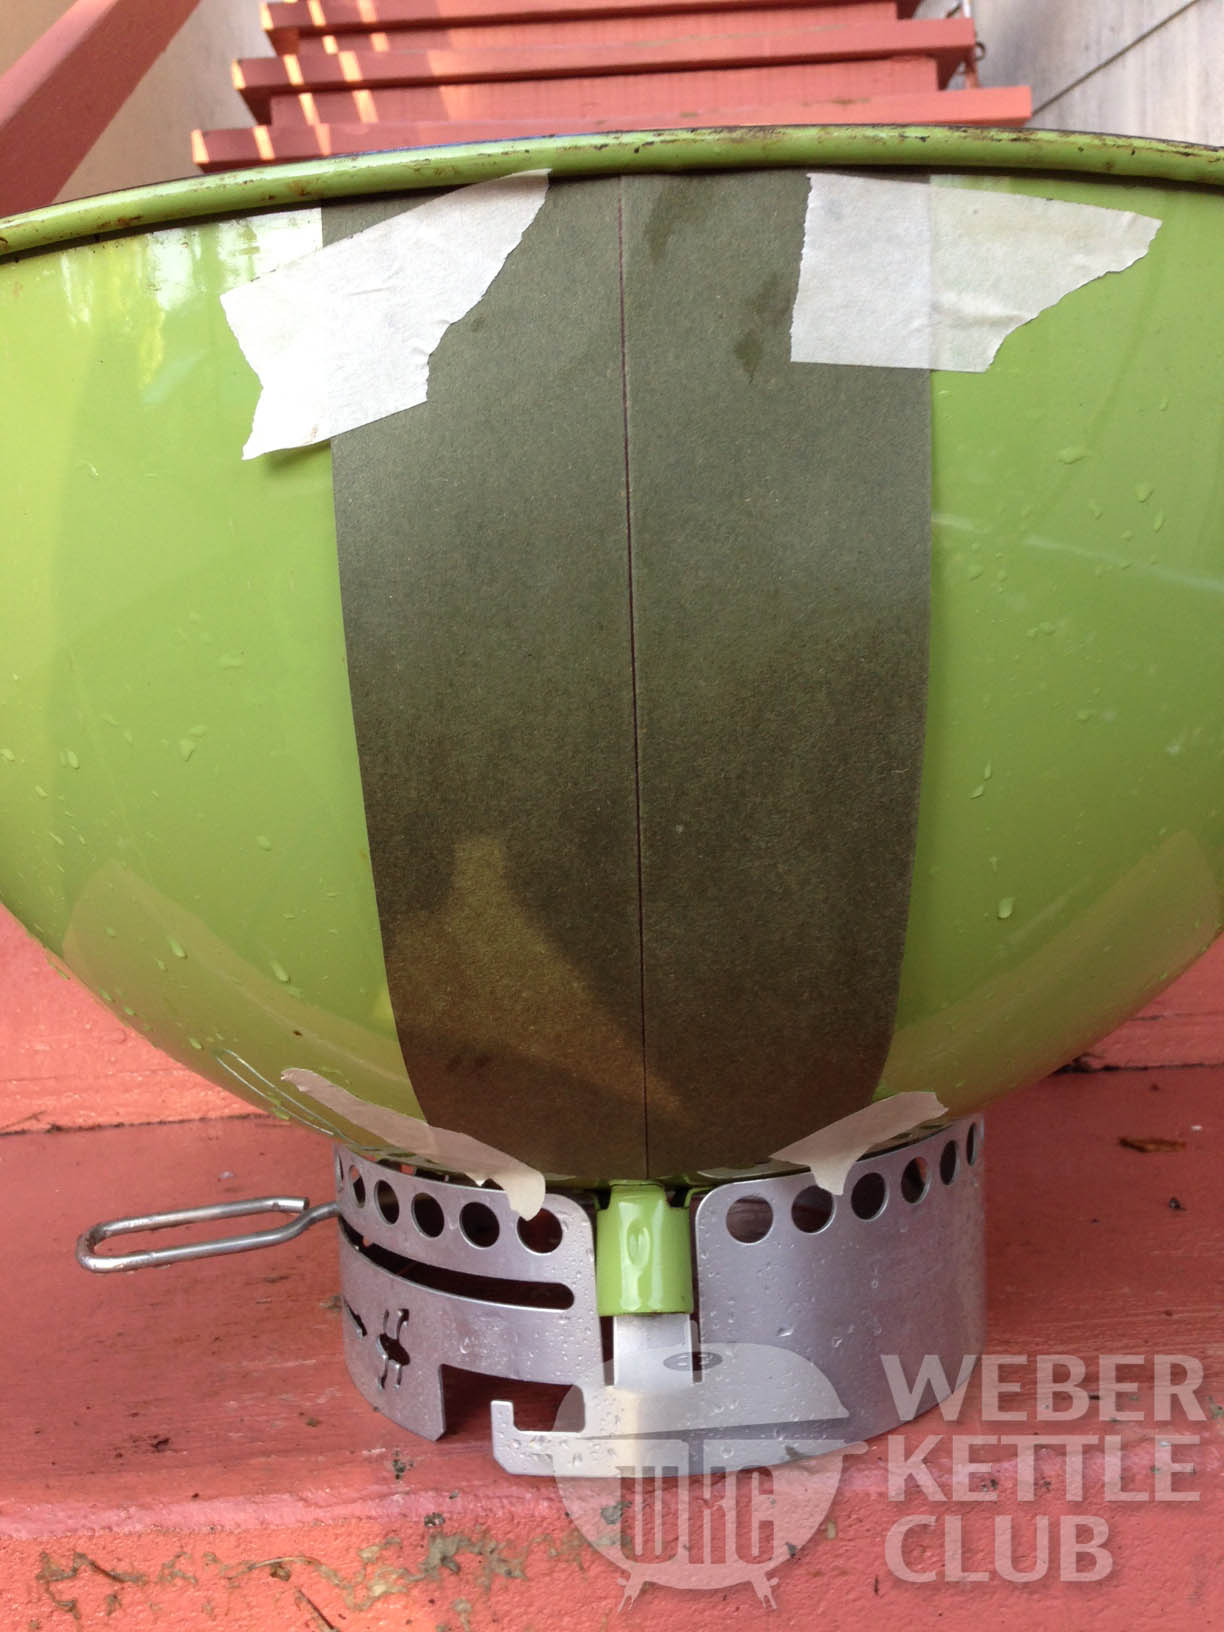
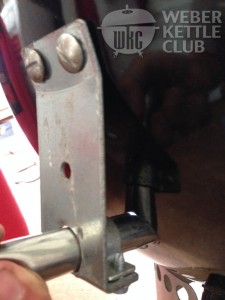
Now that the template is finished we can move on to the donor kettle. I taped up the region of install with masking tape. The tape makes a great marking surface and minimizes chipping when drilling and cutting.
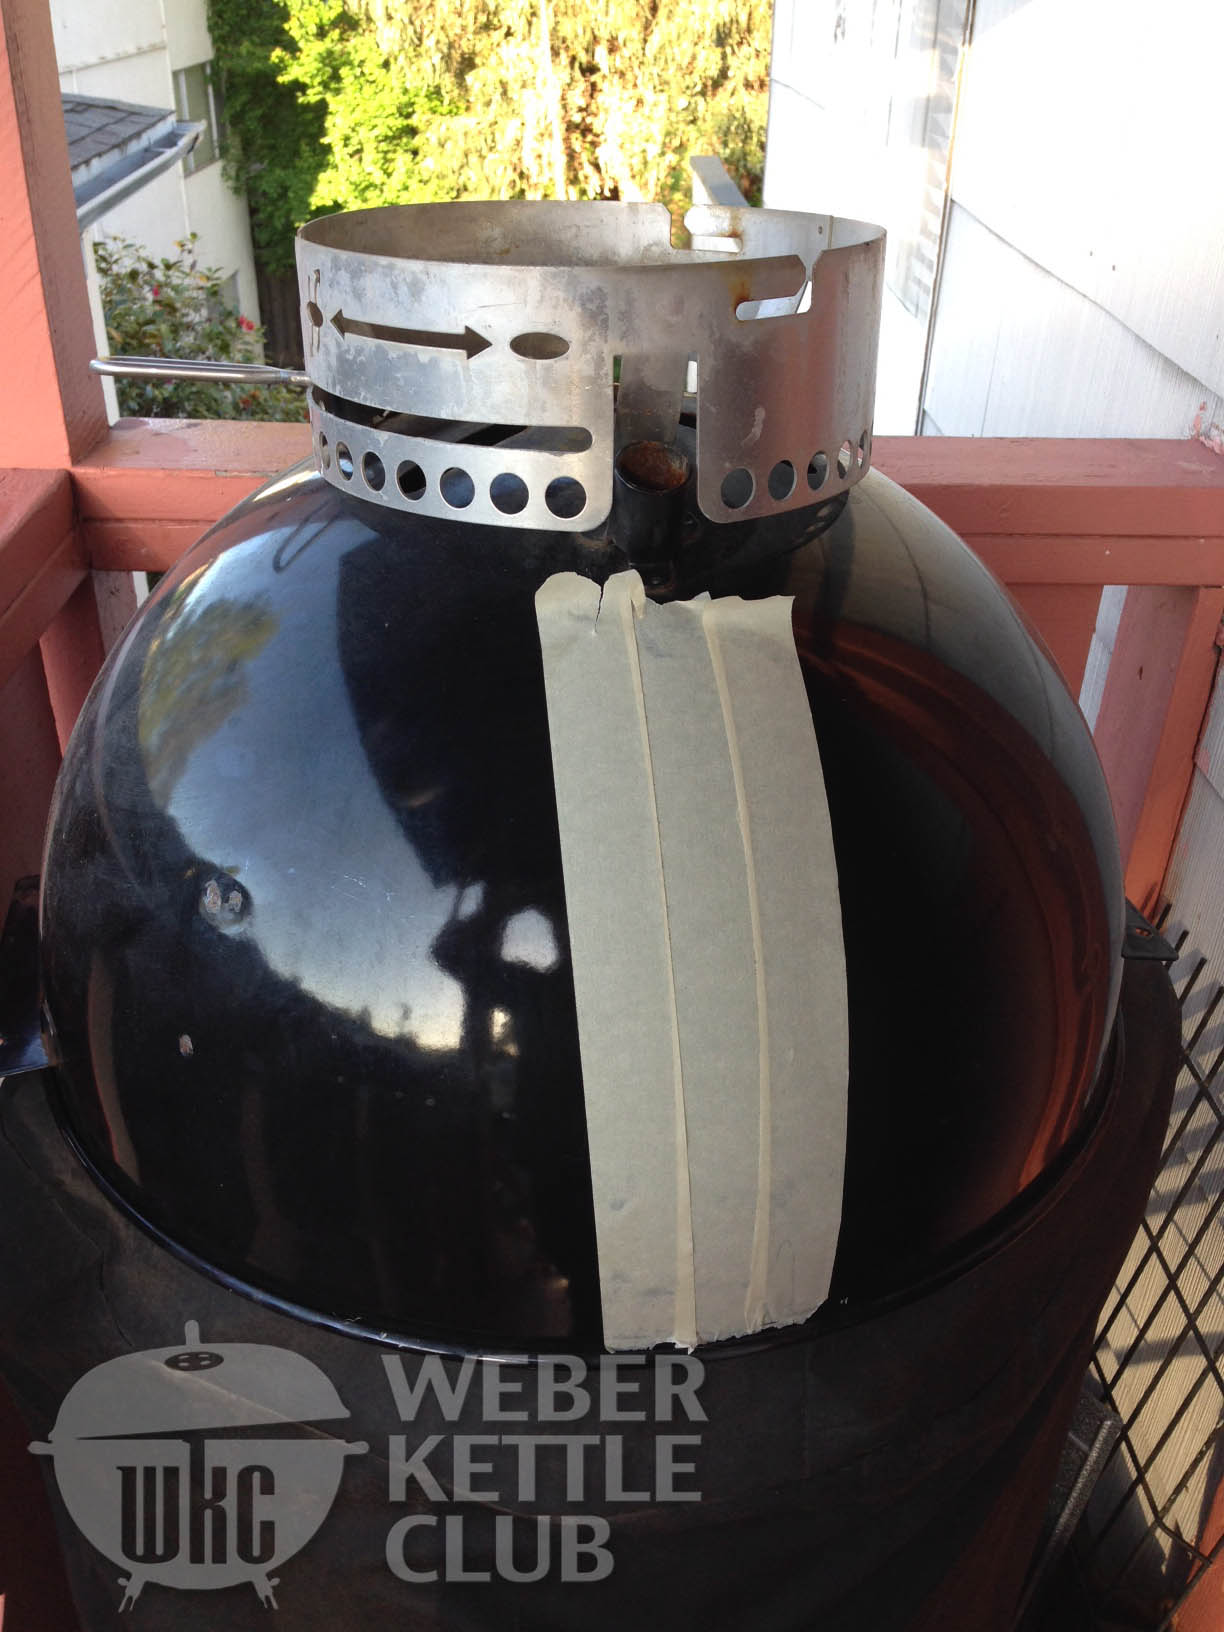
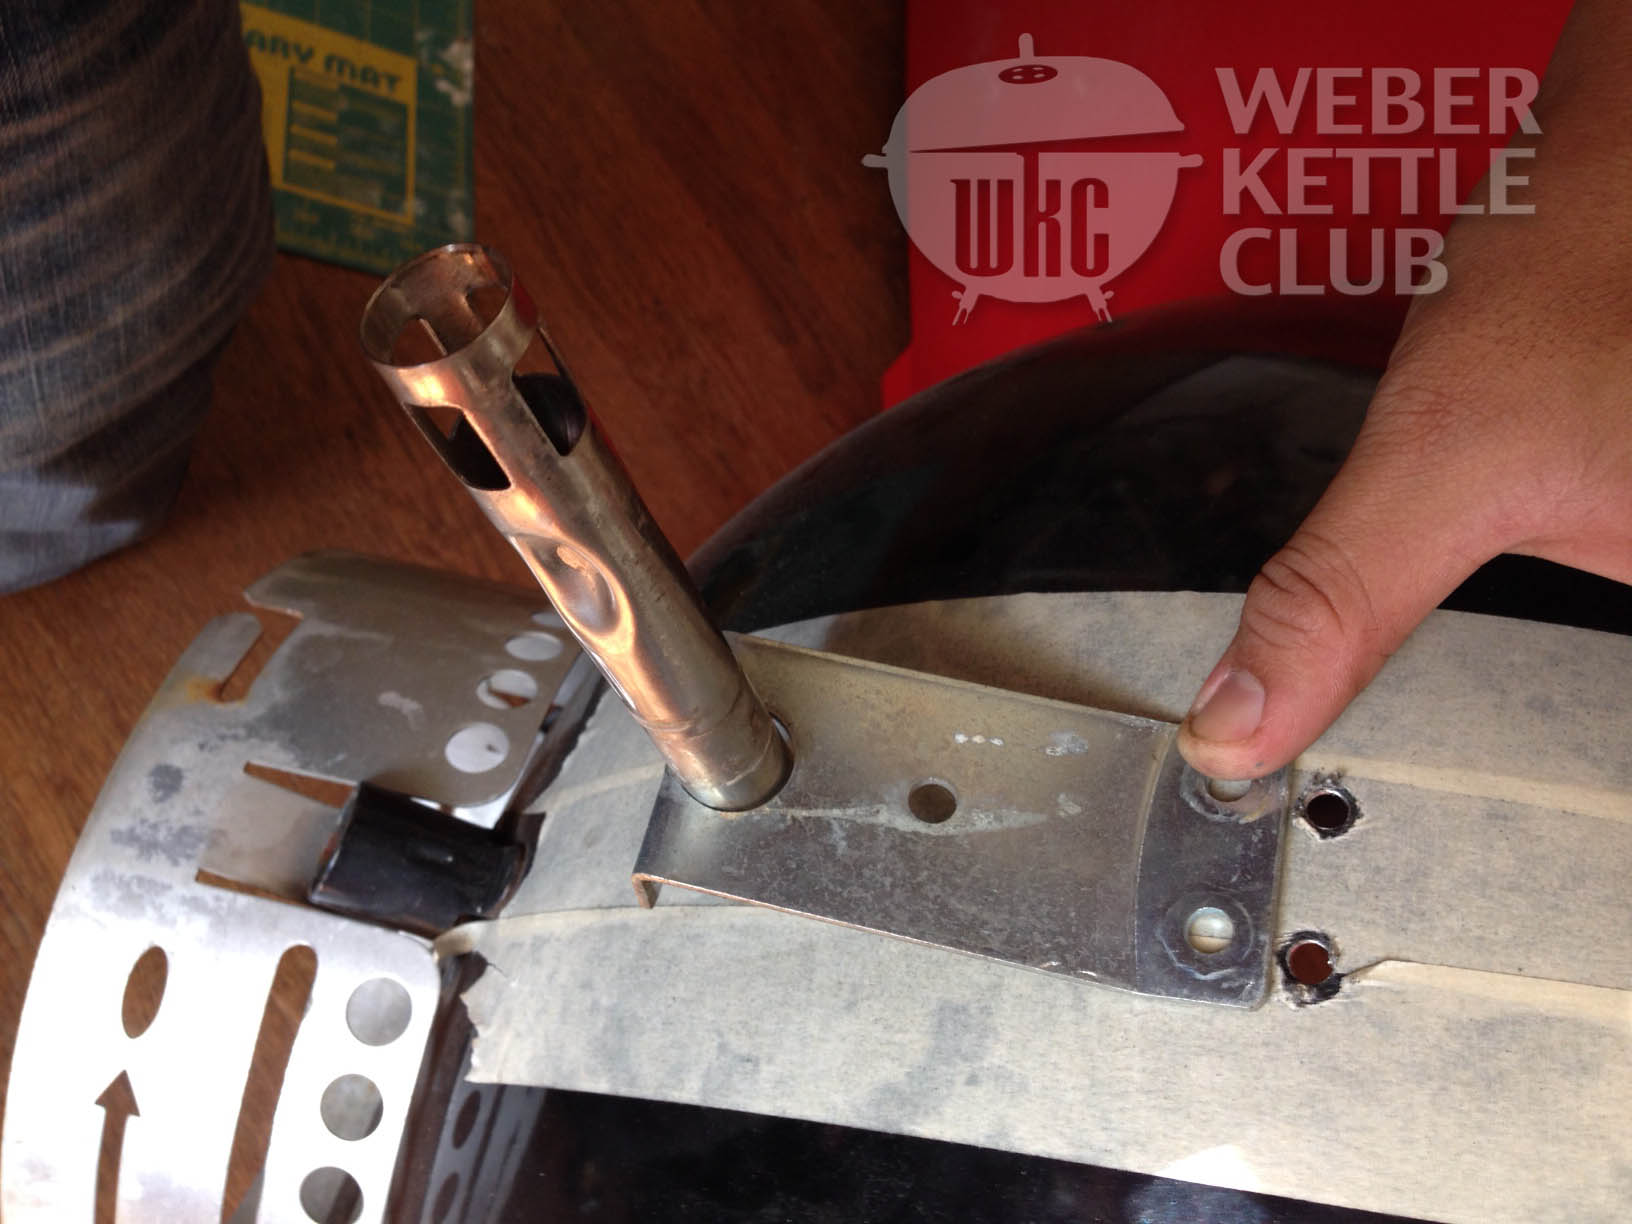
I aligned both ends of the template center line to the side bracket. I also made sure it was square to the kettle lip edge.
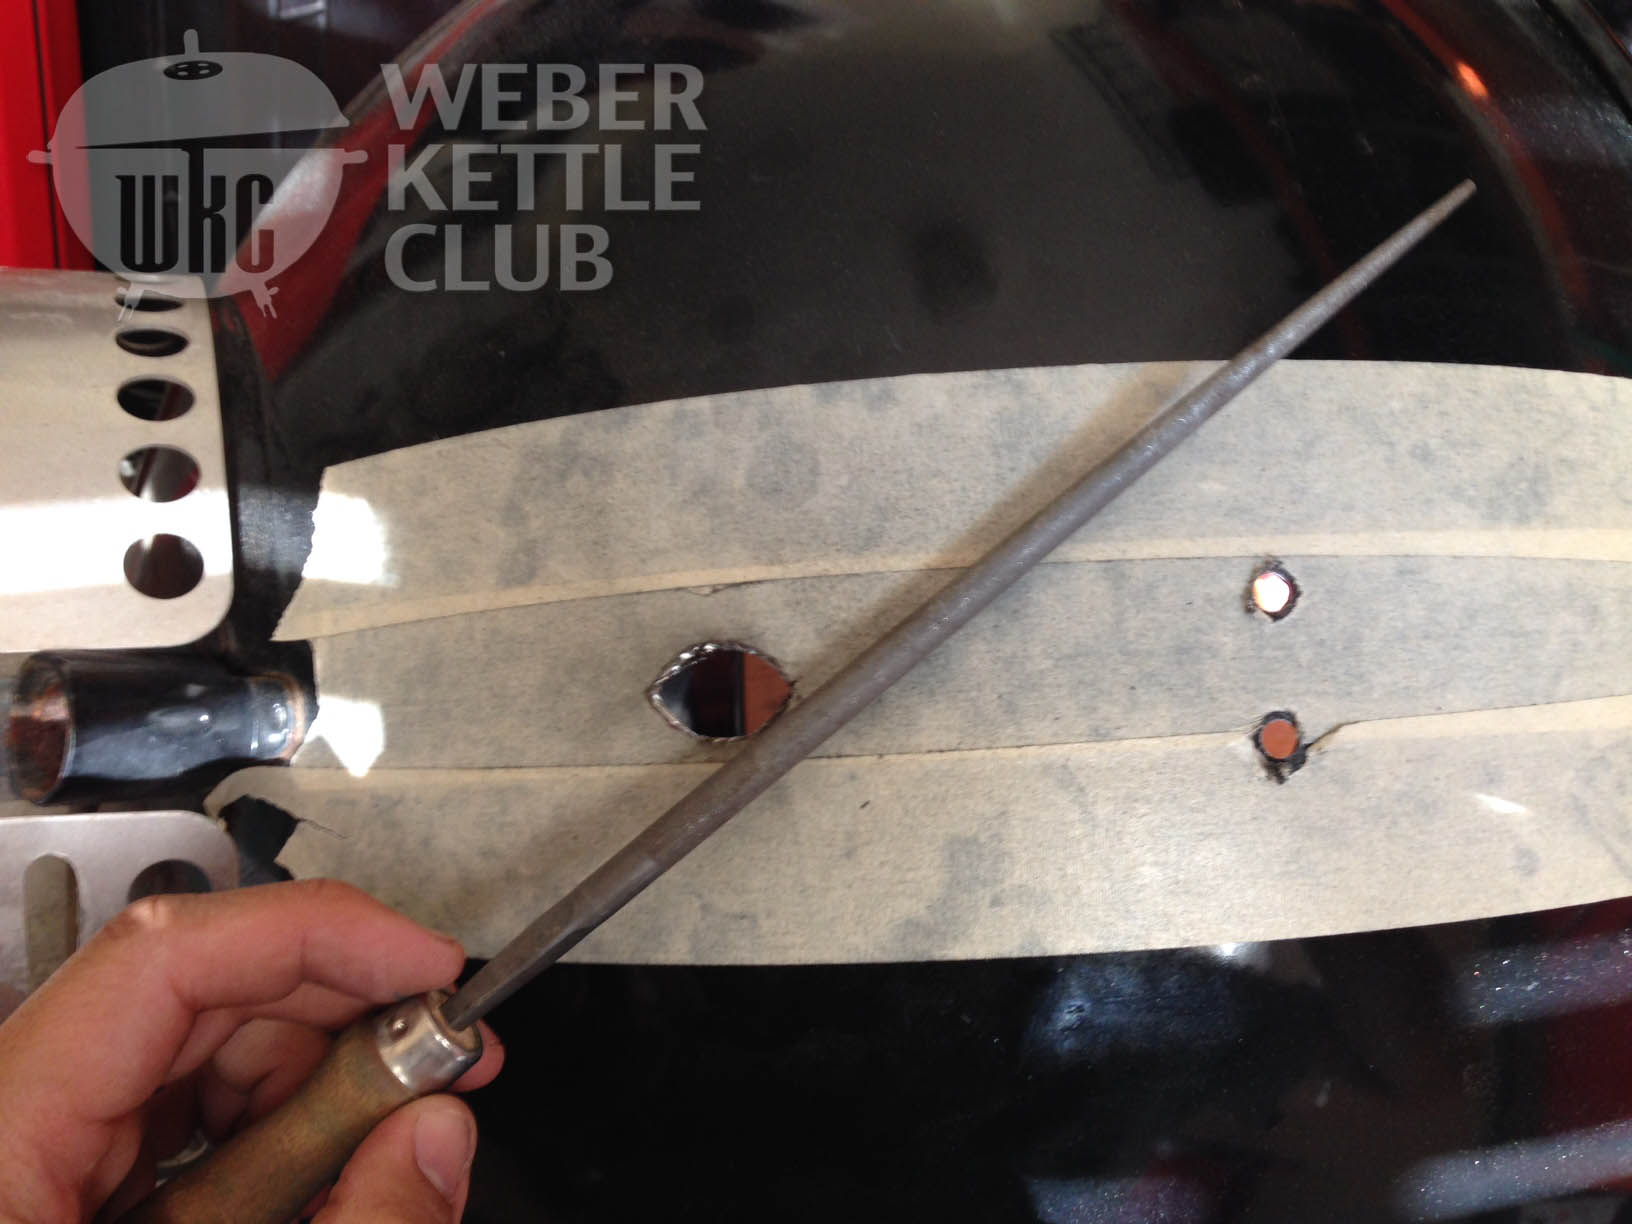
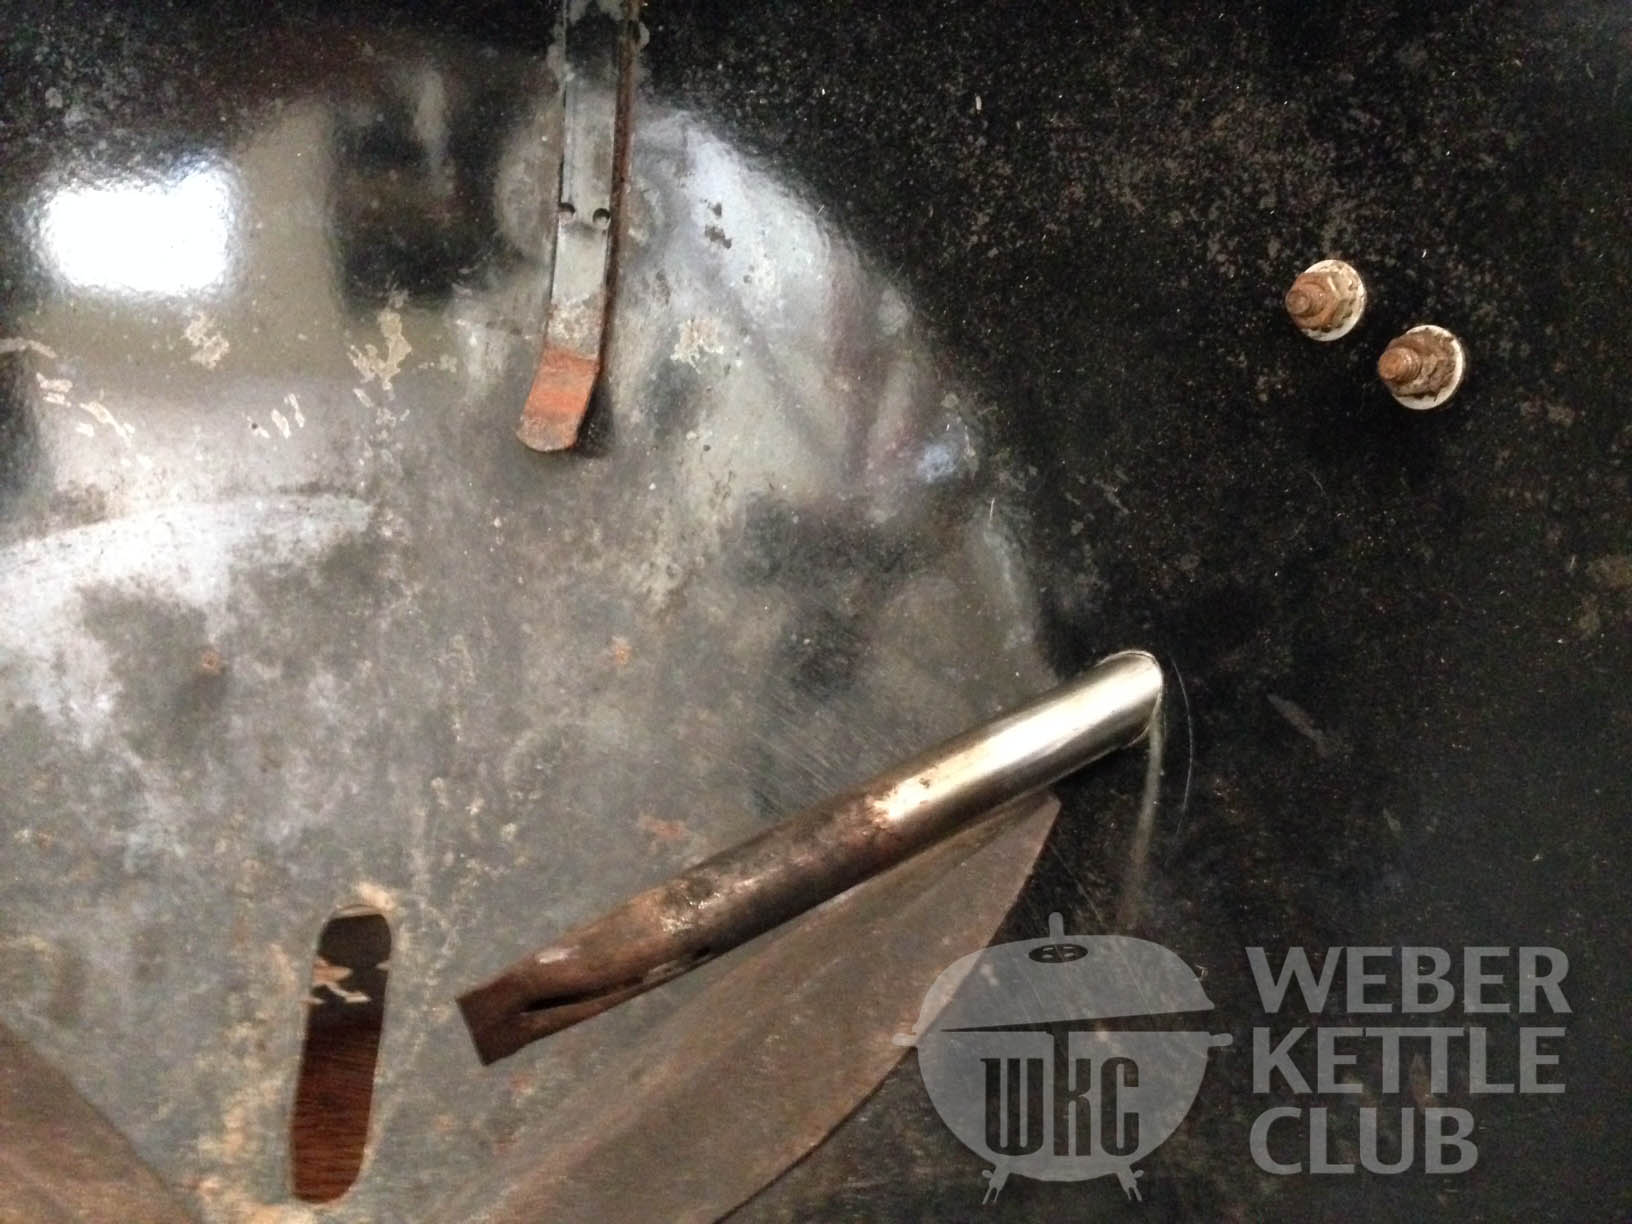
Mark your holes! I drilled the mounting holes already. DO NOT CENTER PUNCH THE MOUNTING HOLES. You will crack them. Just use a sharp drill bit. I usually start with a small pilot hole then redrill the full size hole.

Now use a dremel cutoff wheel or similar to cut the burner hole. The hole is actually pretty small so it’s better to use a smaller diameter (read: worn out) cutting wheel to get around the tight curves. Use eye protecting and a respirator!


Go slow! Your priority right now should be to get the burner through the hole region you marked first then start doing the fitting later. I cut the width of the burner hole first and stuck the tube in so that I’d be able to do test fitting on the major axis of the hole.

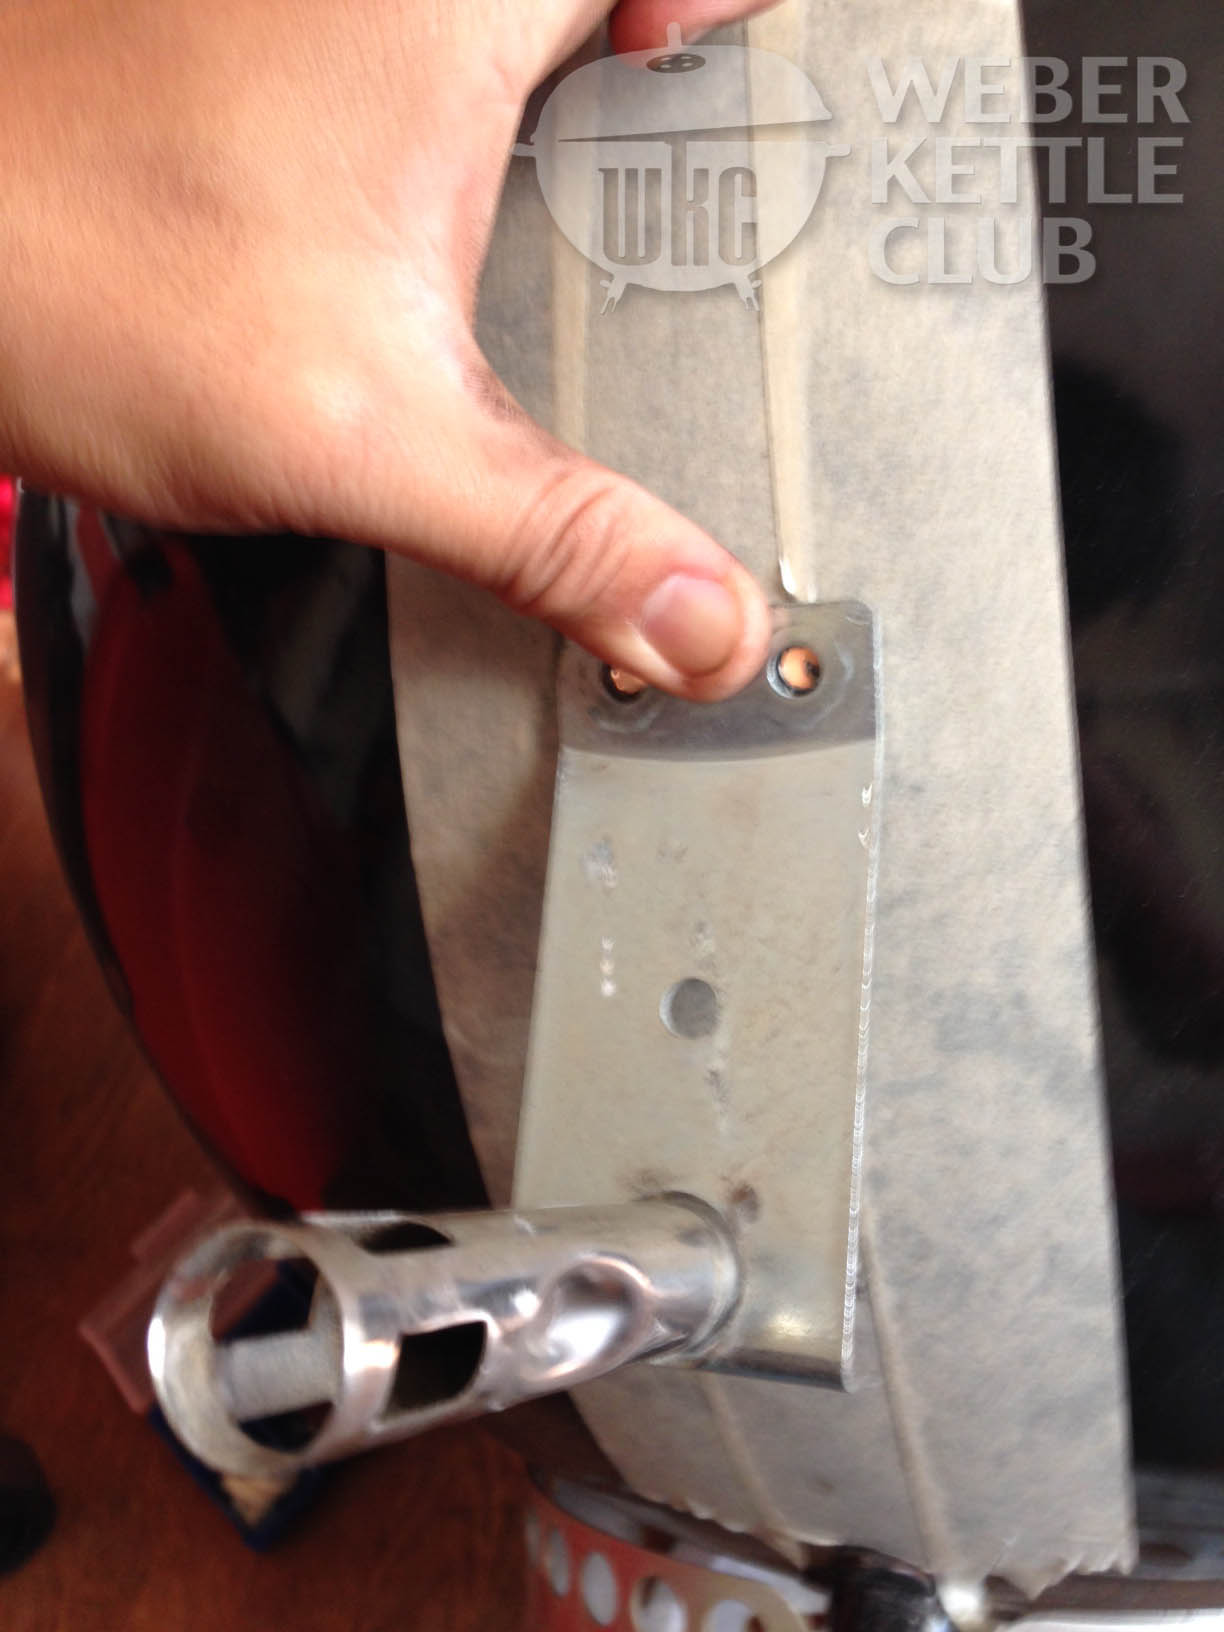
Do your test fits with the bracket. Once you start to get close it will be better to use abrasive tools like a sanding drum or circular file. Below, the bracket holes dont line up so we know that the major hole axis needs to be expanded.
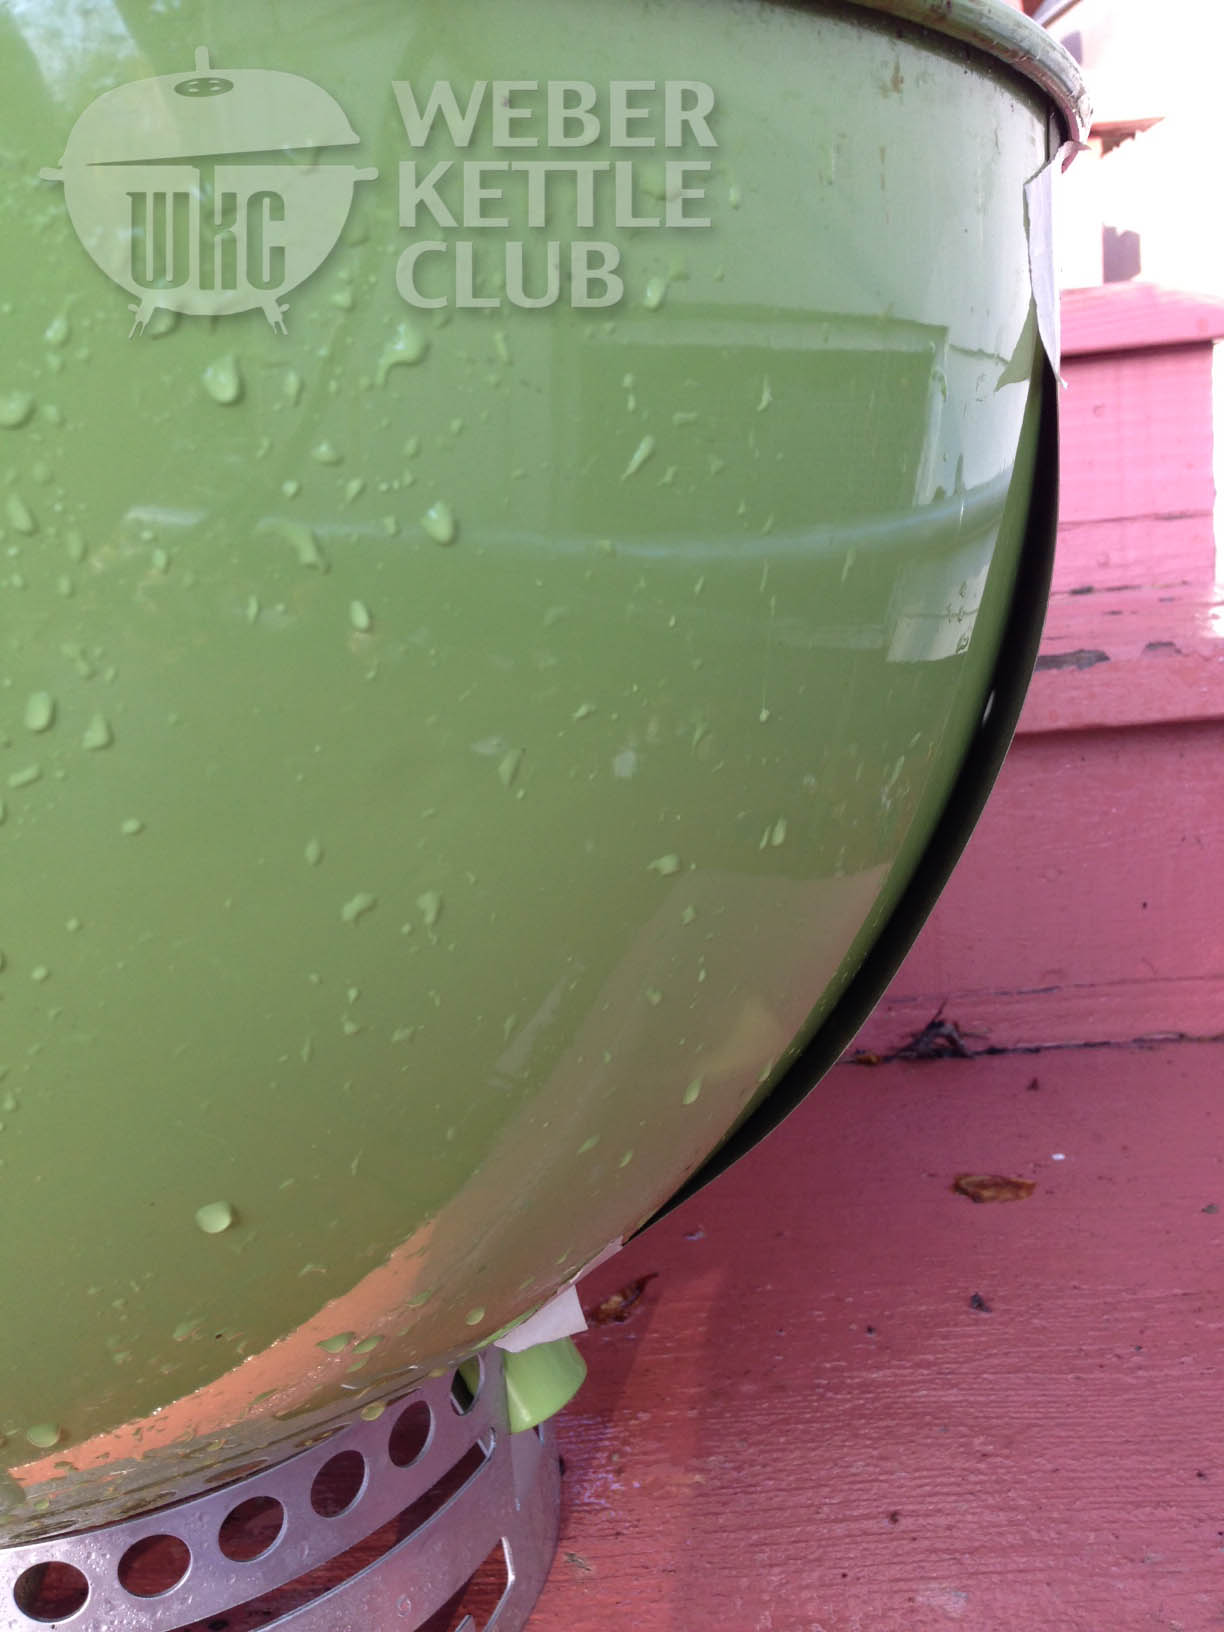
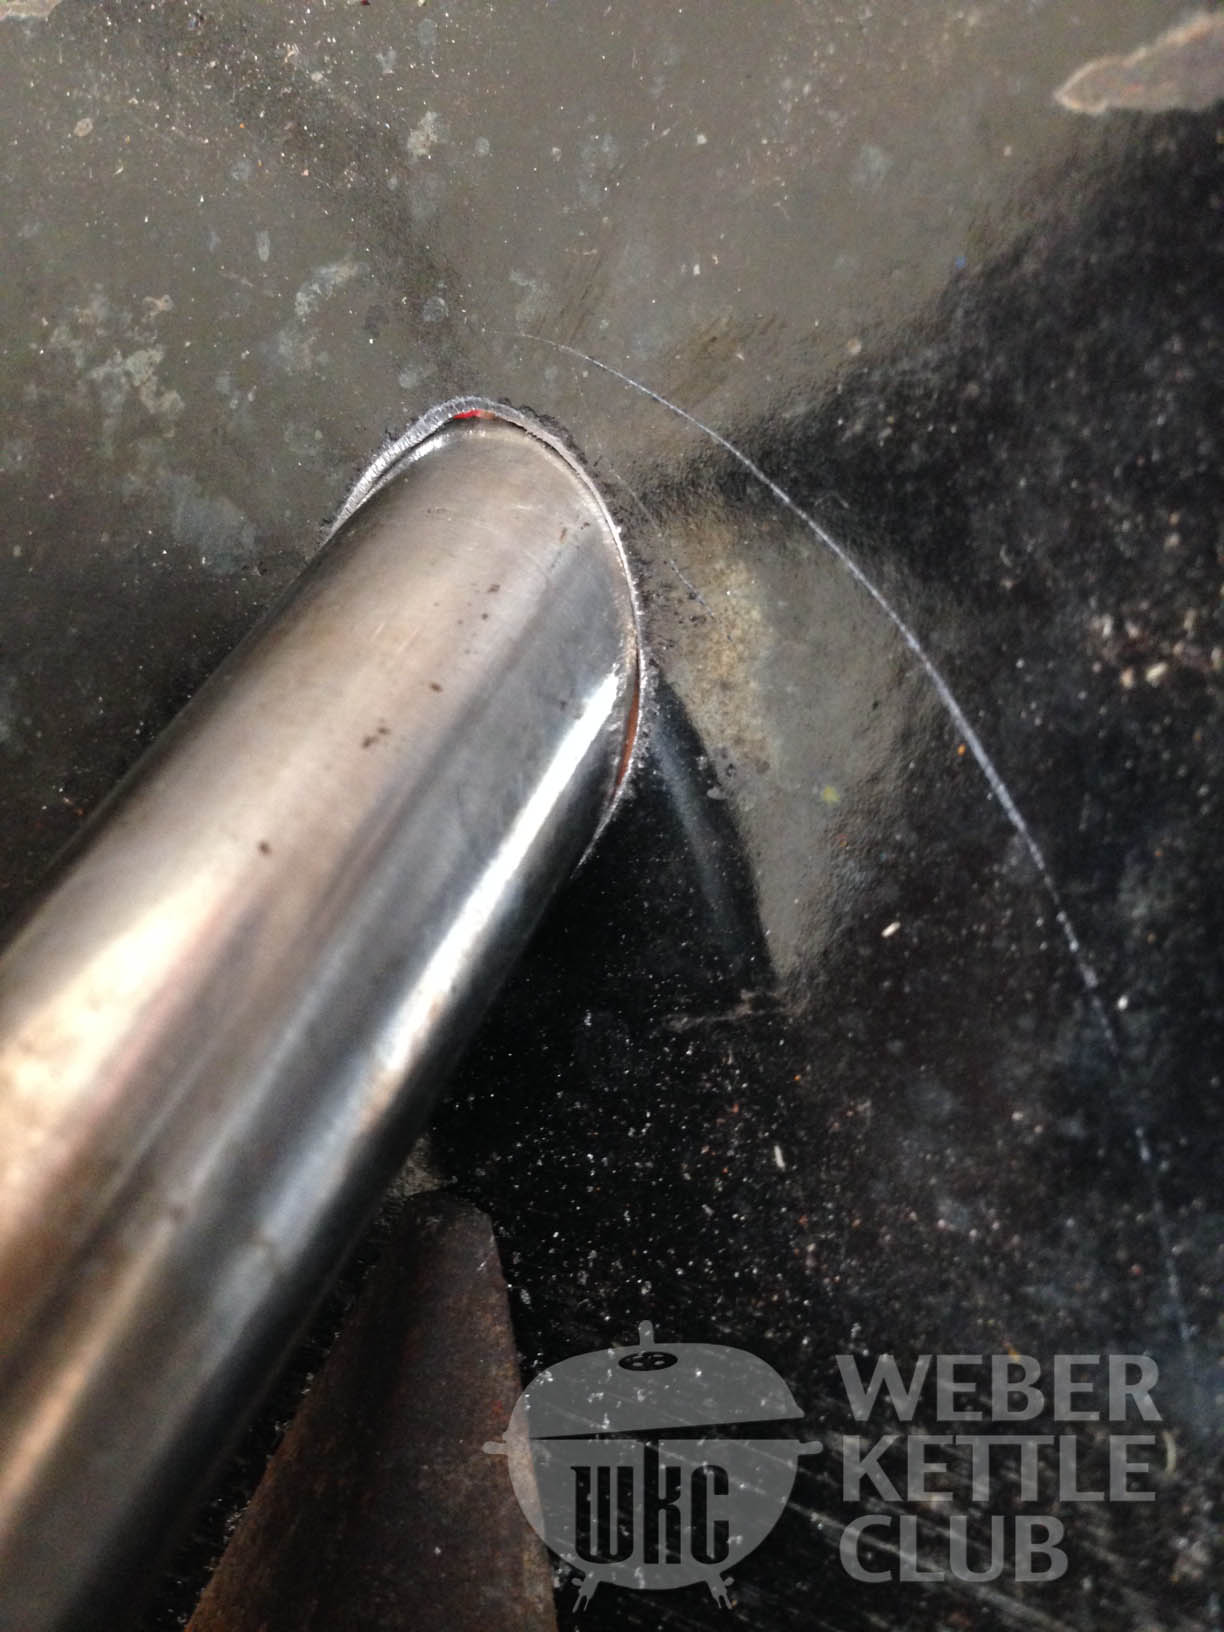
Your hole is still nice, smooth, and tight, right?
It fits! Now smooth out the edges and burrs and hope you have a tight fit. Mine fit just like oem and there was no issue with air leaking. The seal will get even better once the kettle gets gunked up.


could you send me a link to your template, or a pdf or something so I could do this mod, Thanks Steve
Hi Lawrence, Your blog post is extremely helpful. I want to do the same mod to my performer. Are you able to share your templacement?
Many thanks
Ron
Reading UK
Hey Lawrence,
Thanks for sharing! I just picked up a Weber Performer with no Touch and go. Could you send me the template please so I can make this a proper performer; please and thank you.
Lawrence, can you email me the template
I would also like to attempt this mod. Do you have a template file available, or if not, additional dims. so I can draft my own. Regards, Rob (really nice post BTW)!
Just figured I’d go ahead and do it since a template wasn’t available. Took measurements from a friend’s gas assist equipped grill and a bunch of photos. I transferred the measurements to my grill using a laser level and several bubble levels and a plumb bob, gritted my teeth and went slow and steady. The parts that I ordered installed perfectly and the gas assist works like a champ!
Excellent instructions. Will you share the template or am I on my own ??
AwesomePlease send me your template.
Thanks!!!
Hi Lawrence,
I wonder if you could email me a template?
thanks,
Paul
Great work. This is an awesome reference for a noOb like me. Can you share your template please?
Hey, nice guide!
Please share your template.
Regards,
Rob
Hi Lawrence,
Awesome job. I recently picked up a Stainless Performer and want to change out the bowl. The new bowl isn’t made for gas assist. Can you email me a copy of the template to do this? I’d really appreciate it.
Thanks