Ive been wanting a WSM for sometime now but didn't want to spend $300-400 on it.
I saw the kits sold by Smoke-ez, cajun bandit, etc...to convert the 22 kettle into a smoker when needed, but figured "what if build my own"?
I had previously seen mods using 120 qt stock pots, 50 gal drums, etc to use with the 22. but it seemed expensive, still.
Then I researched on the web and found that guys had built mini smokers using the SJ and the JJ with mod'd stock pots. When I researched how much the stock pots cost, they were much cheaper than the 120 qt ones, the smoke-ez or cj. Since I already had a JJ (with wooden pieces by
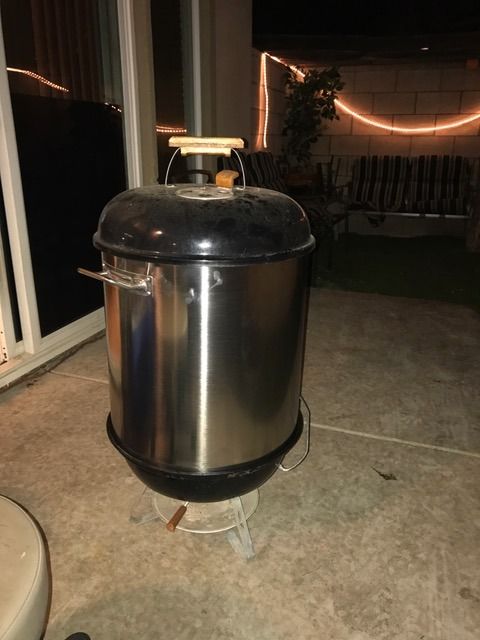
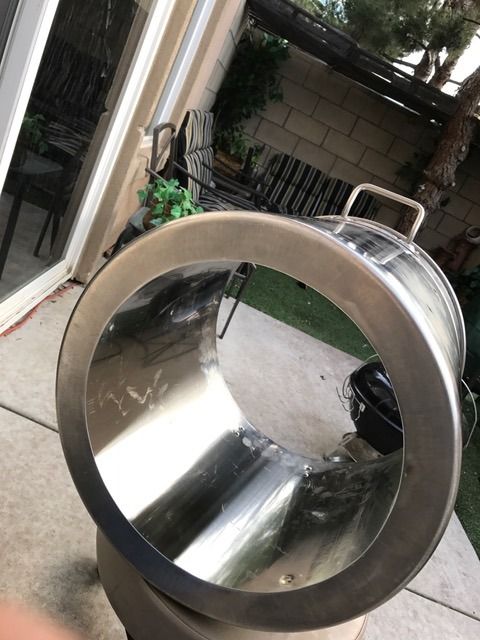
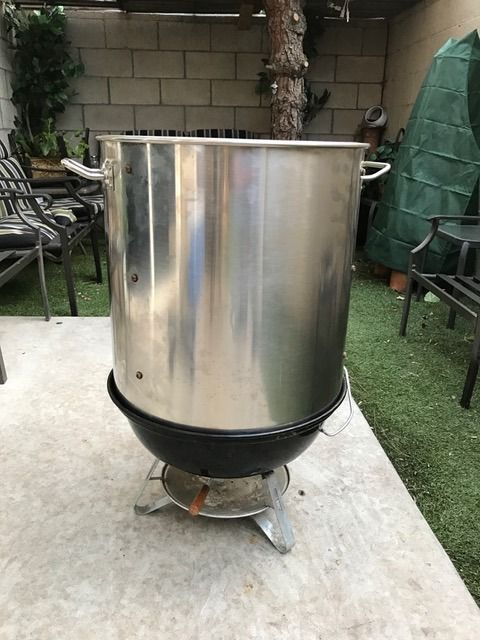
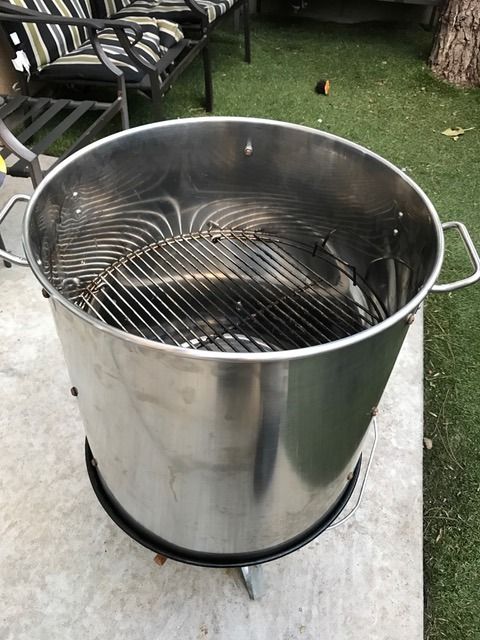
@zavod44), i decided to build my own Smoker with a 80 qt pot, which turns out it fit the grill perfectly at both the bowl and lid.
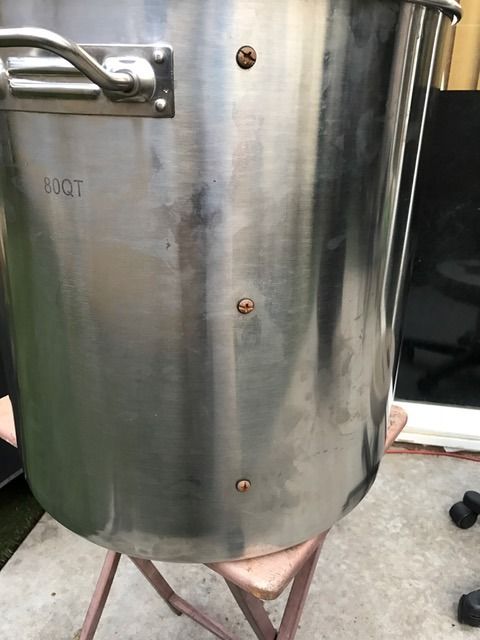
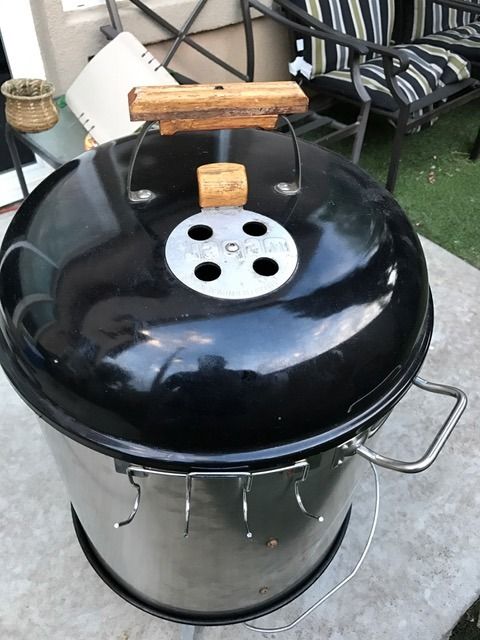
this is pre mods, with the pot in original condition. Fits perfect!!!
After researching, this is what I found I would need-
-JJ (already had)
- 80 qt SS (or aluminum) stock pot, Bought on ebay
- 9 of each of the below (together, they will become the grate supports and diffuser/ water pan supports)
-3/4 #20 1/4 in button head phillips bolts
- 1/4 in lock washers
- 1/4 in fiber washers
- 1/4 in nuts
- Expanded sheet metal (honey comb) to make the charcoal basket
- Rebar tie wire (to tie expanded metal to charcoal grate)
- 1 Extra (maybe 2) 18 in cooking grates
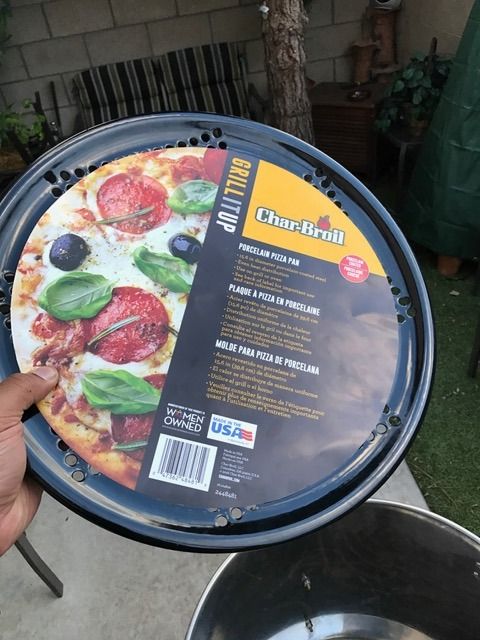
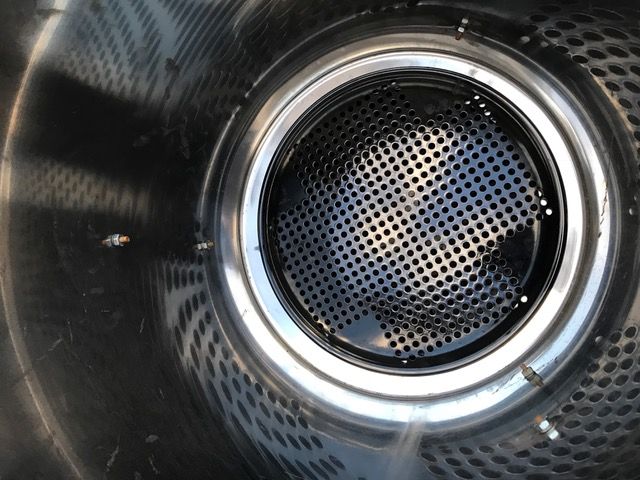
- Pizza pan (perforated or not)
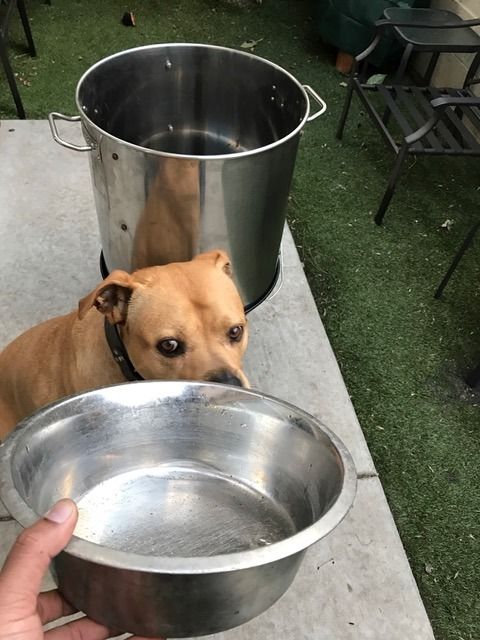
- Water pan
This project was made possible by allot of fellow Weber enthusiasts all over the web and other forums, but especially this guy (
https://www.youtube.com/channel/UCmyB6D47WXY_wU_LEBQ5e7Q) on youtube who made a step by step video on how to do this project. I screen shot some of his video to show some steps since i failed to document some of them....here we go.
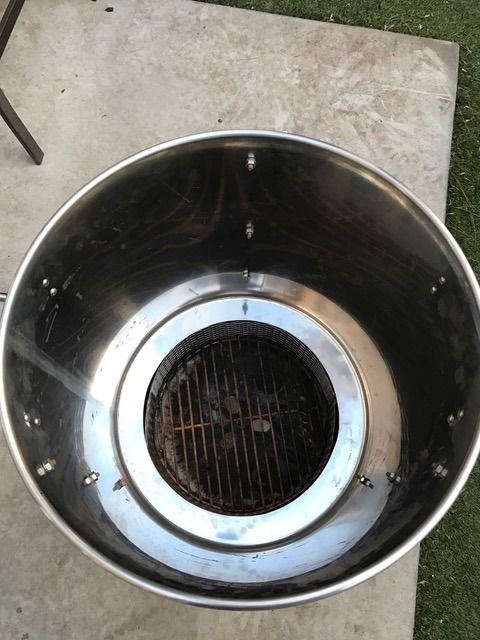
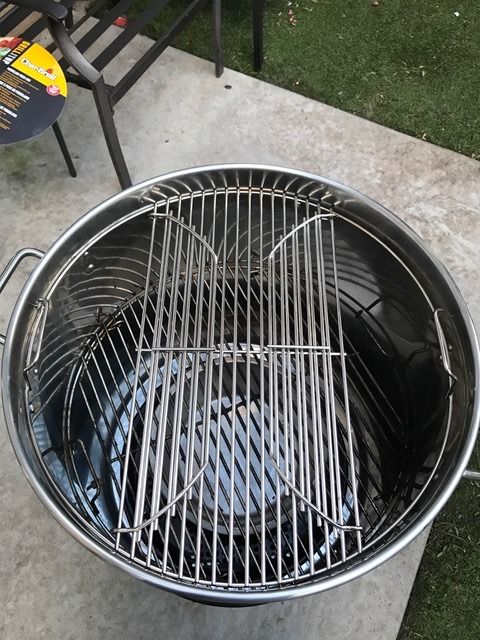
First i decided the grate would only need 3 supports, so i divided the pot top into thirds (by eyeballing it).
Once I had them pretty even, I used those points around the pot as the locations for my grate supports.
Then I needed to measure where i would want the grates to sit. The top grate, i decided to have it sit 1.5 in from the top, the second grate 7.5 in from the top, and the diffuser/ water pan, 14 in from the top. After marking them with a marker and punch it was time to begin to drill the holes out.
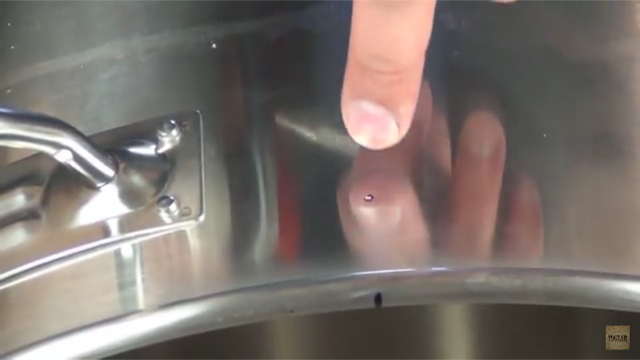
This was one of the tough parts. Had to to use two 1/4 in drill bits that were made for hard metal. After 3 hours, I successfully drilled all 9 holes, 3 at each level!!!! Using persistence, patience, WD40, Blues radio on pandora and a beer (OK more than 1) the holes were done.
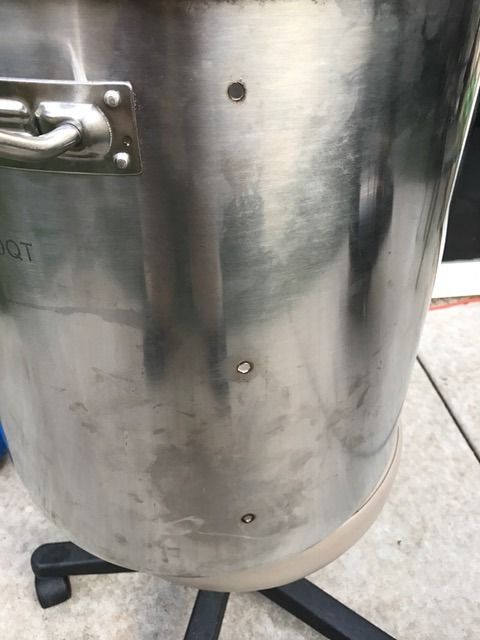
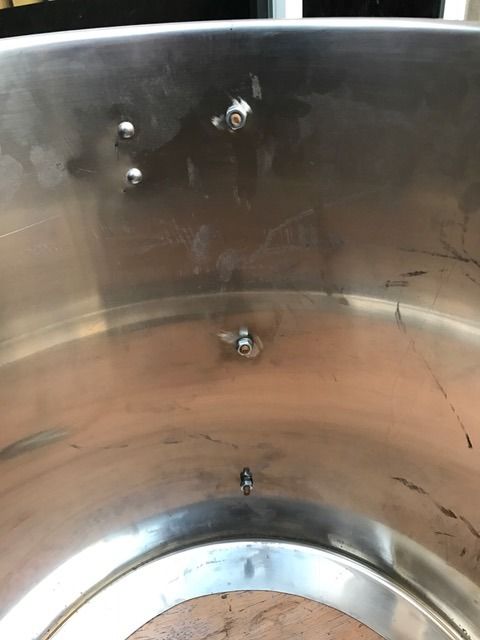
Then, I installed the grate supports (bolt hardware)at each level
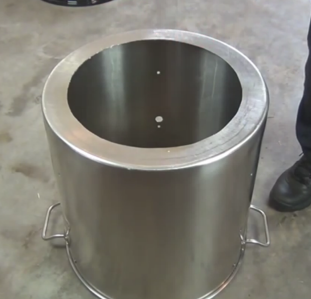
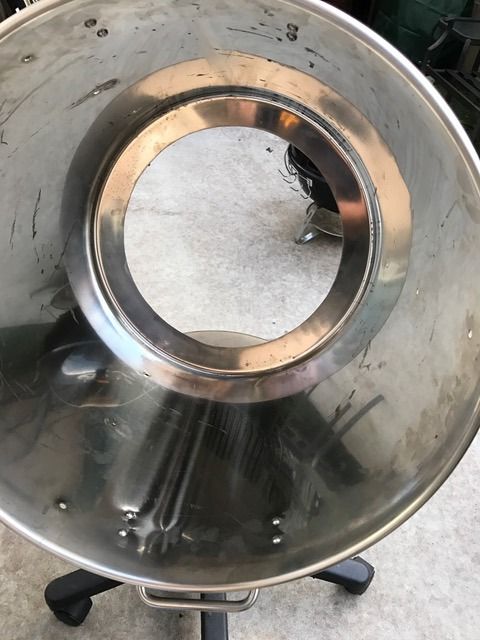
Now I had to cut out the bottom of the pot to allow the smoke to enter the chamber during cooks. Some guys drill holes all around the bottom, but i decided to cut the bottom out. I centered the charcoal grate to the underside of the pot and traced the outline with a marker. I decided to do this bc i didn't want to compromise the pots structure and rigidity if i cut out the entire bottom, plus the left over metal can work to diffuse heat.
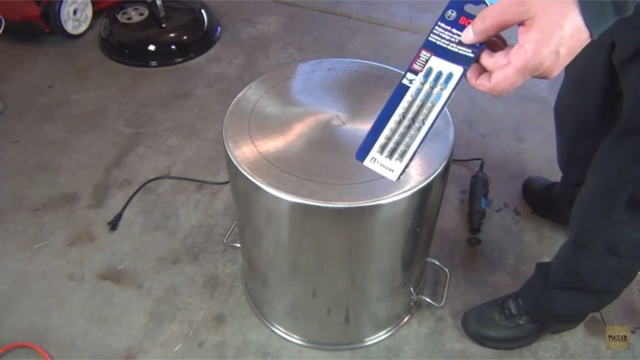
You can use a jigsaw with metal cutting blades, using an angle grinder or dremmel to cut the pilot hole to allow the jigsaw access. Many say this is hard because its gonna be loud, tough and difficult to saw all the way around without having the piece vibrate once you're getting to the end. But it'll get done. Having spent 3 hours just drilling holes, I cheated and took the pot to a local metal-works shop to have the hole cut.
While the pot was at the shop for 1 day having the hole cut, I was at home making the charcoal basket.
I had already measured the height that it needed to be in order for it to allow the pot to sit flush on the bowl, which turned out to be 3.5 in. so i made my markings on the sheet
Now I had to cut the expanded metal to the length and width i needed.
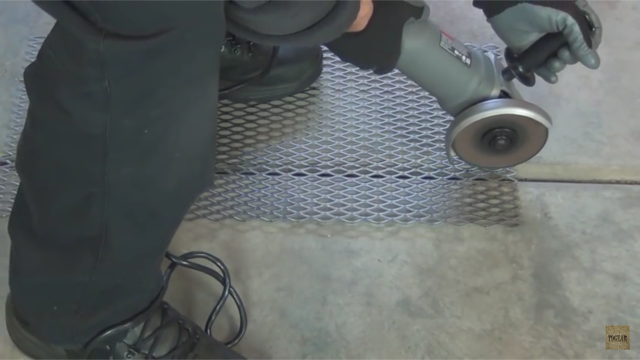
A dremmel or angle grinder can be used, but I used my jigsaw, which cut quickly.
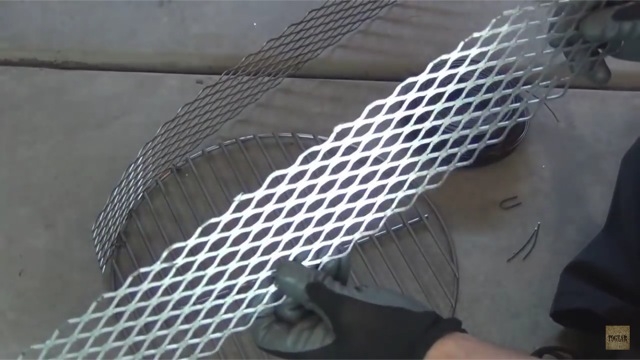
Once the pieces were ready, I began to wrap it around the charcoal grate, tying it to the expanded metal as i went around using rebar wire. I made sure to have the factory smooth side up and the rougher side down.


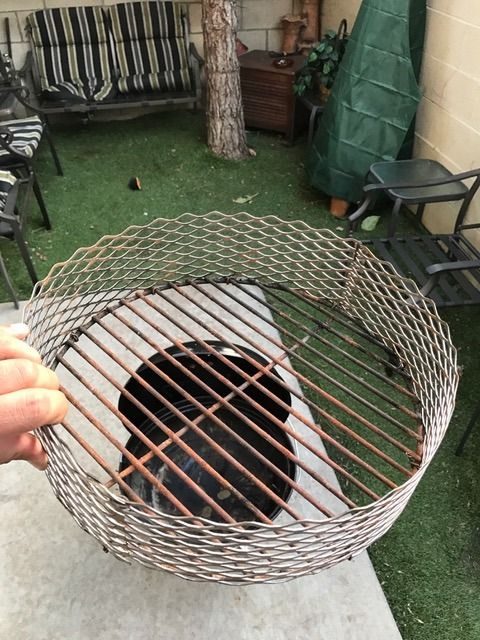

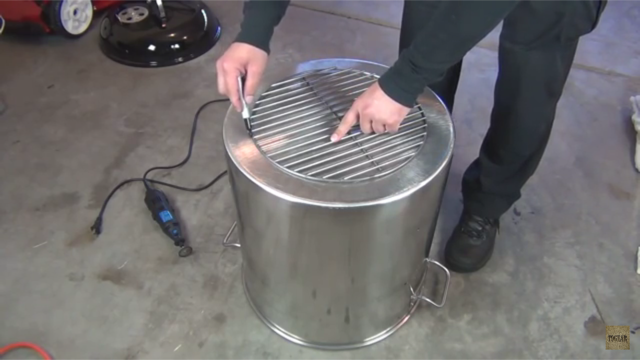
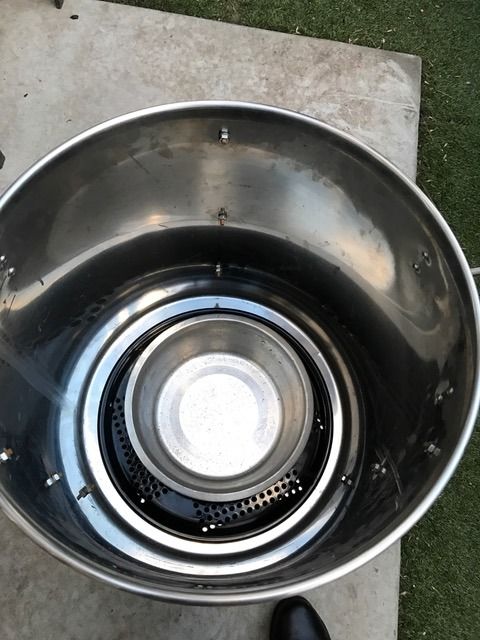
Now, time to put it AAAAAALLLLL together. Here you can see the hole is the same diameter as the basket I made.
Pizza pan in place
Temporary Water pan in place. Its my dogs water bowl and needed something for the pic so i borrowed it. You can see hes wondering what im doing with it.
The distance i allowed bw each grate is enough for a turkey size cook on each level. If i want to water smoke, I can use the water bowl at the bottom level. if i don't, I can use the bottom level for a third grate instead and cook more food.
bottom grate
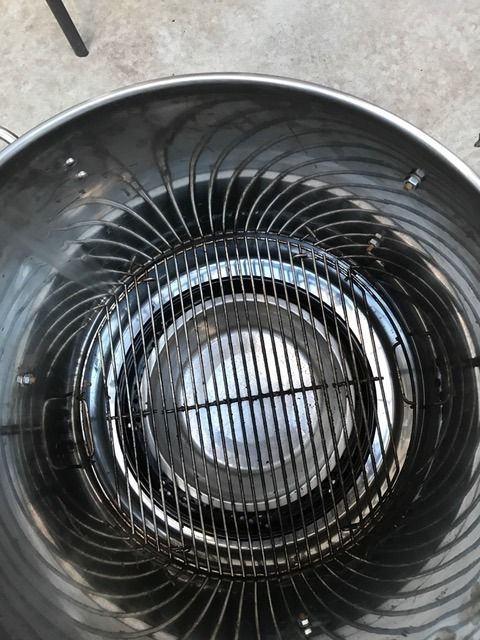
middle grate
top grate
I added a rope hook to the underside of the lid and mounted it by using one of the handle bolts.
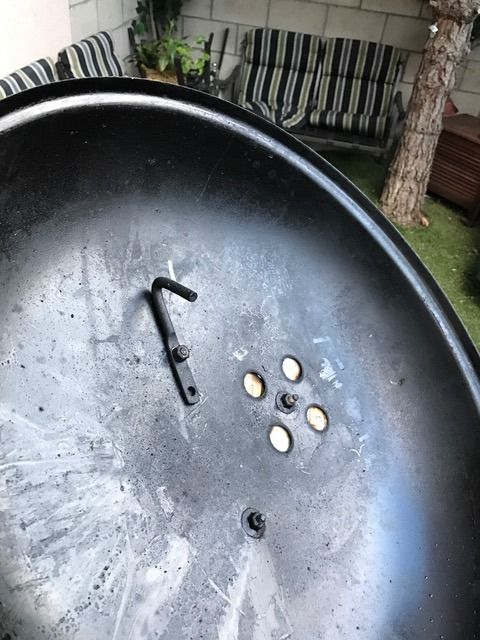
Now I can hang it on the pot lip out my way.
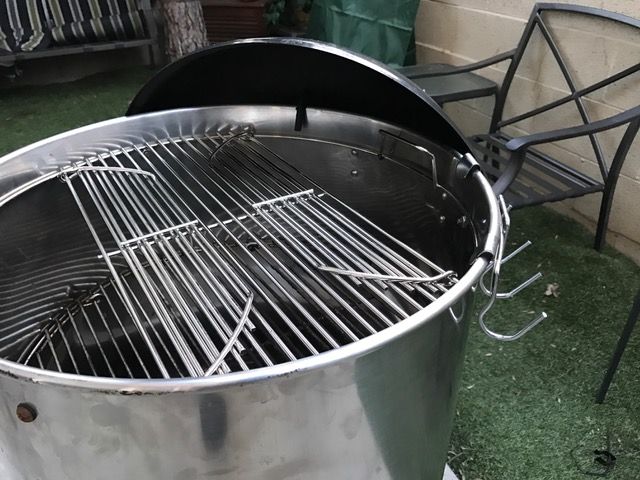
All together now!!!

I added a weber tool hook too
Great thing about this mod is that I MADE IT.
You all know the satisfaction we get when we build something and reap its benefits. Also, it cost me under $200 to make including JJ, pot, labor and supplies (ALLOT LESS than a WSM 18). I can also still use it as a portable grill, which is its primary use (tailgates, etc). Now I can take this smoker to tailgate too.
Things I still need to do-
- Paint black
- Add gaskets to lid and bowl
- cut hole and install grommet for therm access
- Mark positions on ash bowl to make it easy for me to know degrees of bottom vent closures (1/4, 1/2, 3/4)
- See if
@zavod44 can make wooden handles to place on the stock pot handles (CROSSING FINGERS)
- get the Weber hanging rack
- get ideas from you guys on what to smoke.
- COOOOK/ SMOOOOKE!!!!

 Topic: Jumbo Joe converted into mini Smoker (pic heavy) (Read 8013 times)